Part 1: Architecture summary
Part 2: Installation & Configuration
Part 3: Video & Playlist Management
Part 4: Including Videos & Playlists in Drupal content
In this multi-part blog post, we are covering the various aspects of the new Brightcove Video Connect module for Drupal 8. The first part consisted of an architecture summary and discussed the technical approach used during the development of the module. The second part detailed the installation & configuration steps required to get the module up and running properly. The third part illustrated the management of videos & playlists and discussed some of the changes compared to the Drupal 7 version of the module. This fourth part demonstrates how to add Brightcove videos & playlists into Drupal content.
This posts reads as a step-by-step guide for the following tasks:
- Add Brightcove Video field
- Browse Brightcove Videos using the Entity Browser module
- Upload Brightcove Videos inside Drupal content using the Inline Entity Form module
- Browse and upload from the same field in your Drupal content, using the Entity Browser IEF submodule
- Browse and upload Brightcove Videos from CKEditor
Add Brightcove Video field
We will go through step by step how to add Brightcove videos into Drupal content. The same steps apply to Brightcove playlists.
Once we created the Brightcove Video and Playlist entities (or synchronised Drupal with Brightcove in case of an already-existing Brightcove account), we can include them in any other content type. We can do this via a new field: we add a new field to the chosen content type referring to the Brightcove Video or Playlist Entity.
Navigate to Structure > Content types and choose Manage fields.
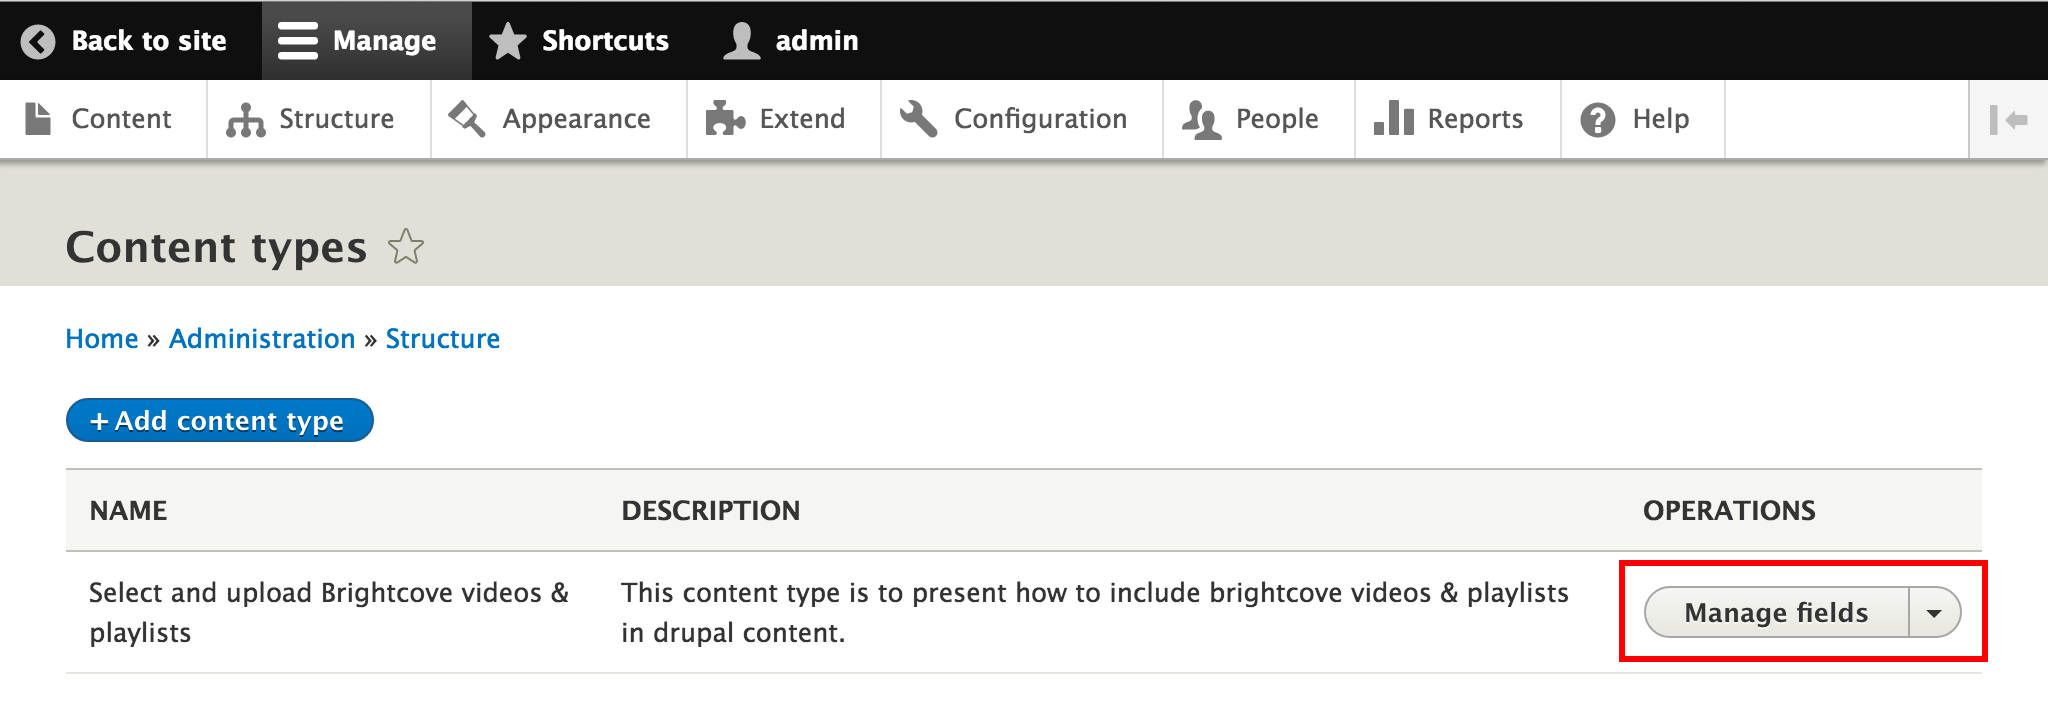
Add field.
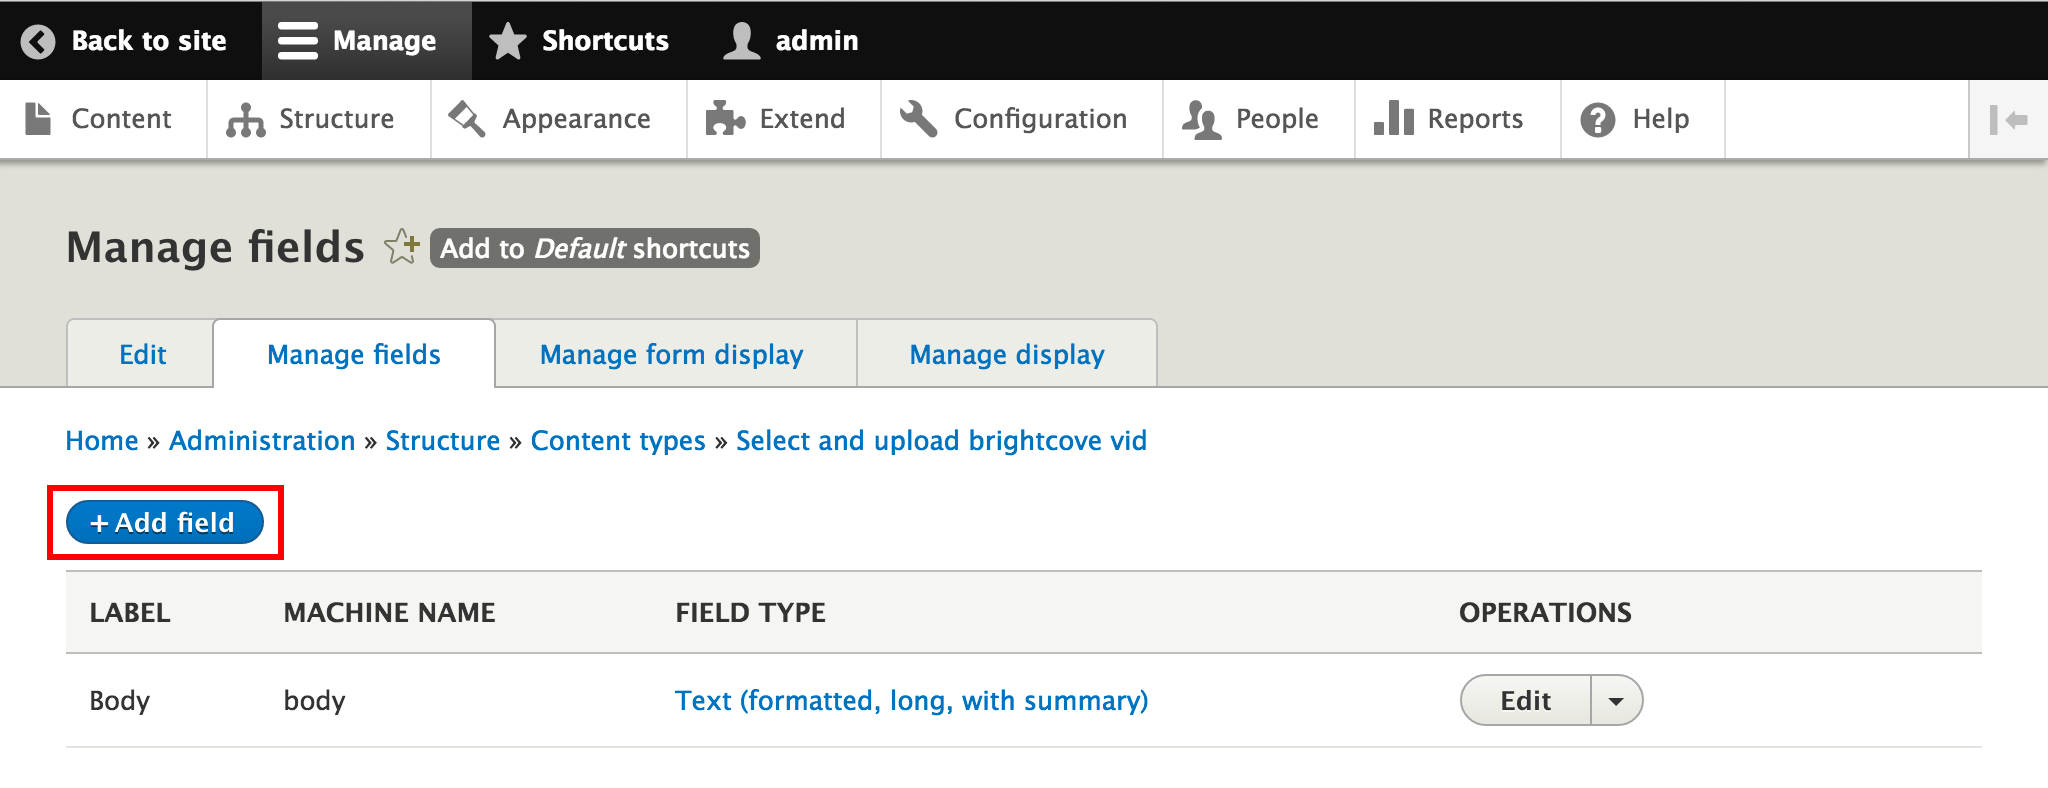
From Add a new field select Reference / Other…. Label this new field, then Save and continue.
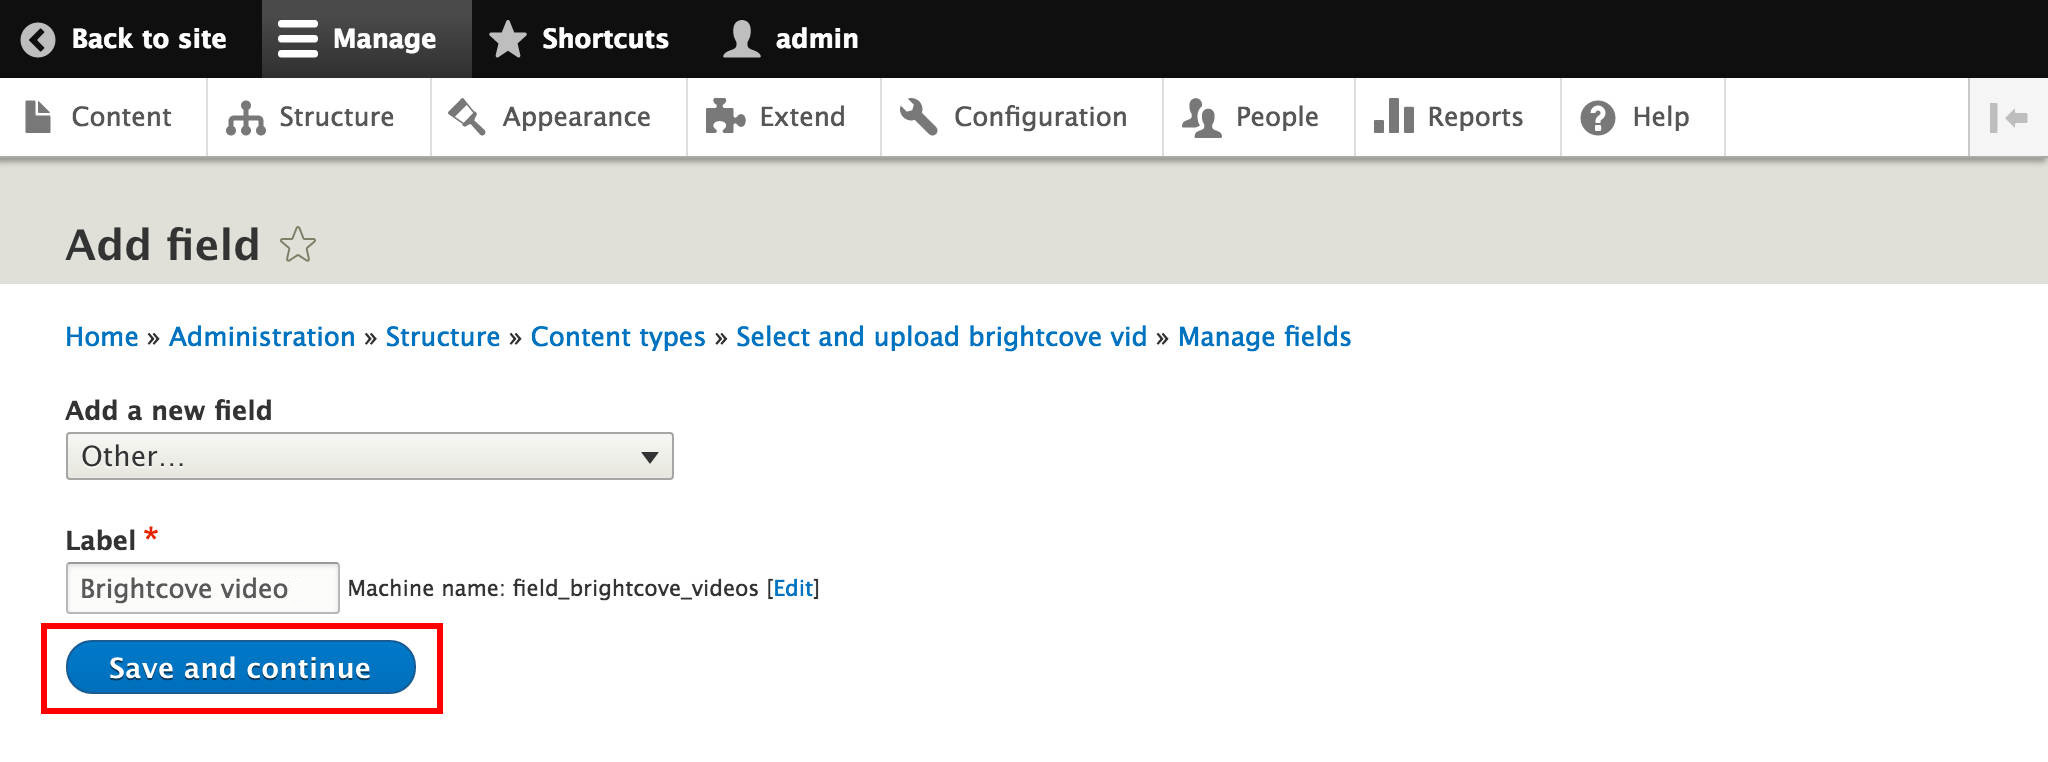
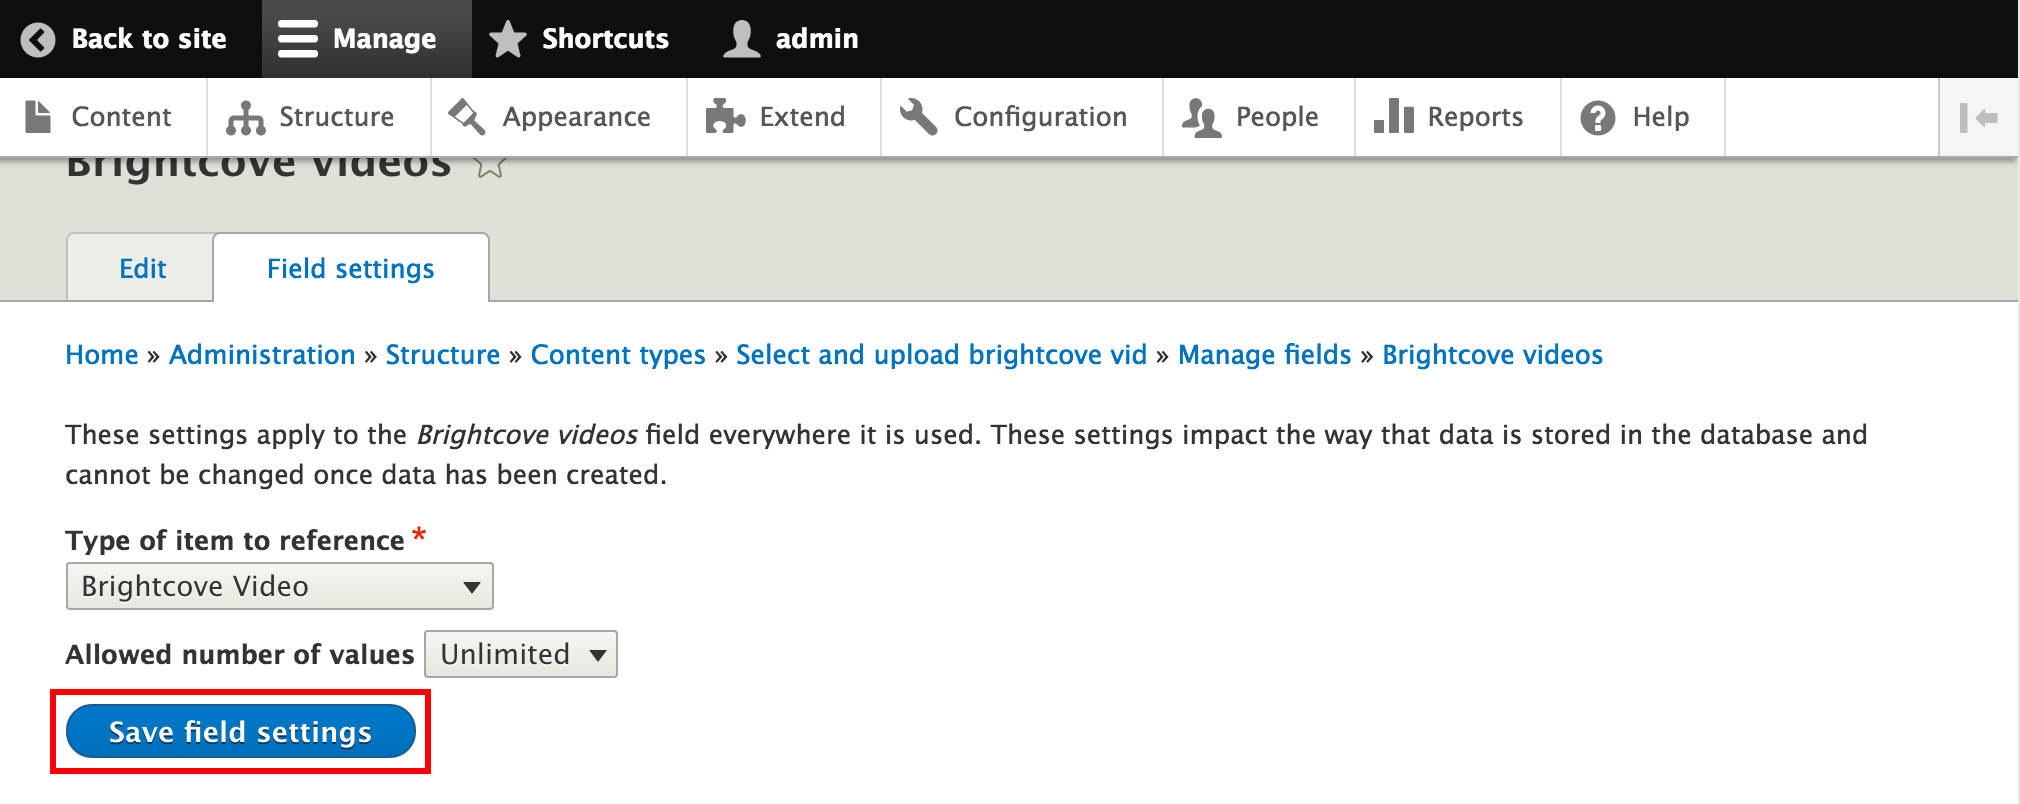
From Type of item to reference select Brightcove Video. Choose the Allowed number of values from the drop-down, then Save field settings.
You can edit further settings and add help text. Once done, Save settings again.
Our new field is ready to go: we can now include Brightcove videos in our content. To do this, we navigate to Content and Add new content (or select the existing content) of the type where we just included the Brightcove Video field.
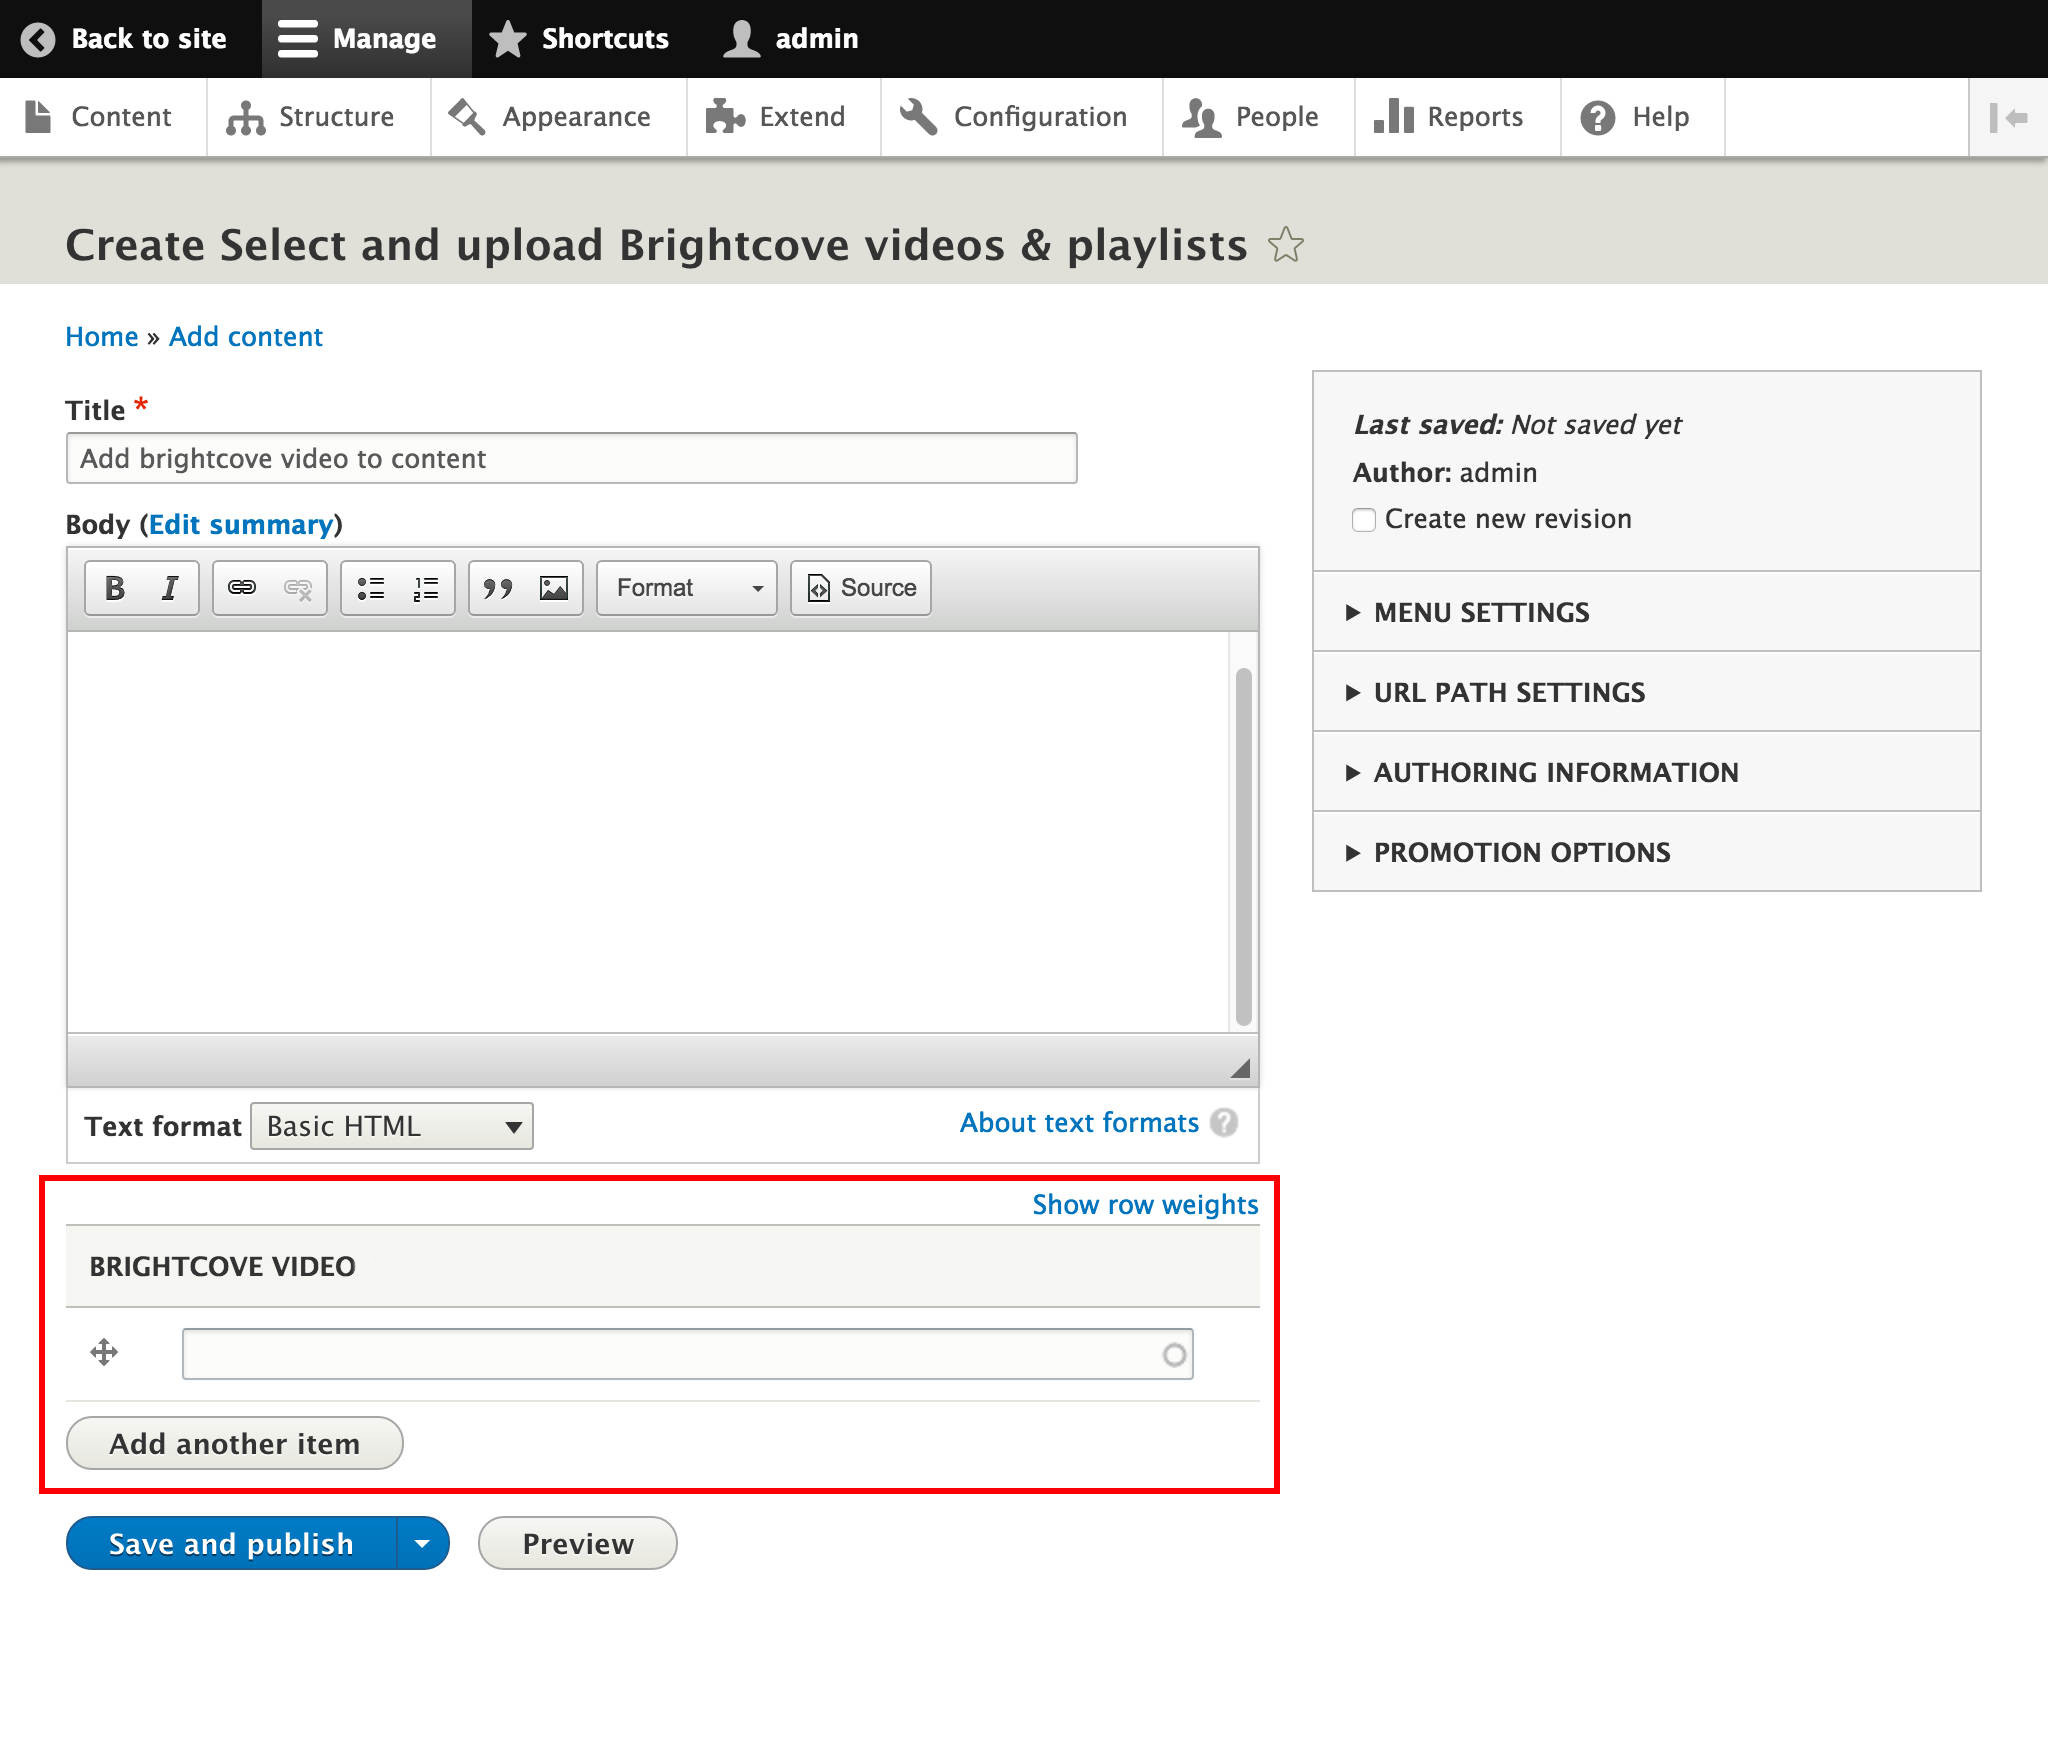
By default, our new field uses the Autocomplete widget - so we can browse videos by starting to type in their names.
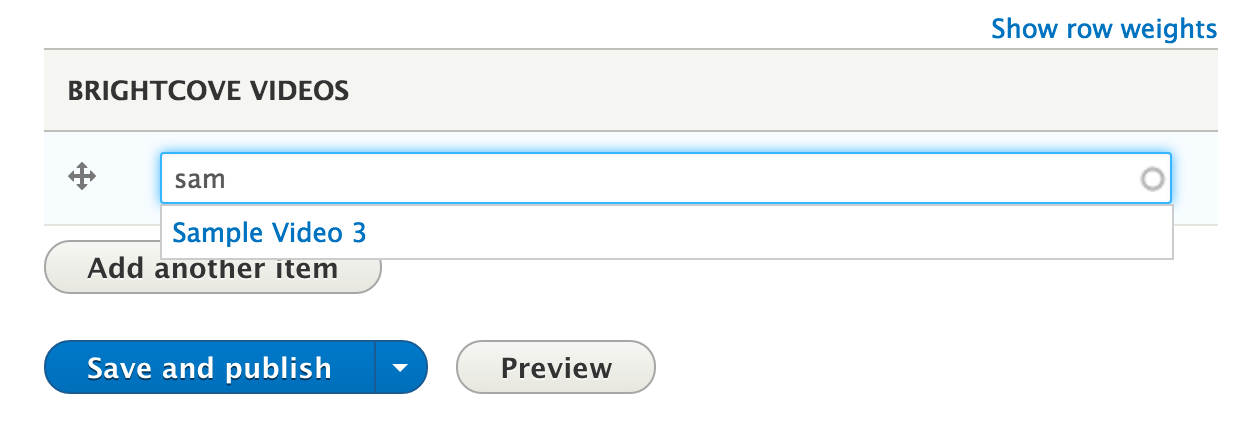
What if we have hundreds of videos on our Brightcove account? Then we might have trouble selecting them using the standard autocomplete widget for entityreference fields. Entity Browser module to the rescue! With this module, we can create our custom widget via Views to browse our videos. Let’s see how it works!
Browse Brightcove Videos using the Entity Browser module
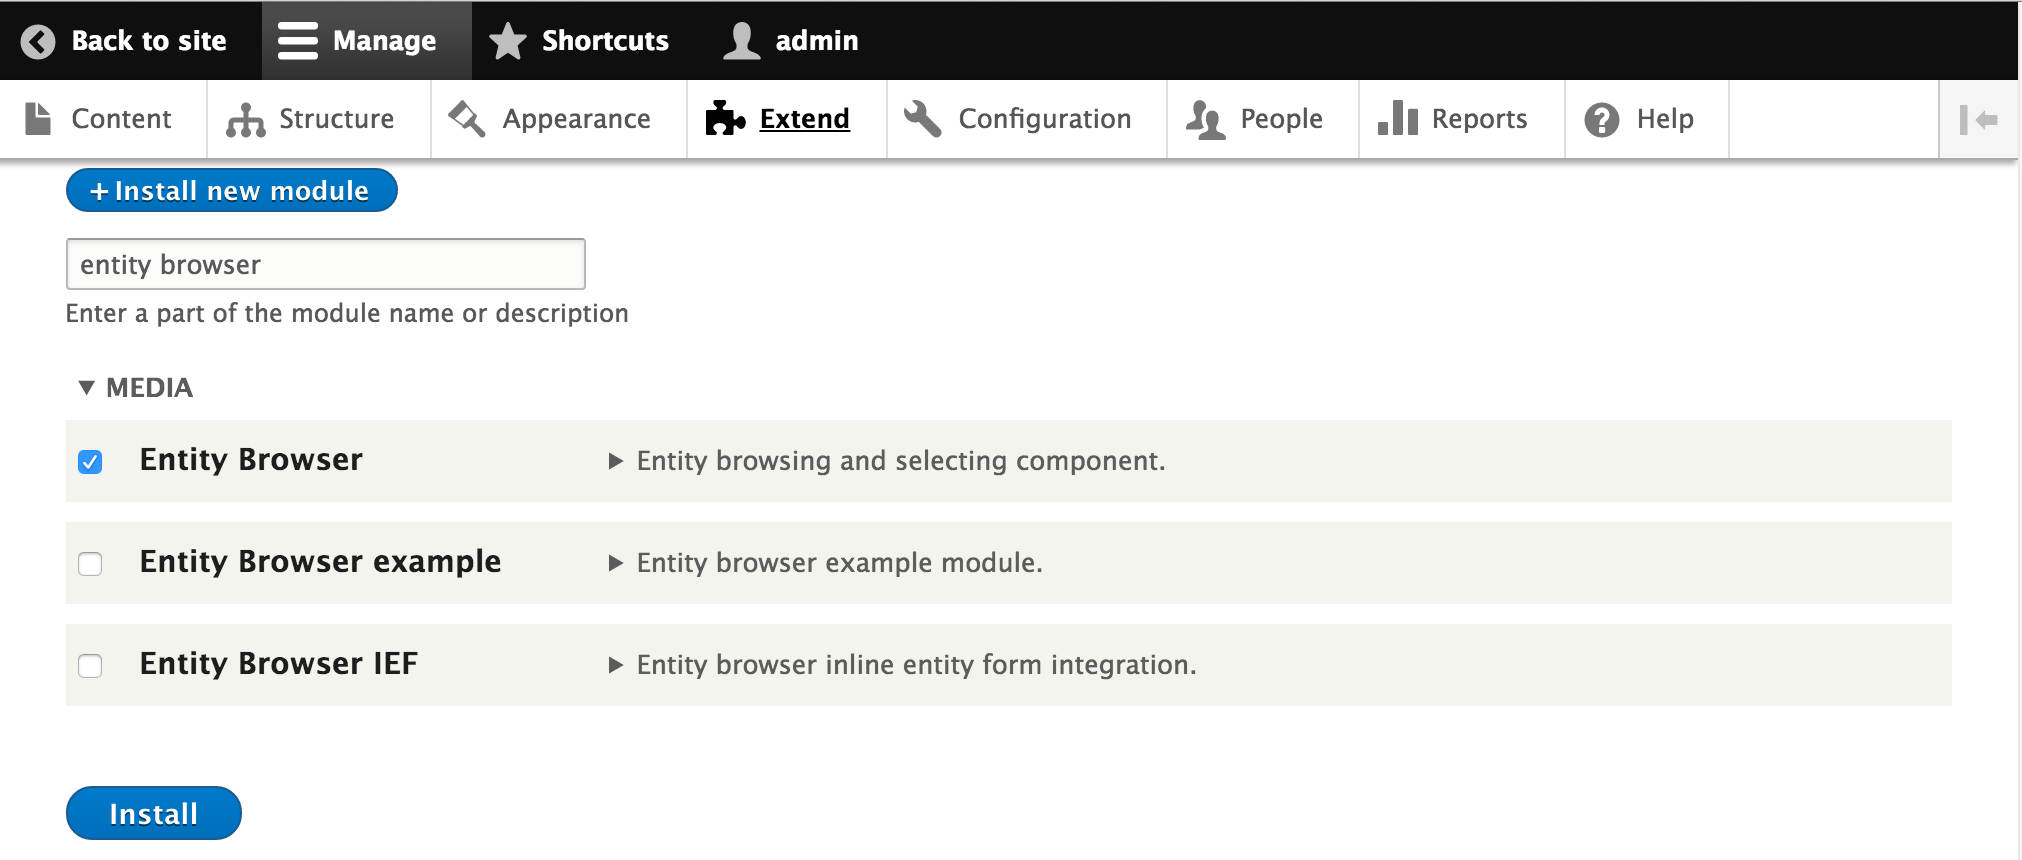
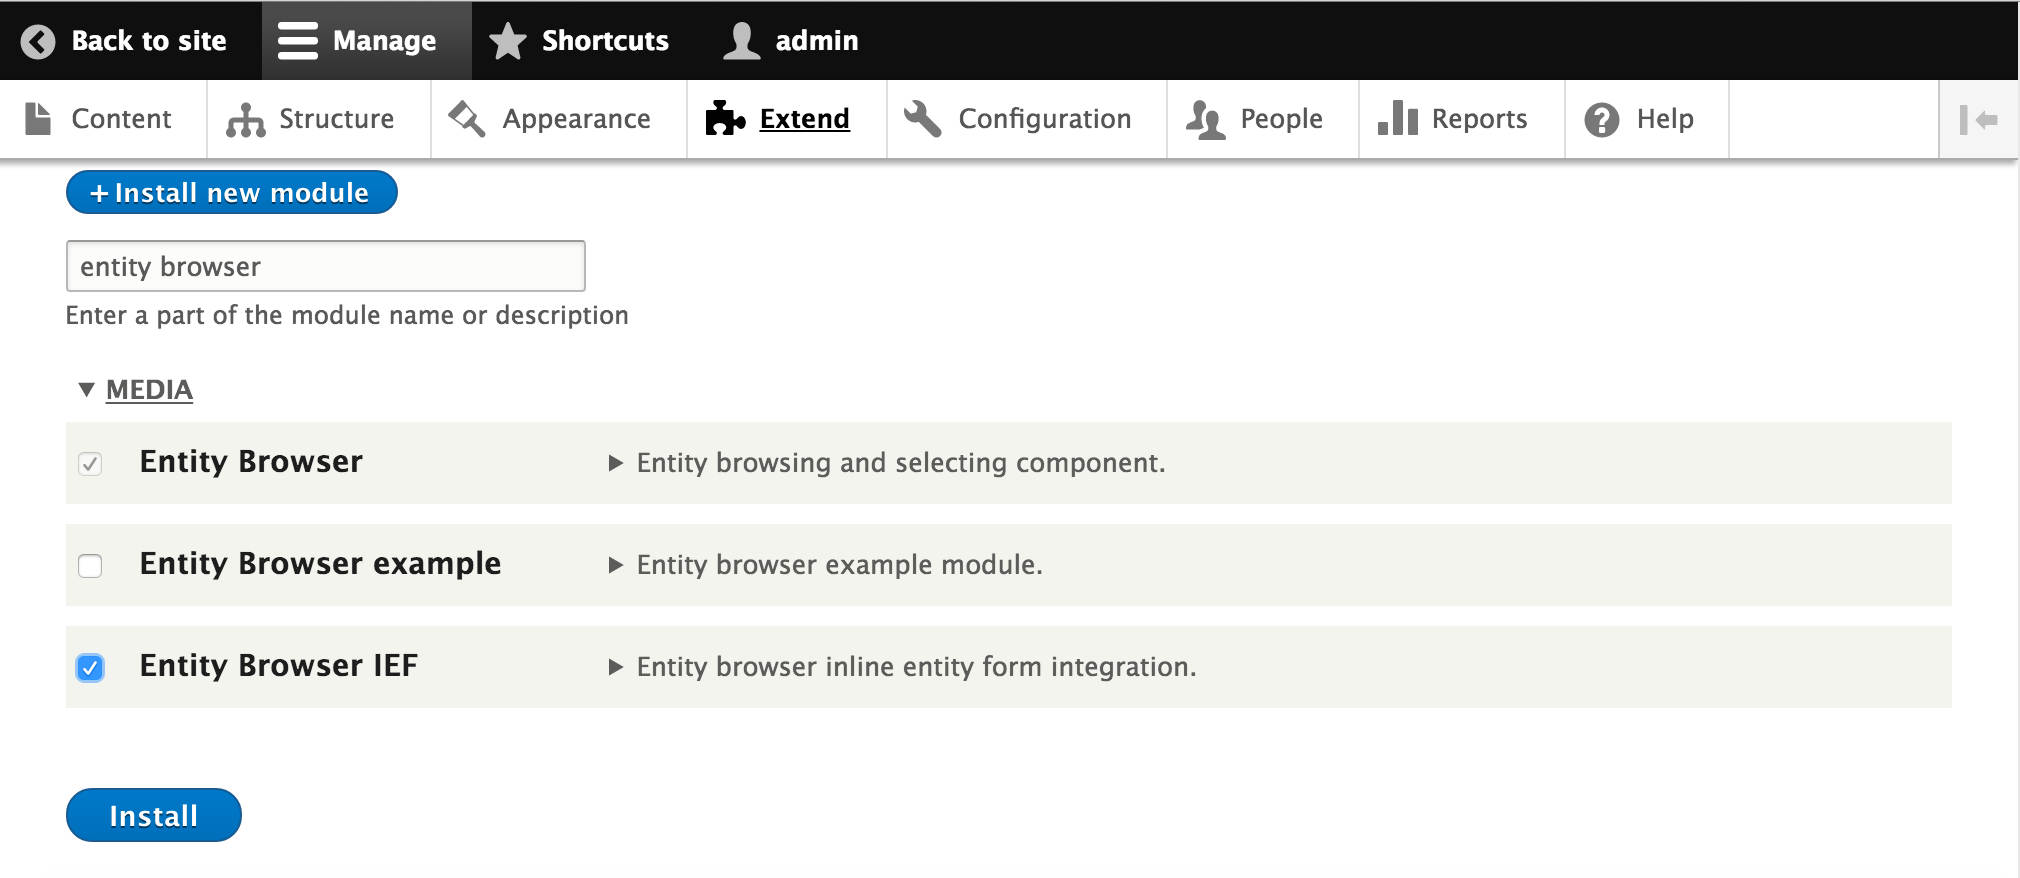
First we need to download and enable the Entity Browser module: in Extend, find and choose Entity Browser via its checkbox then Install. You can find instructions on how to install modules in the Drupal 8 documentation.
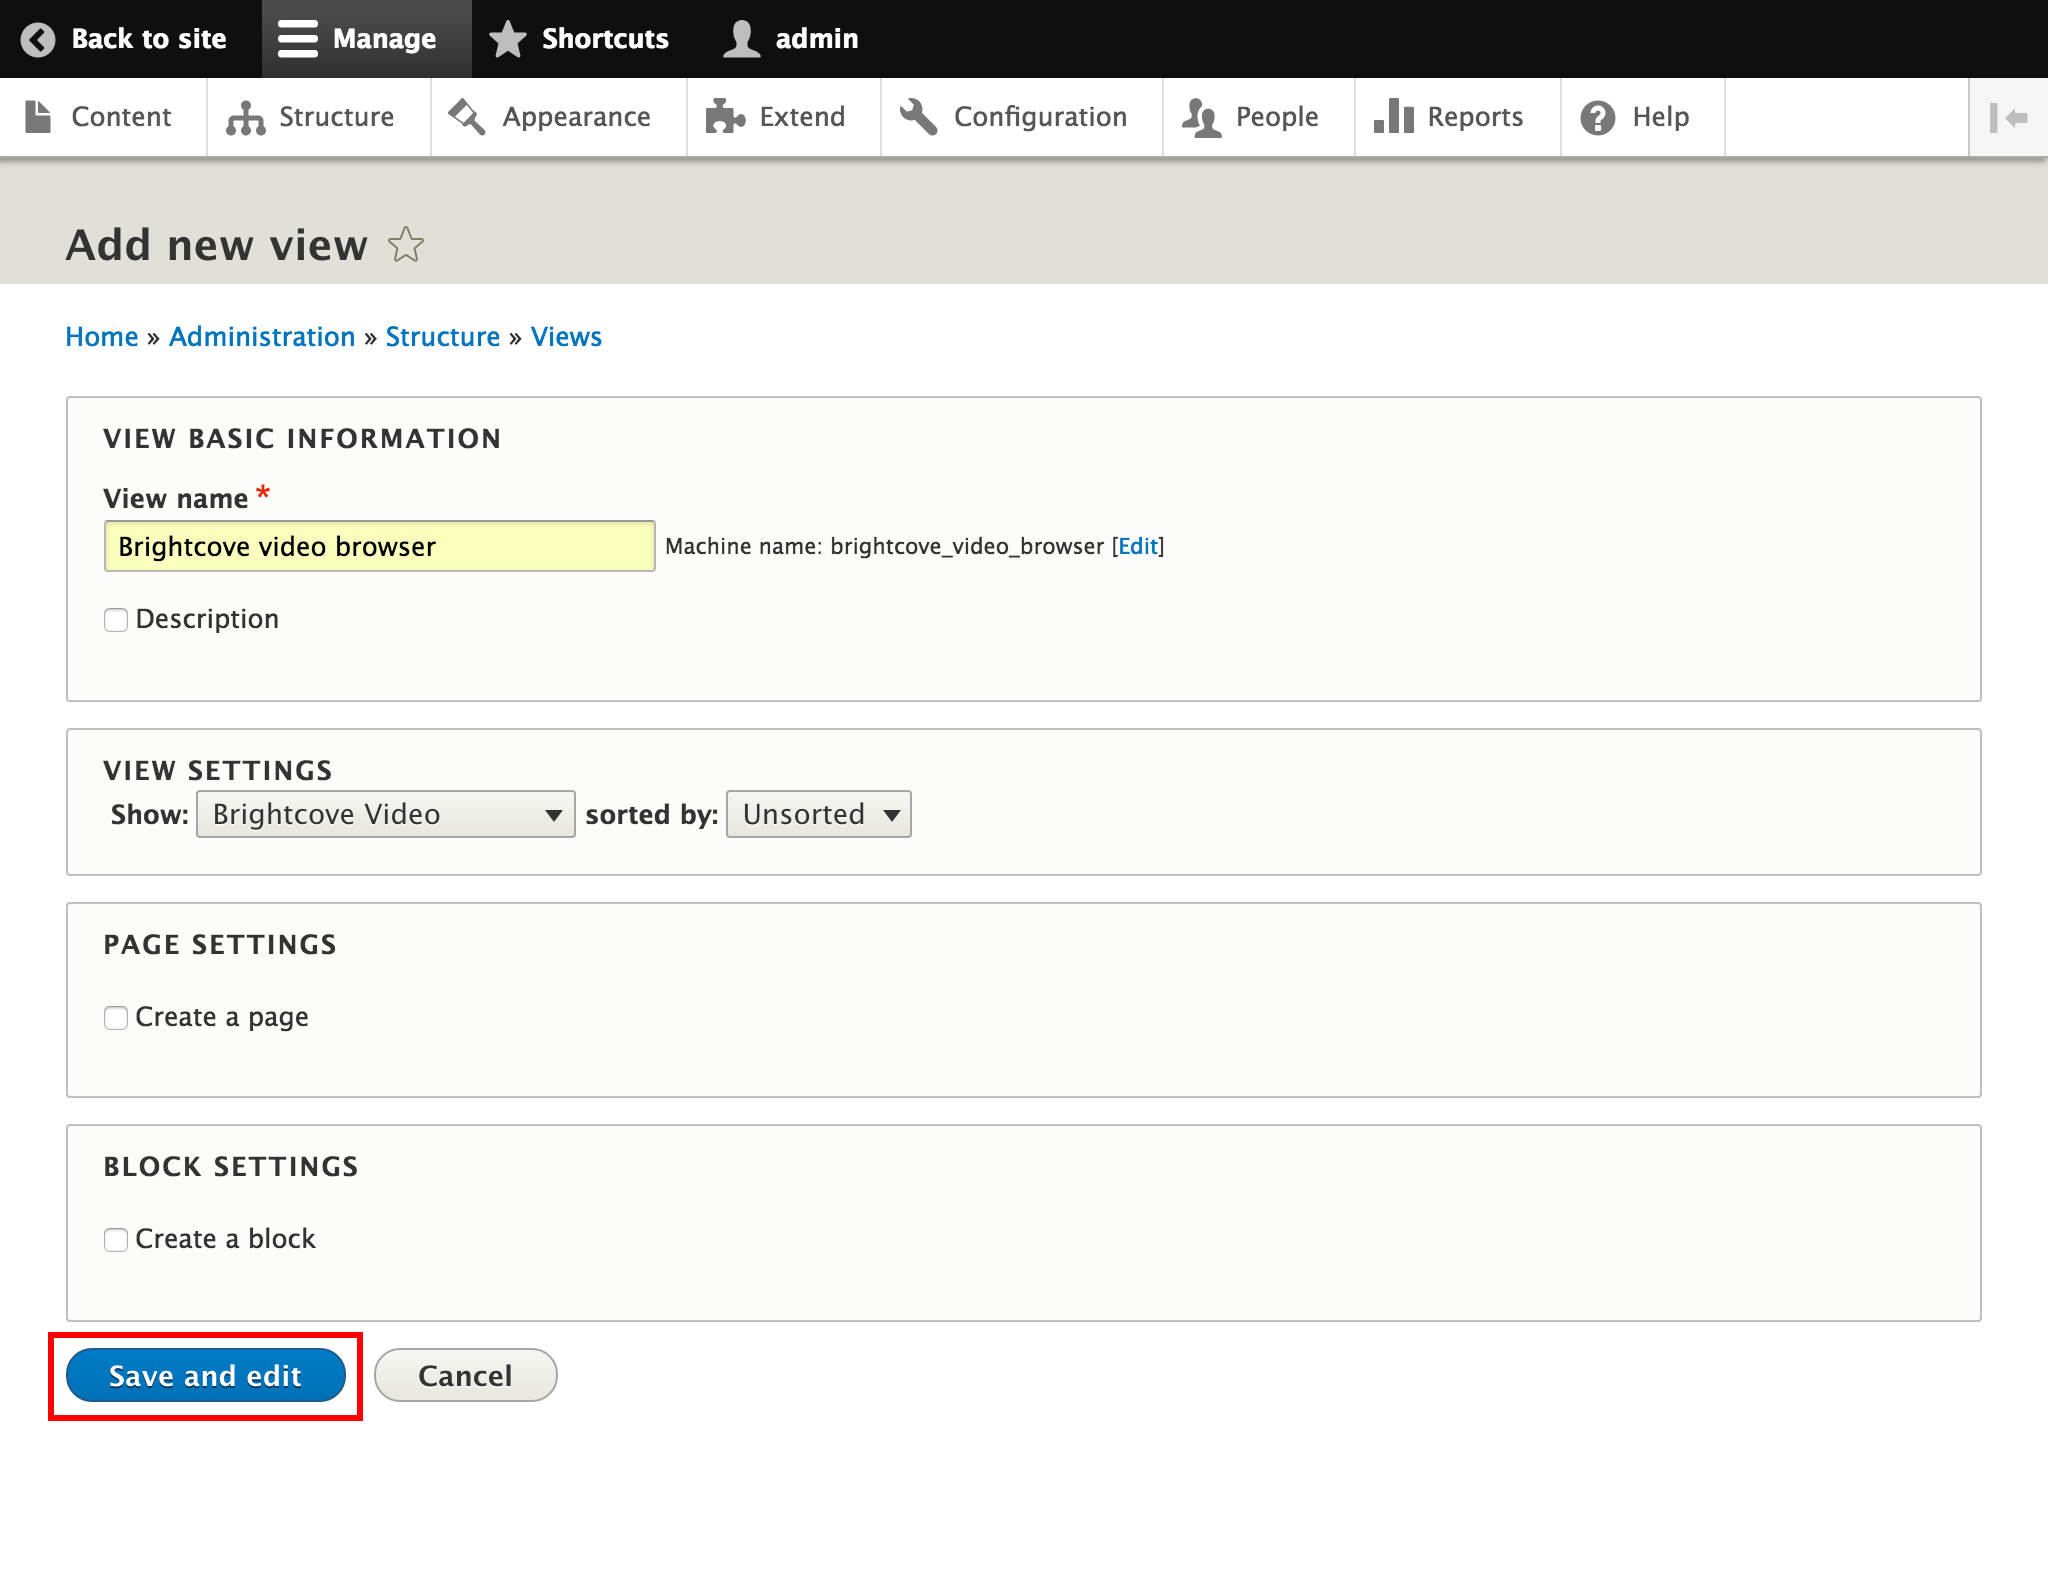
Now we can set up our custom view that we will use for browsing our videos. Navigate to Structure > Views and Add new view. Give View name. From View settings select to show Brightcove Video then Save and edit.
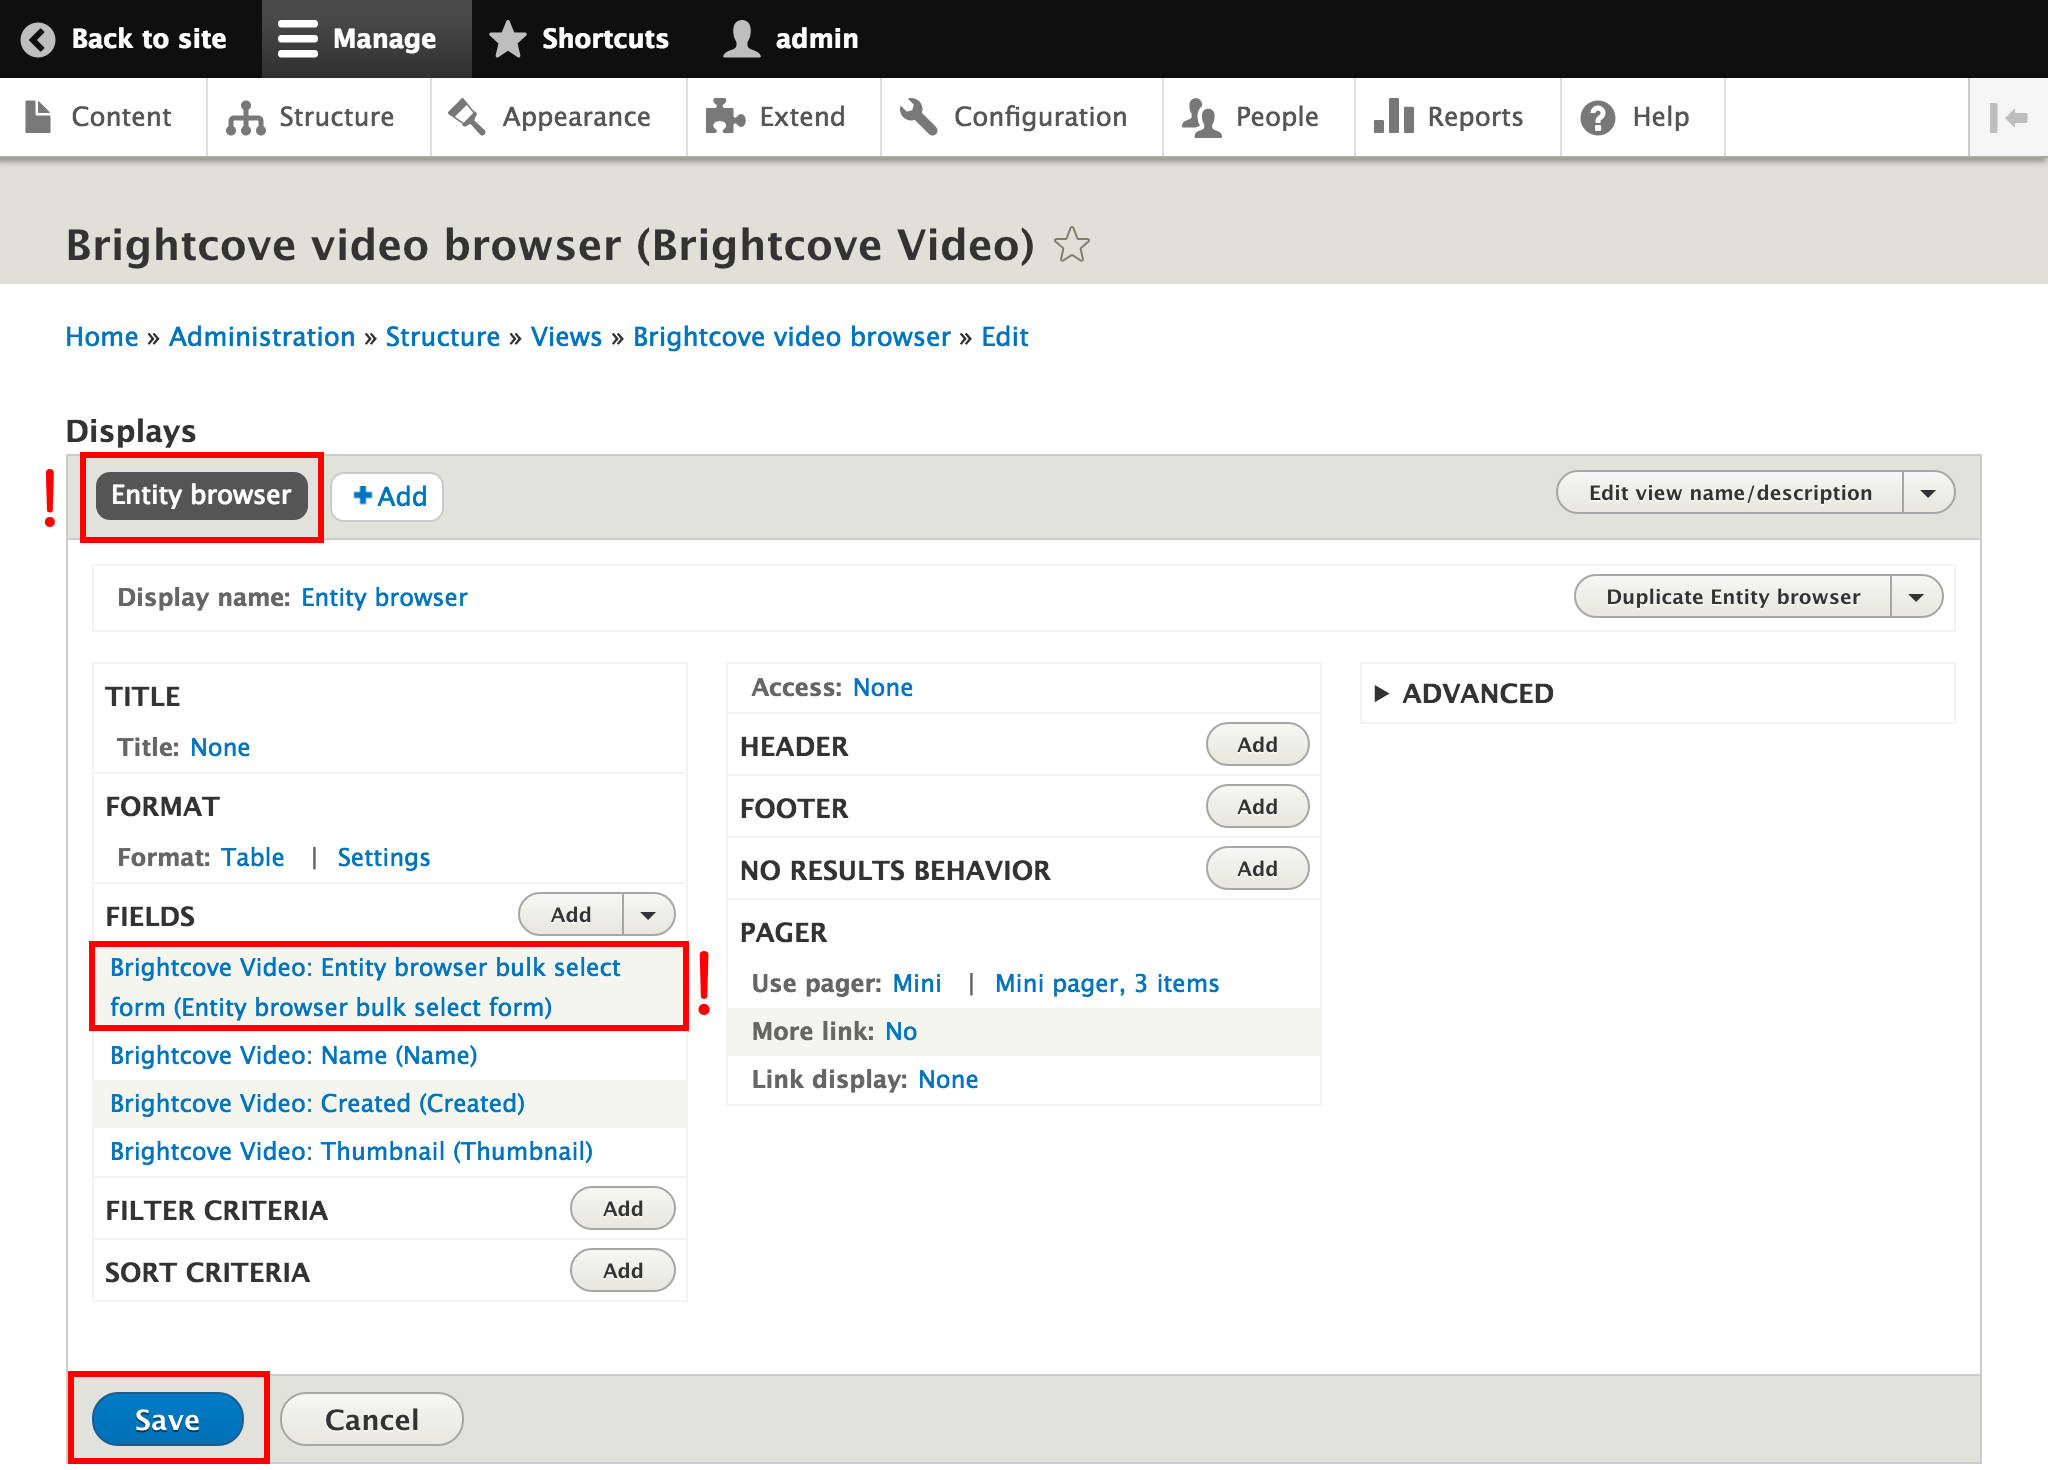
In this example we will use the Table format and we Add the following fields: Name, Created, Thumbnail and Entity browser bulk select form. To add this Entity browser bulk select form is very important, otherwise we cannot select our videos. The rest of the fields are all a matter of taste, you can add whichever fields you need.
For now, we will use here a mini pager and display 3 items per page.
Click +Add in the Displays section and choose Entity browser, then Save.
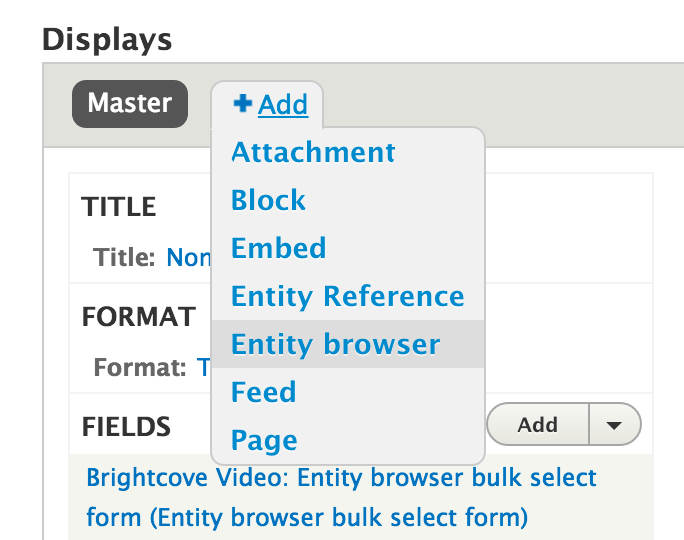
Then choose Add in the Fields section and choose Entity browser bulk select form. We are automatically switched to the form’s configuration. Once you applied your settings, Save the Display section again.
The next step is to set up the entity browser widget, which we will use instead of the standard autocomplete widget for browsing our Brightcove Videos. This form depends on Chaos tool suite (ctools) module, so make sure it is installed and enabled.
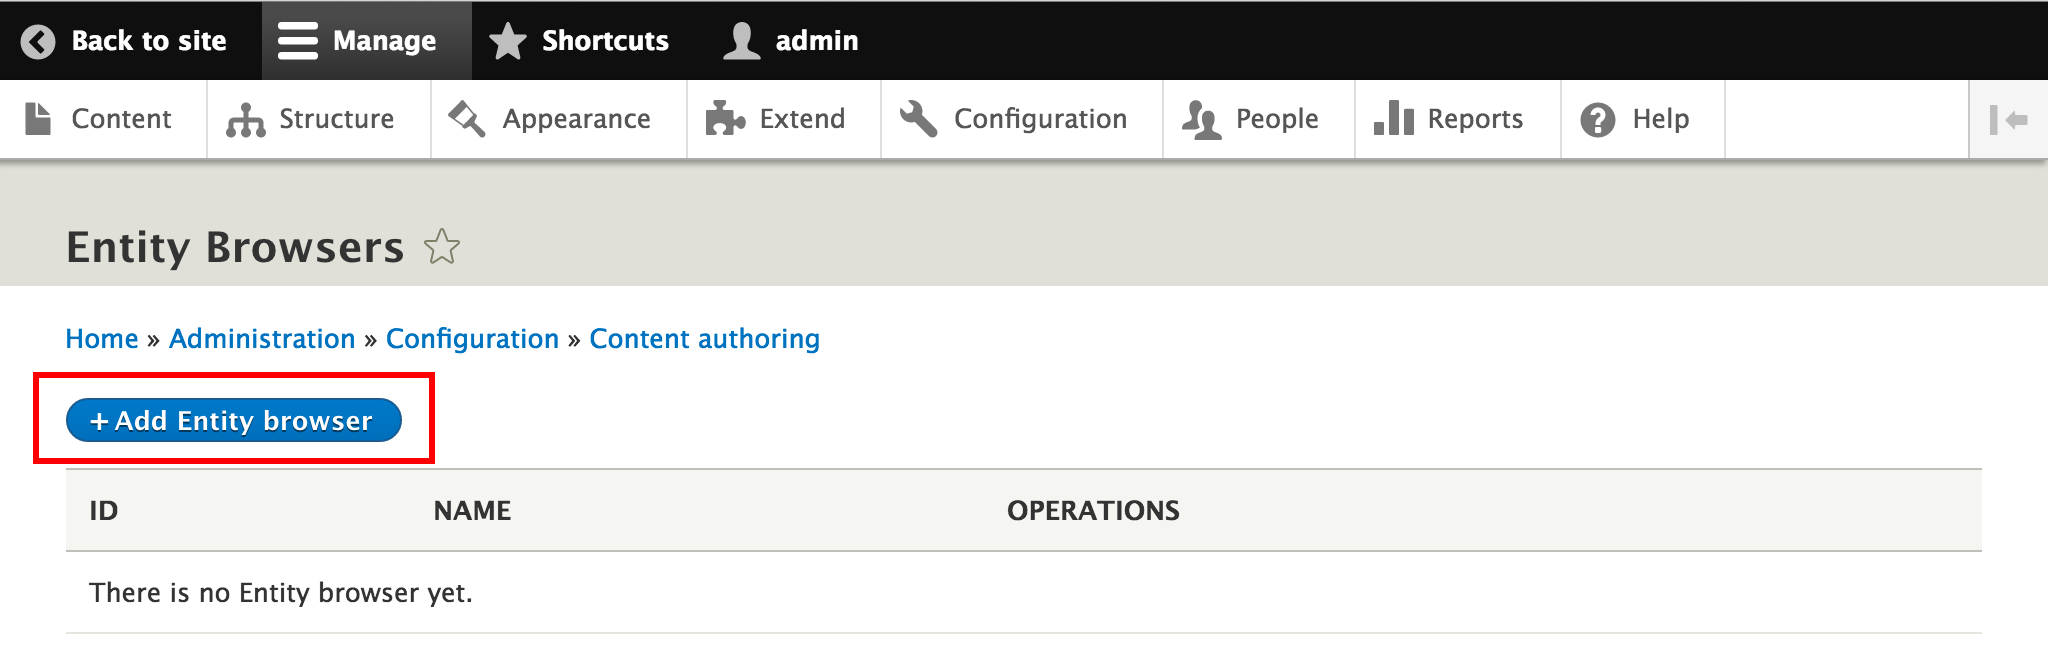
Navigate to Configuration and select Entity browsers in the Content Authoring section.

Click Add Entity browser.
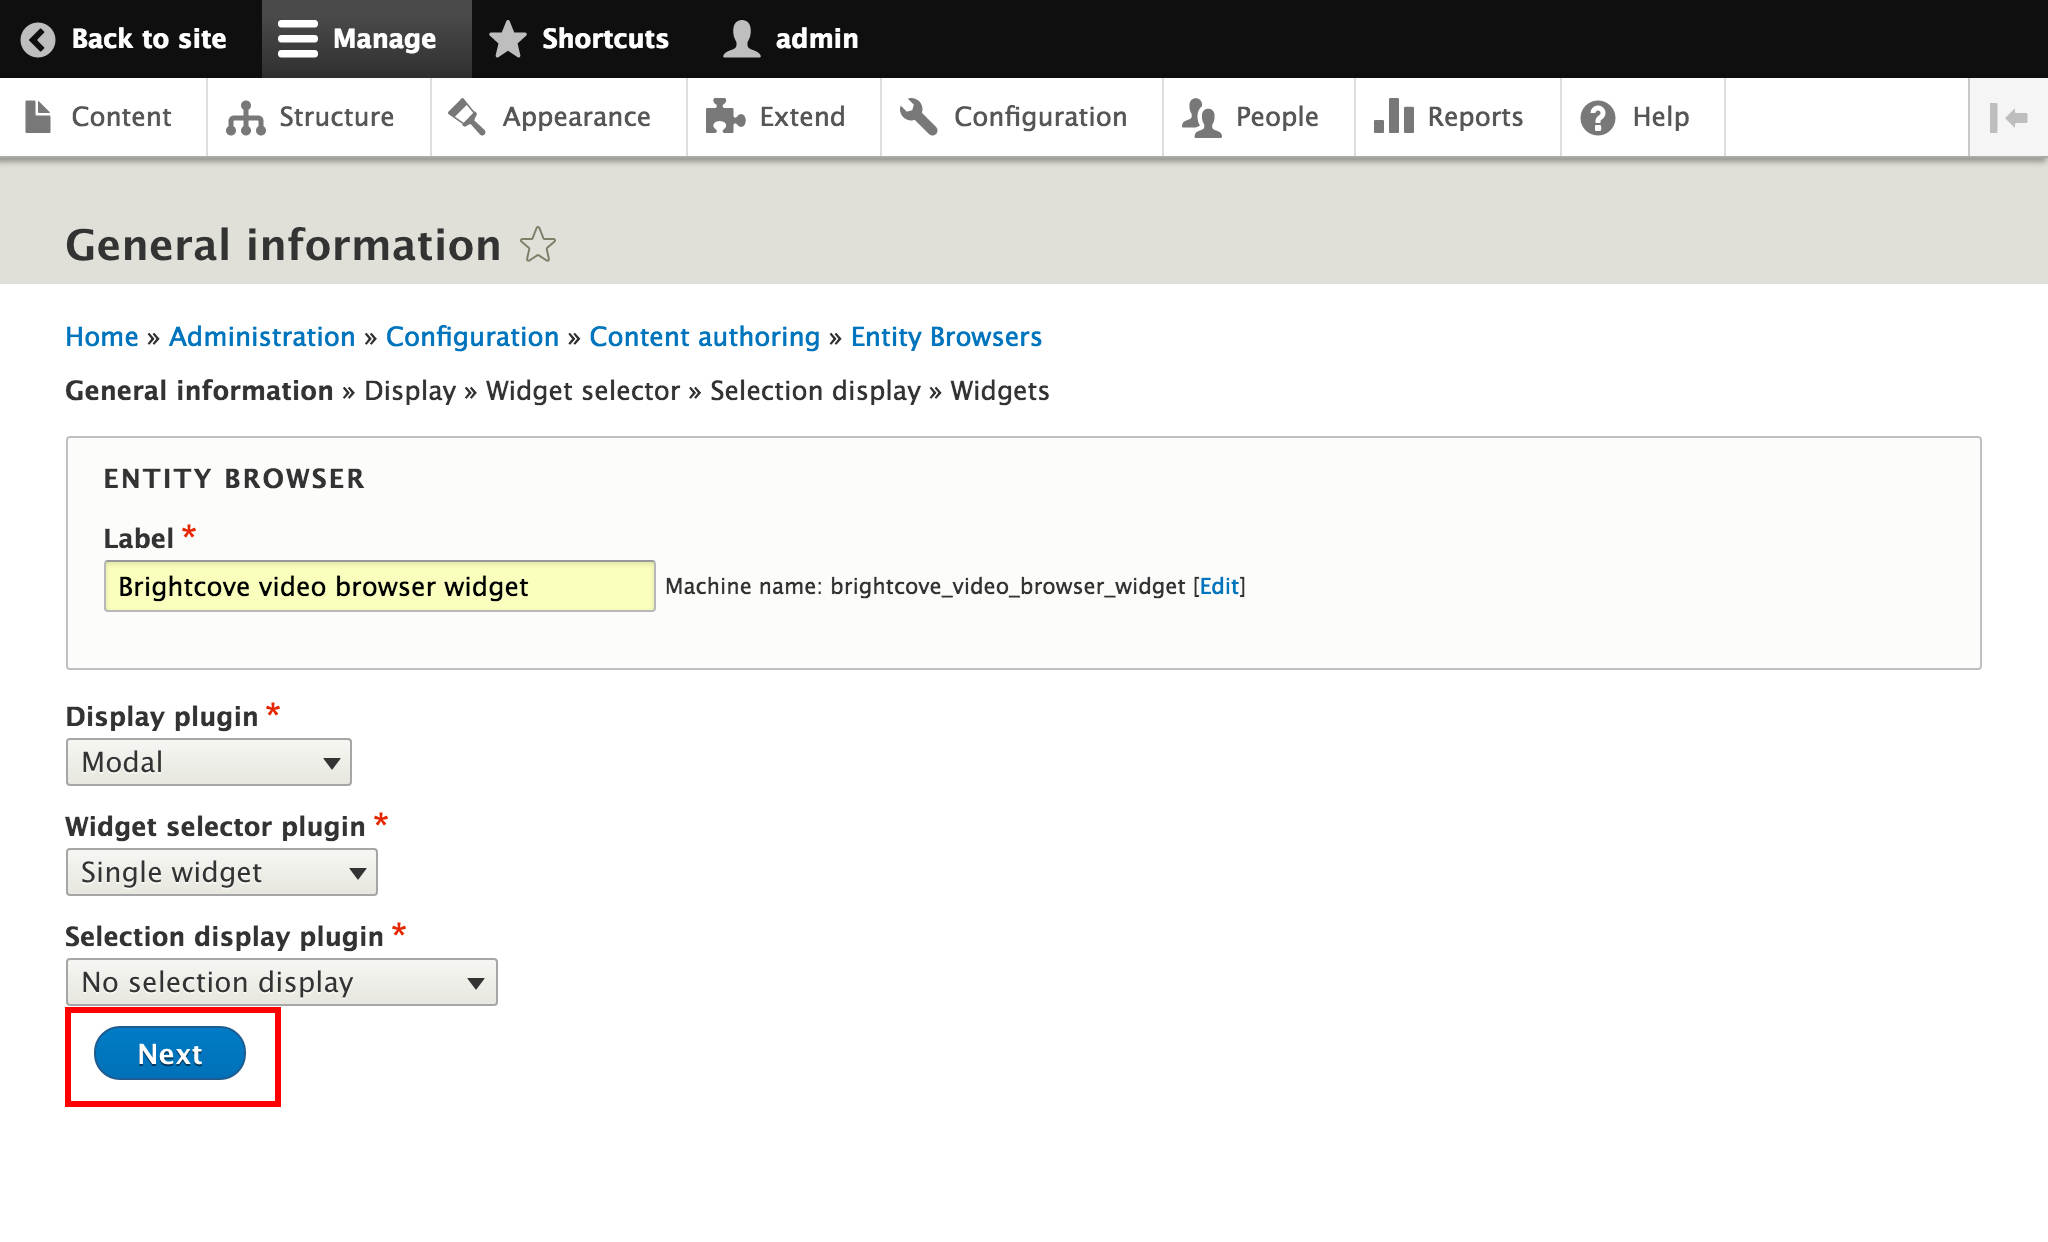
Enter a Label for the entity browser. Select Modal from Display plugin. Select the Single widget selector plugin for now - we will discuss another solution in the browse and upload new Brightcove video section!
Choose No selection display as the default Selection display plugin. Feel free to play around with the other options. Click Next.
Next, we get to the configuration settings for the modal display plugin’s width and height - we can go with the default settings. Give a Link text for the button link and then go to the Next step.
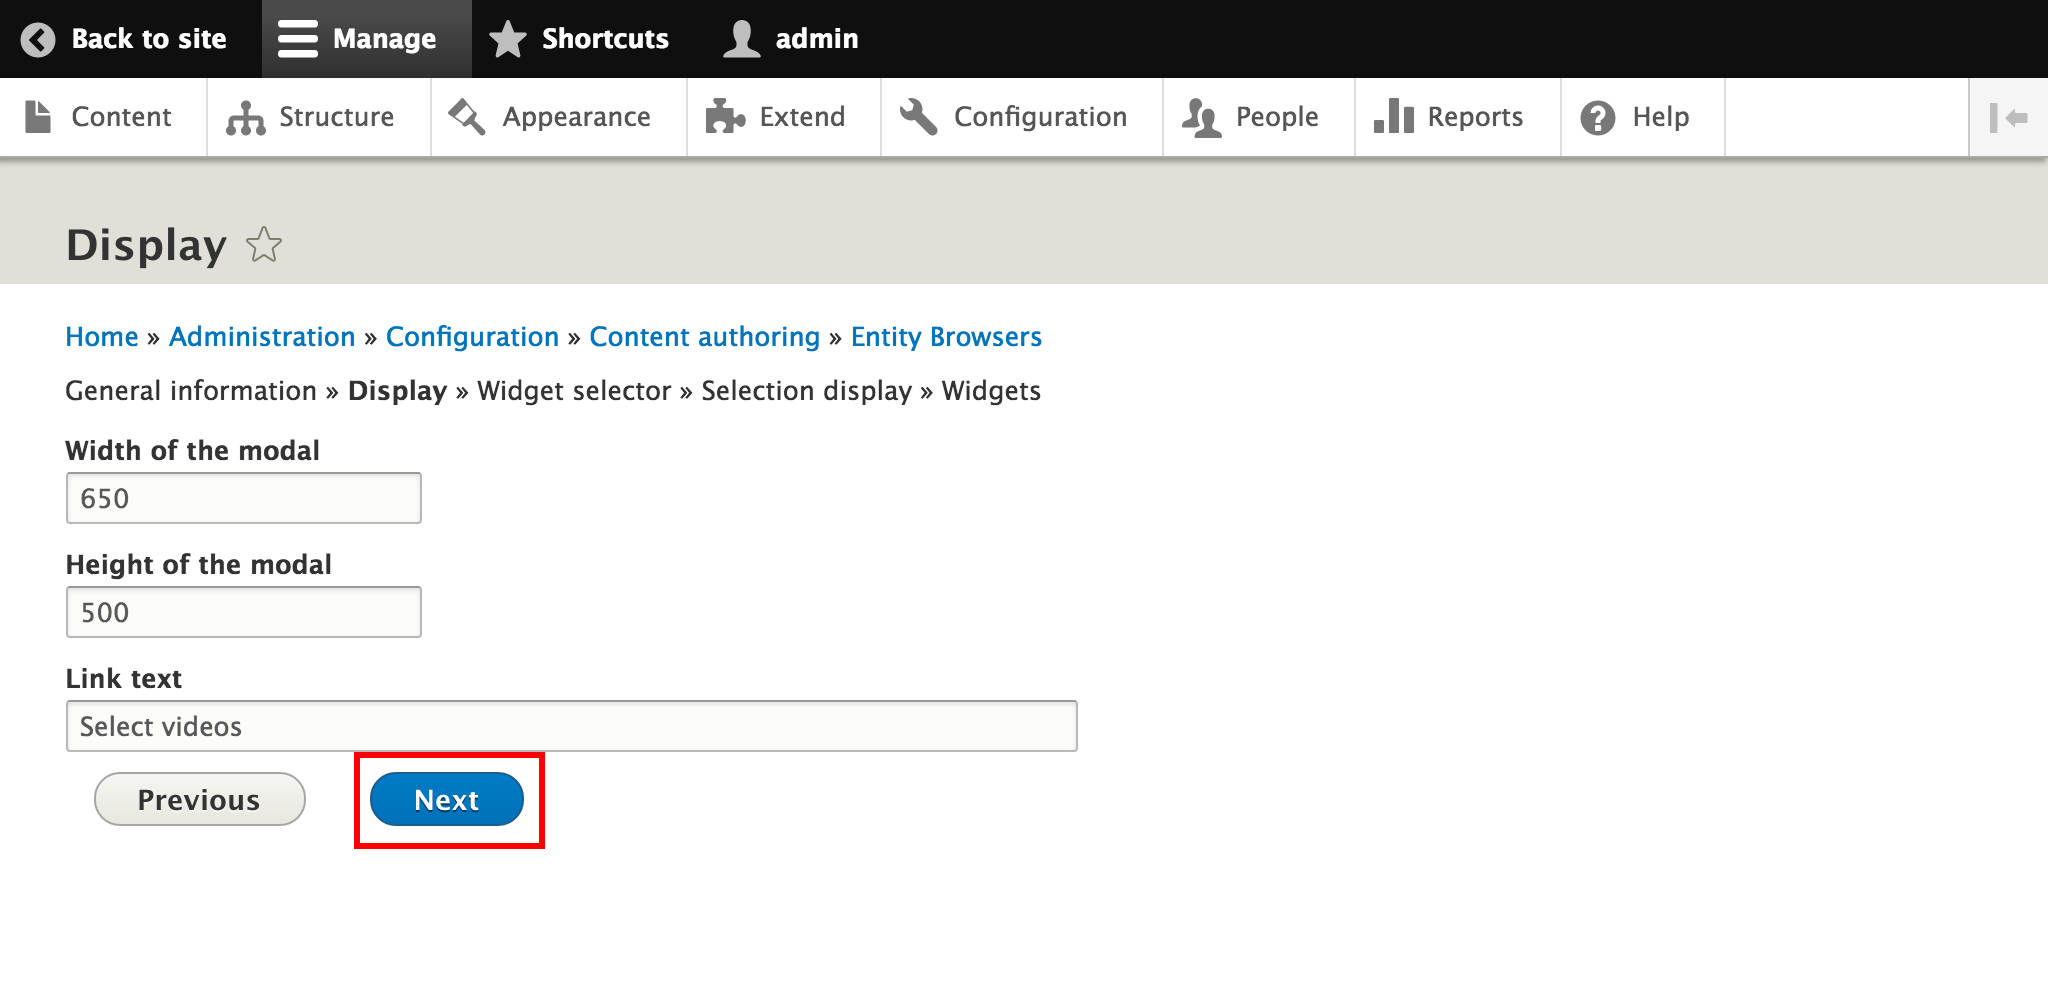
There are no available configuration options for the next two steps (Widget selector and Selection display), so just click Next in both cases.
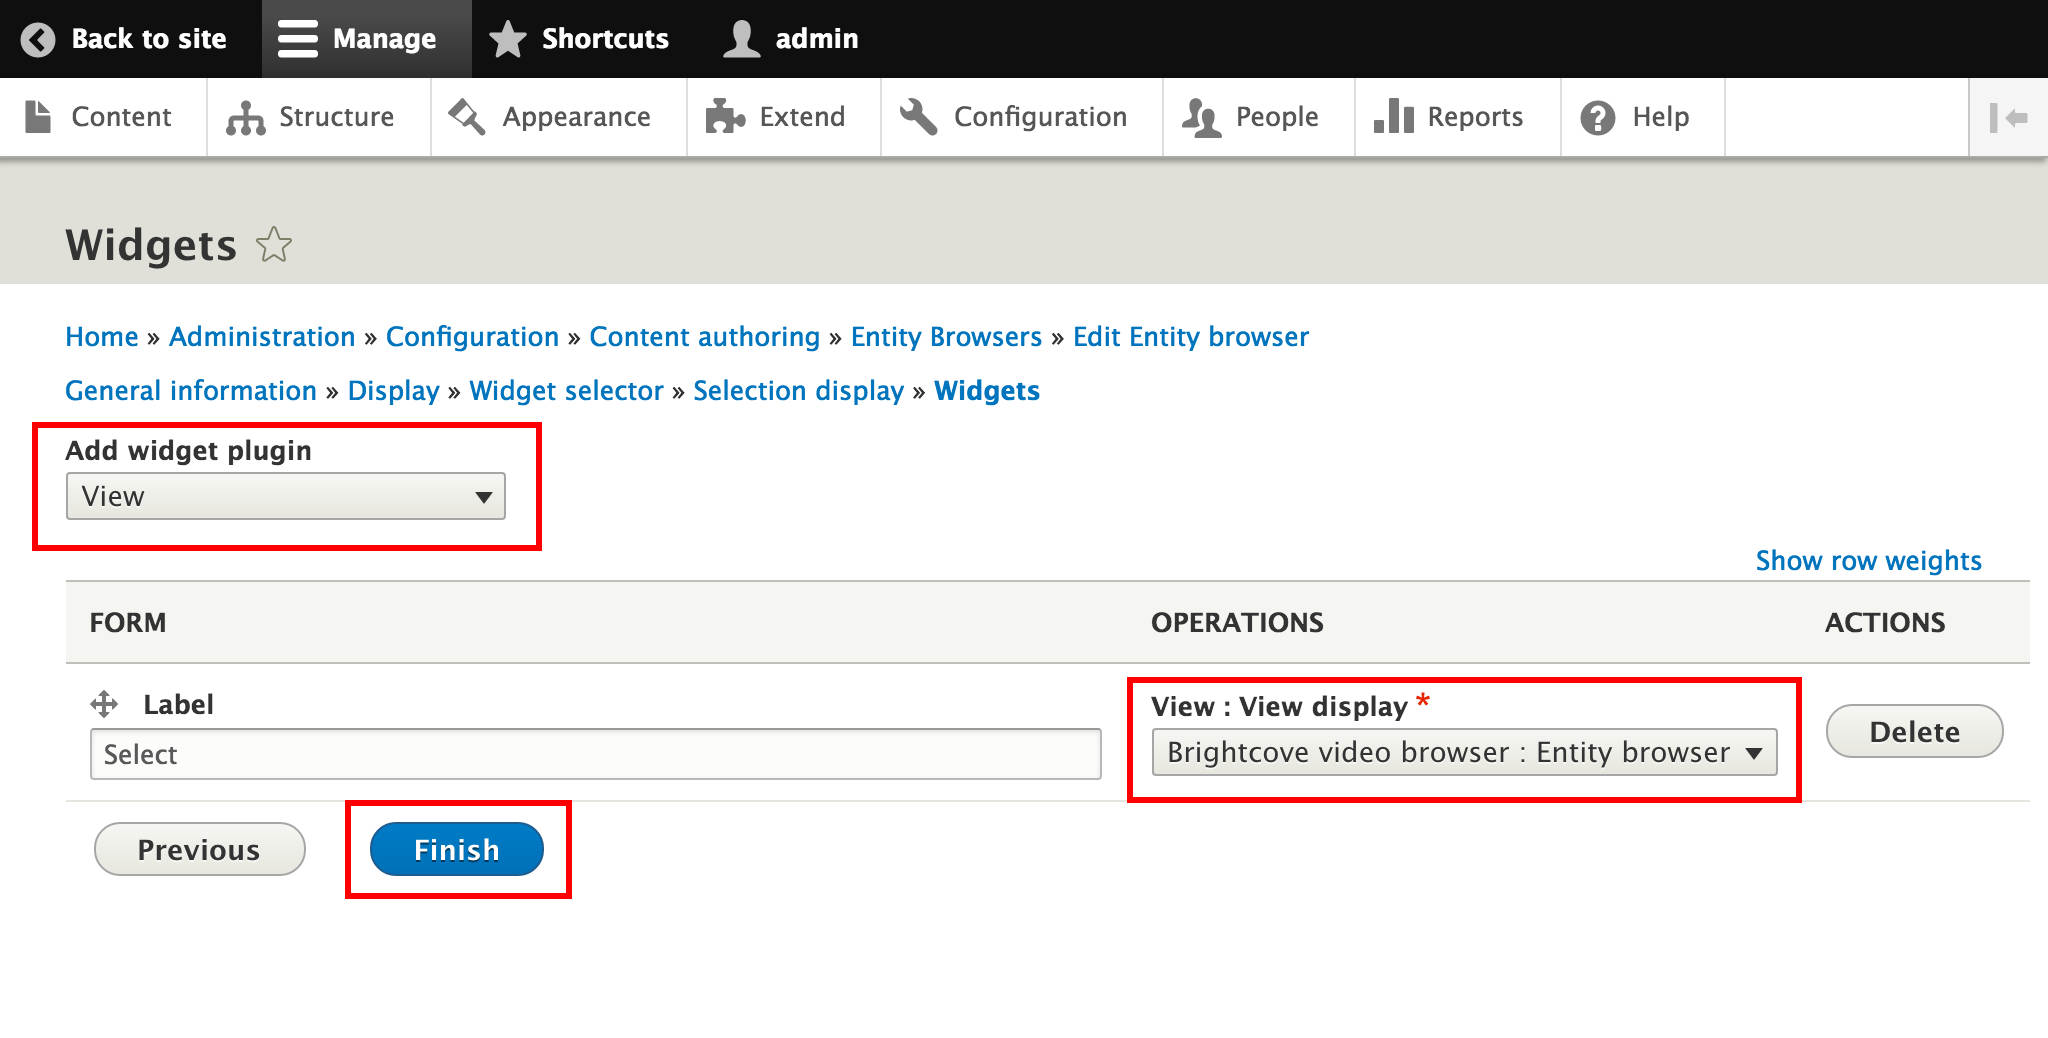
In the final configuration step, choose View from the Add widget plugin dropdown. Give it a Label. Finally, select the newly created entity browser from the View display list, then hit Finish.
We are almost done! We still have to tell Drupal that we want to use our entity browser (instead of the default autocomplete) to select our videos for the Brightcove video field (in whichever content type we included it in).
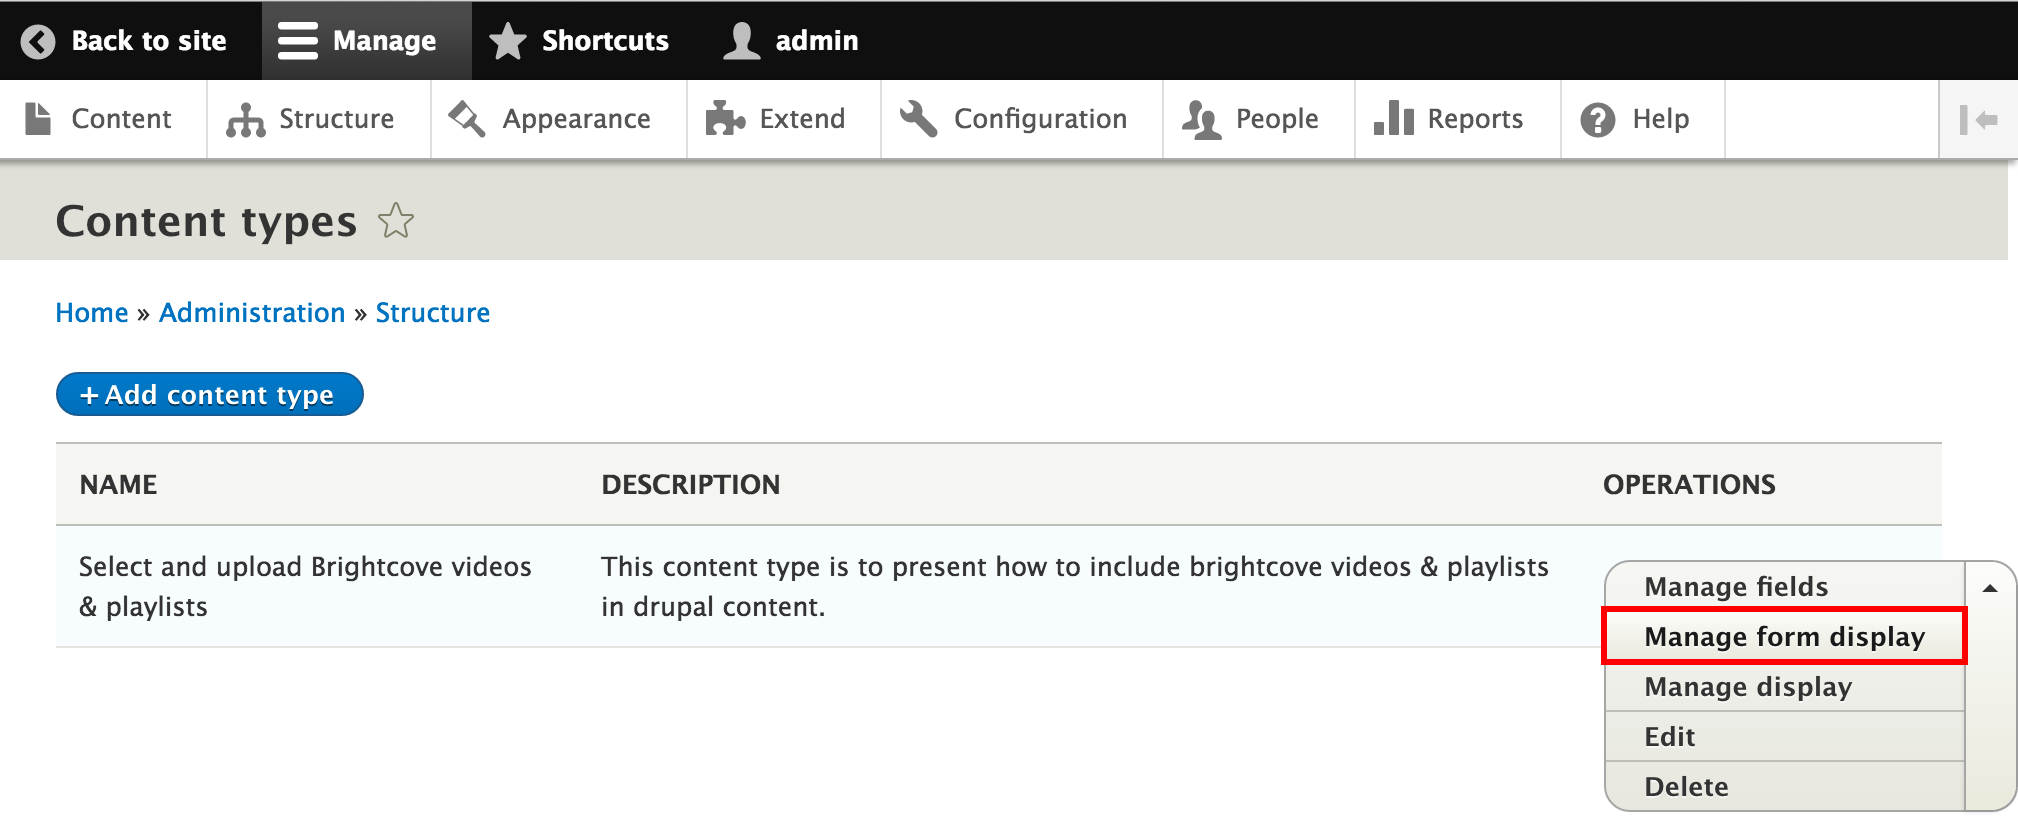
Navigate to Structure > Content types and this time choose Manage form display from Operations on your relevant content type.
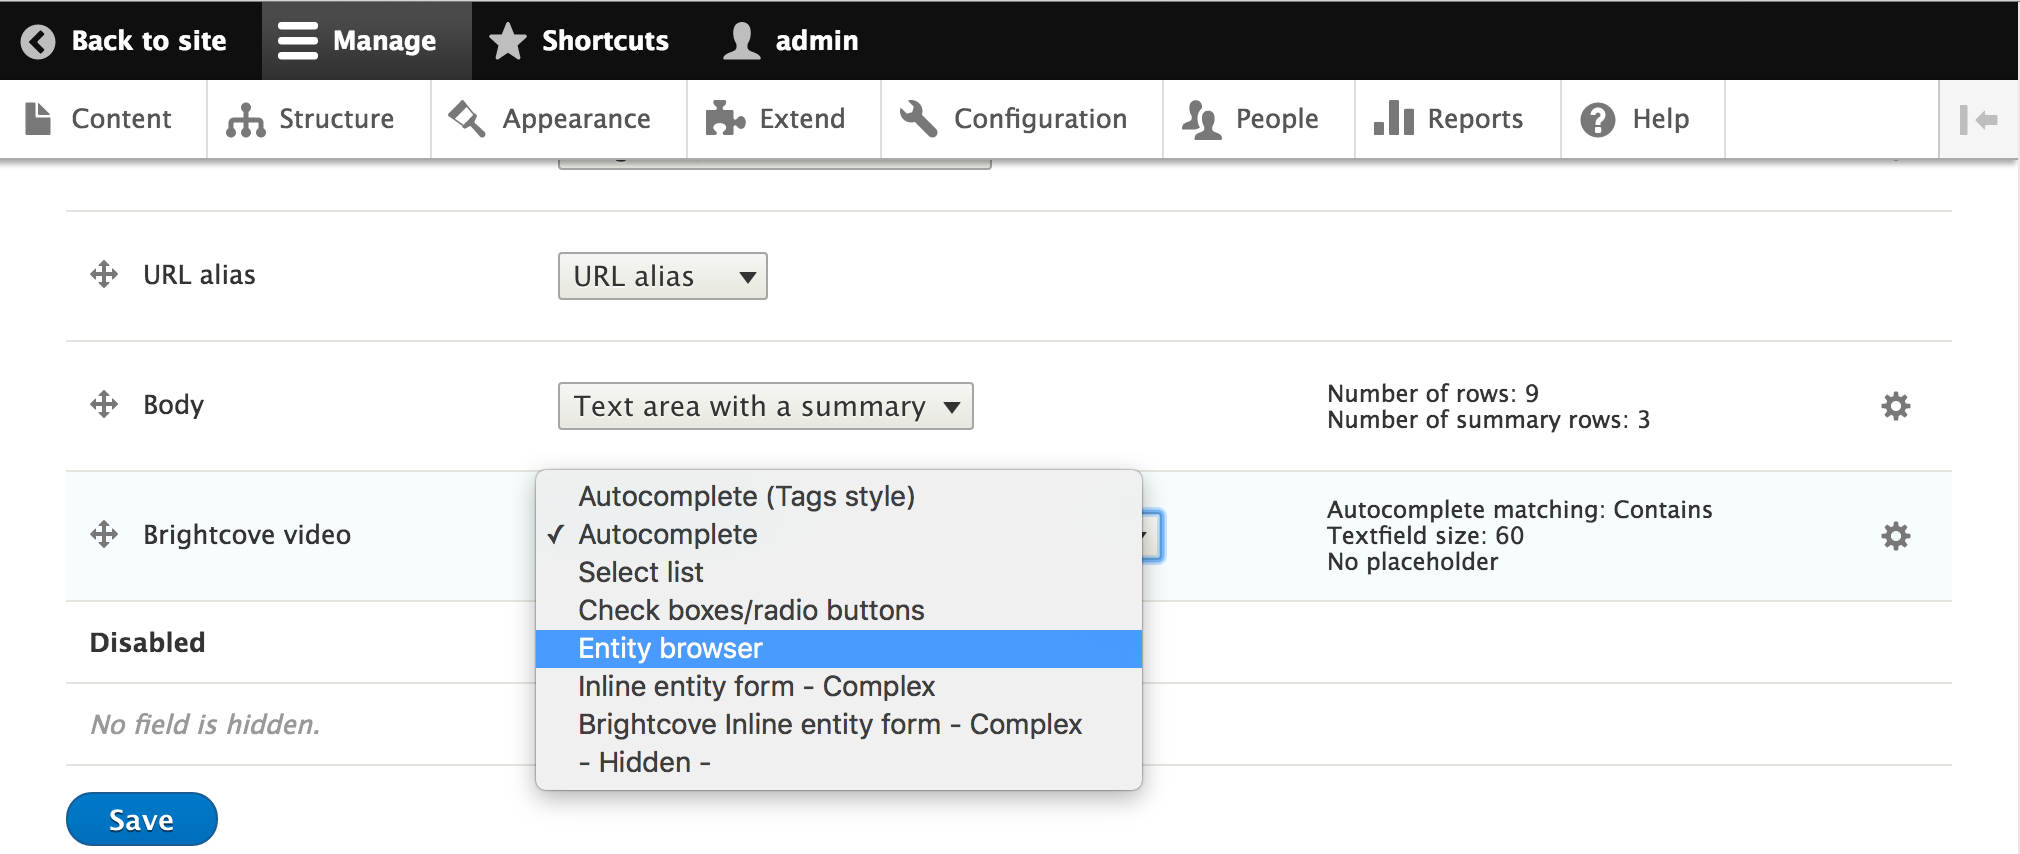
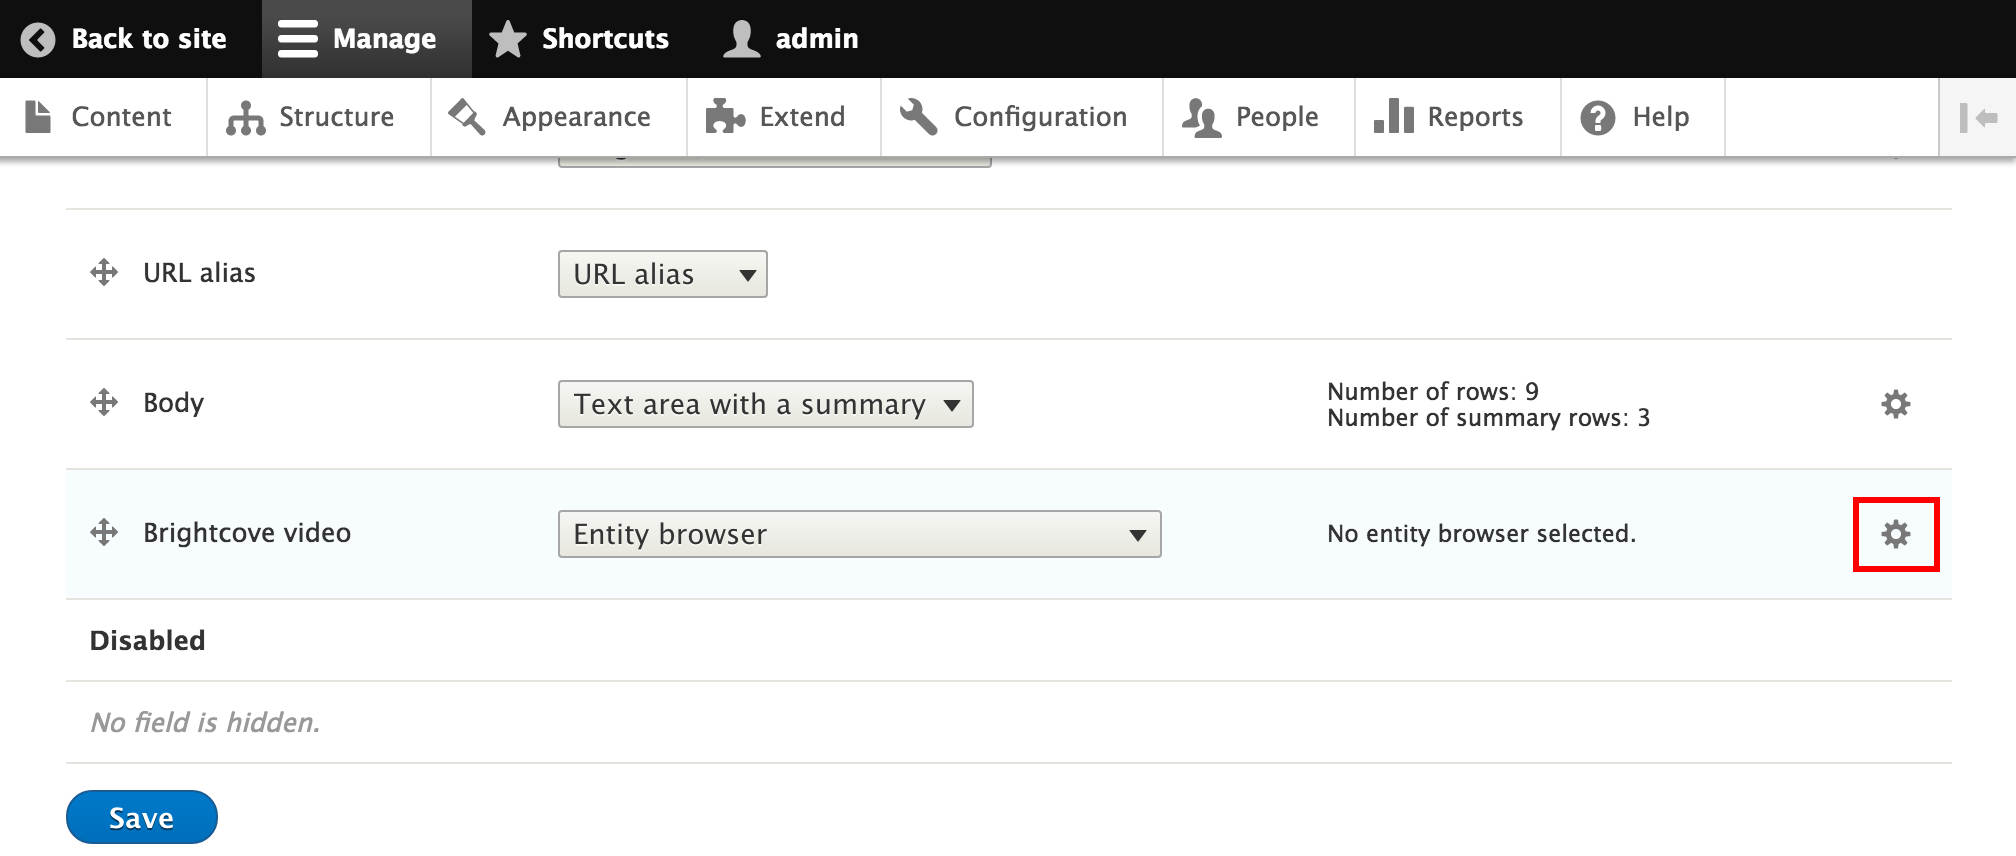
Change the widget settings: choose Entity browser instead of Autocomplete for our freshly created Brightcove video field.
There is no entity browser selected yet. We select via the configuration icon of the field.
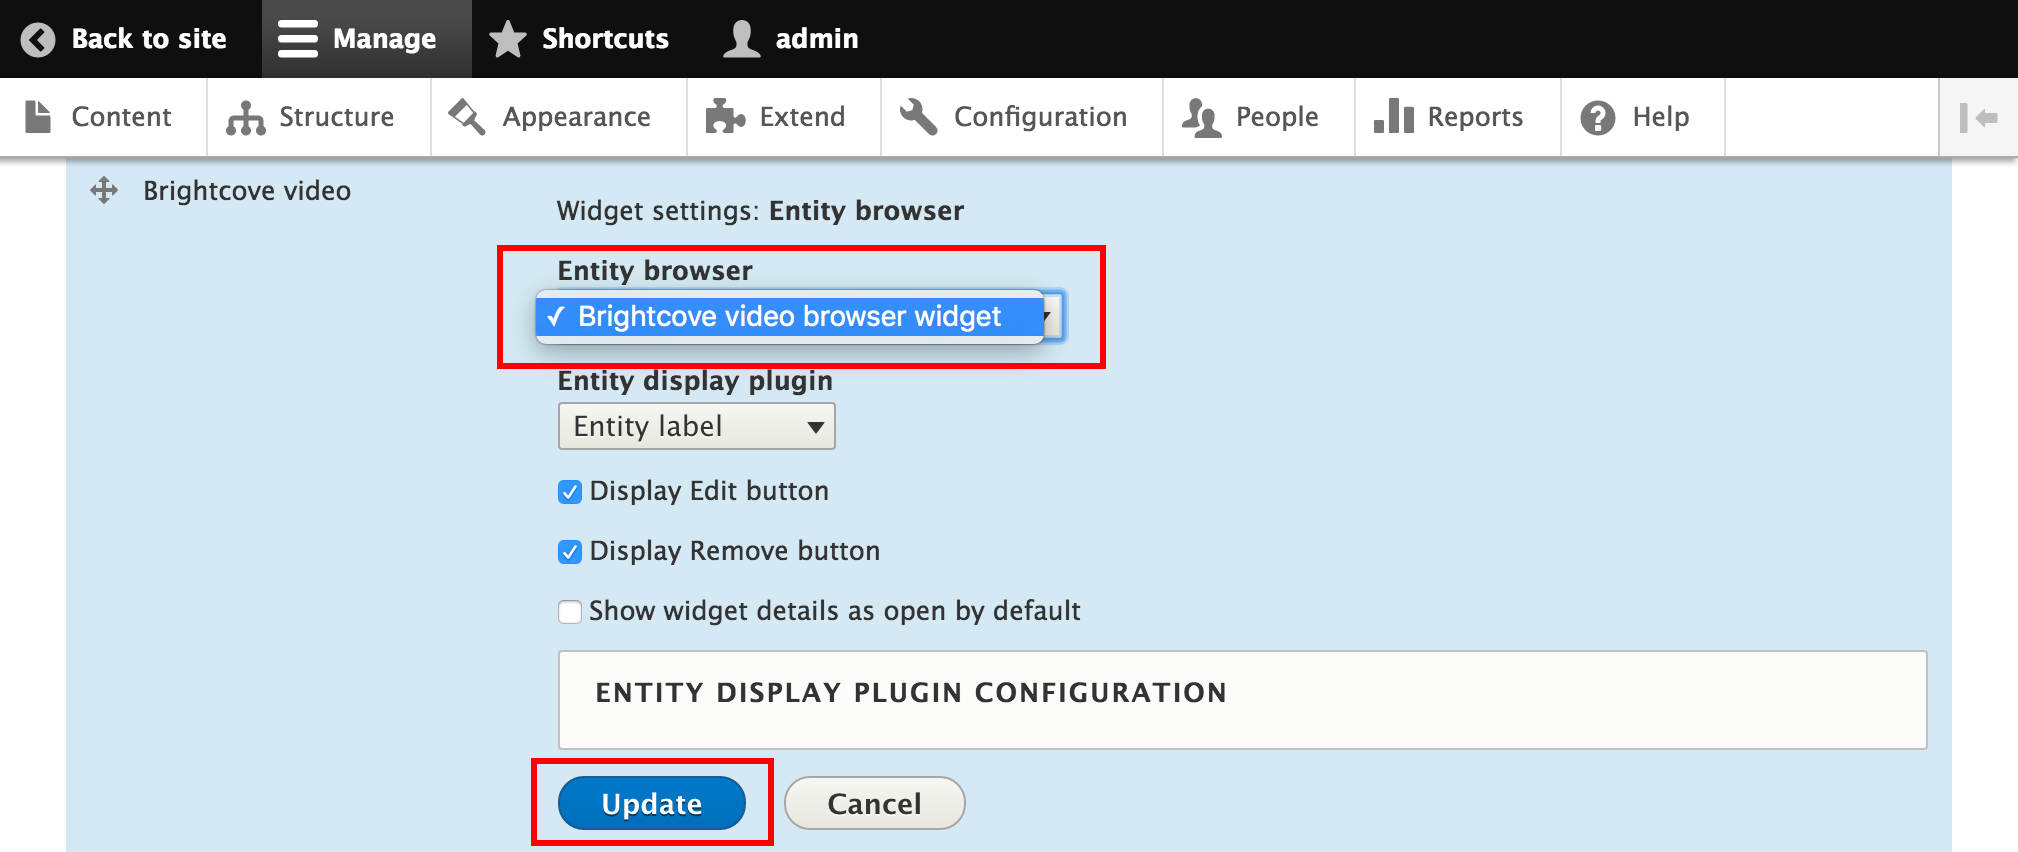
Select Brightcove video browser widget (or whatever name you chose for your entity browser) as the Entity browser. Choose Entity label for Entity display plugin. Update and then Save settings.
Our Brightcove video browser widget is all set up and ready to be used for adding videos into our Drupal content.
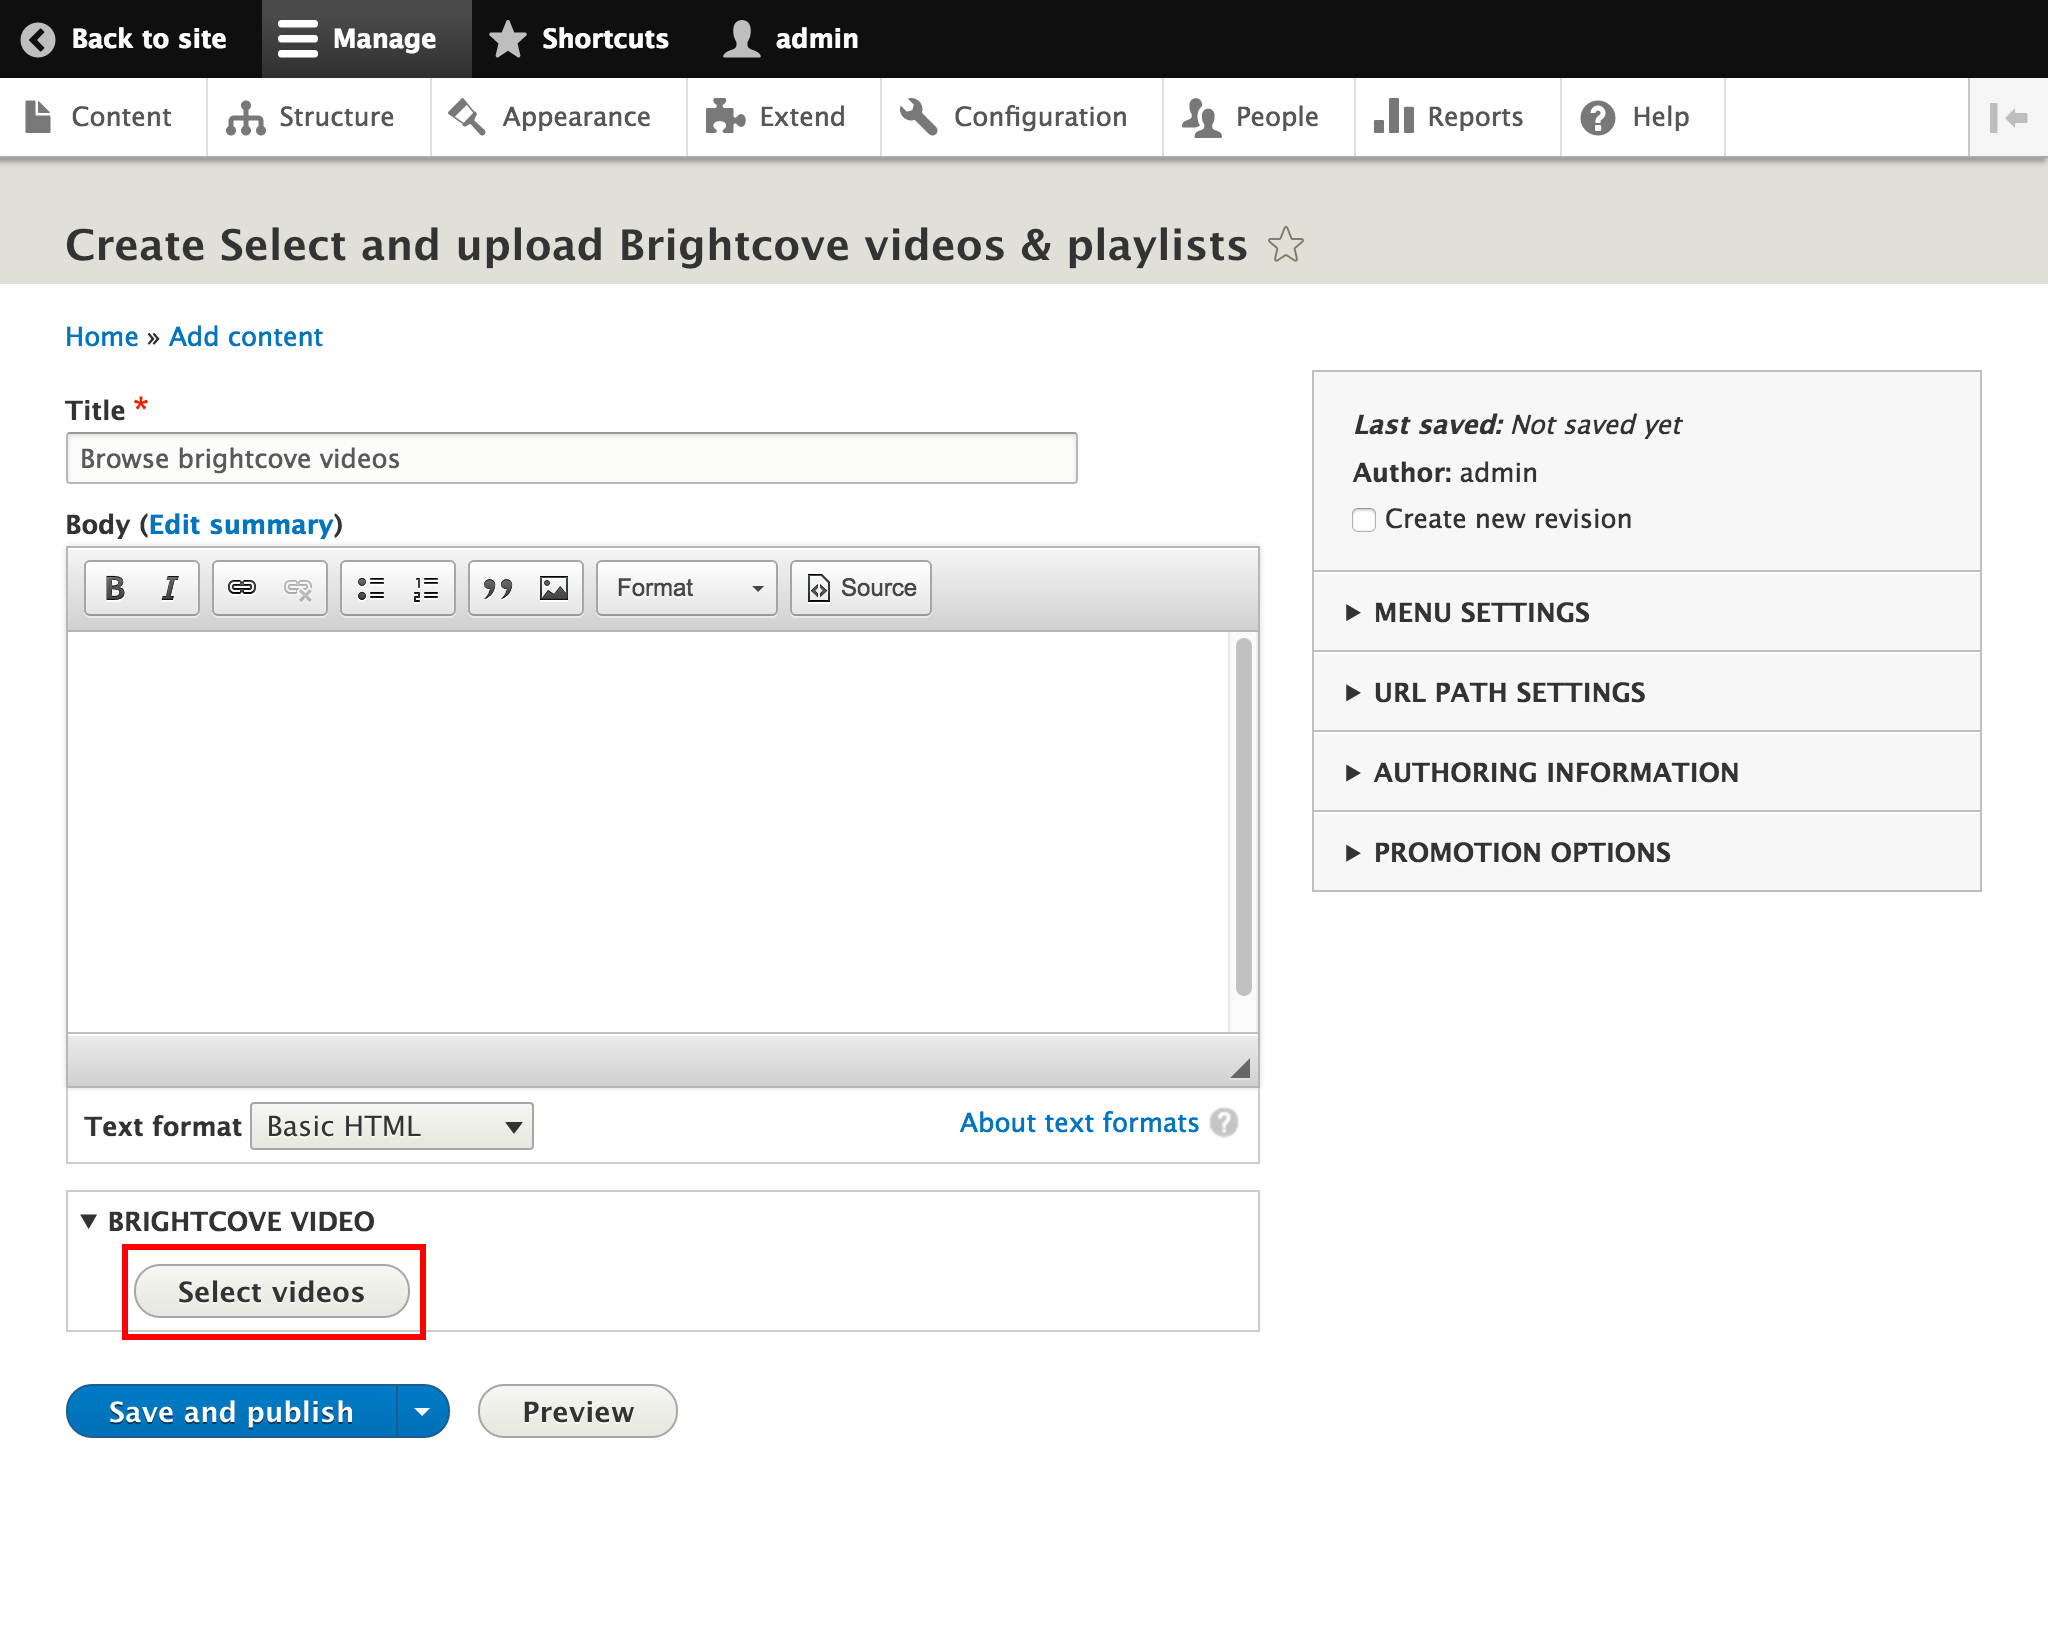
Navigate to Content and Add content (or select an existing one) of the type that includes the Brightcove video field.
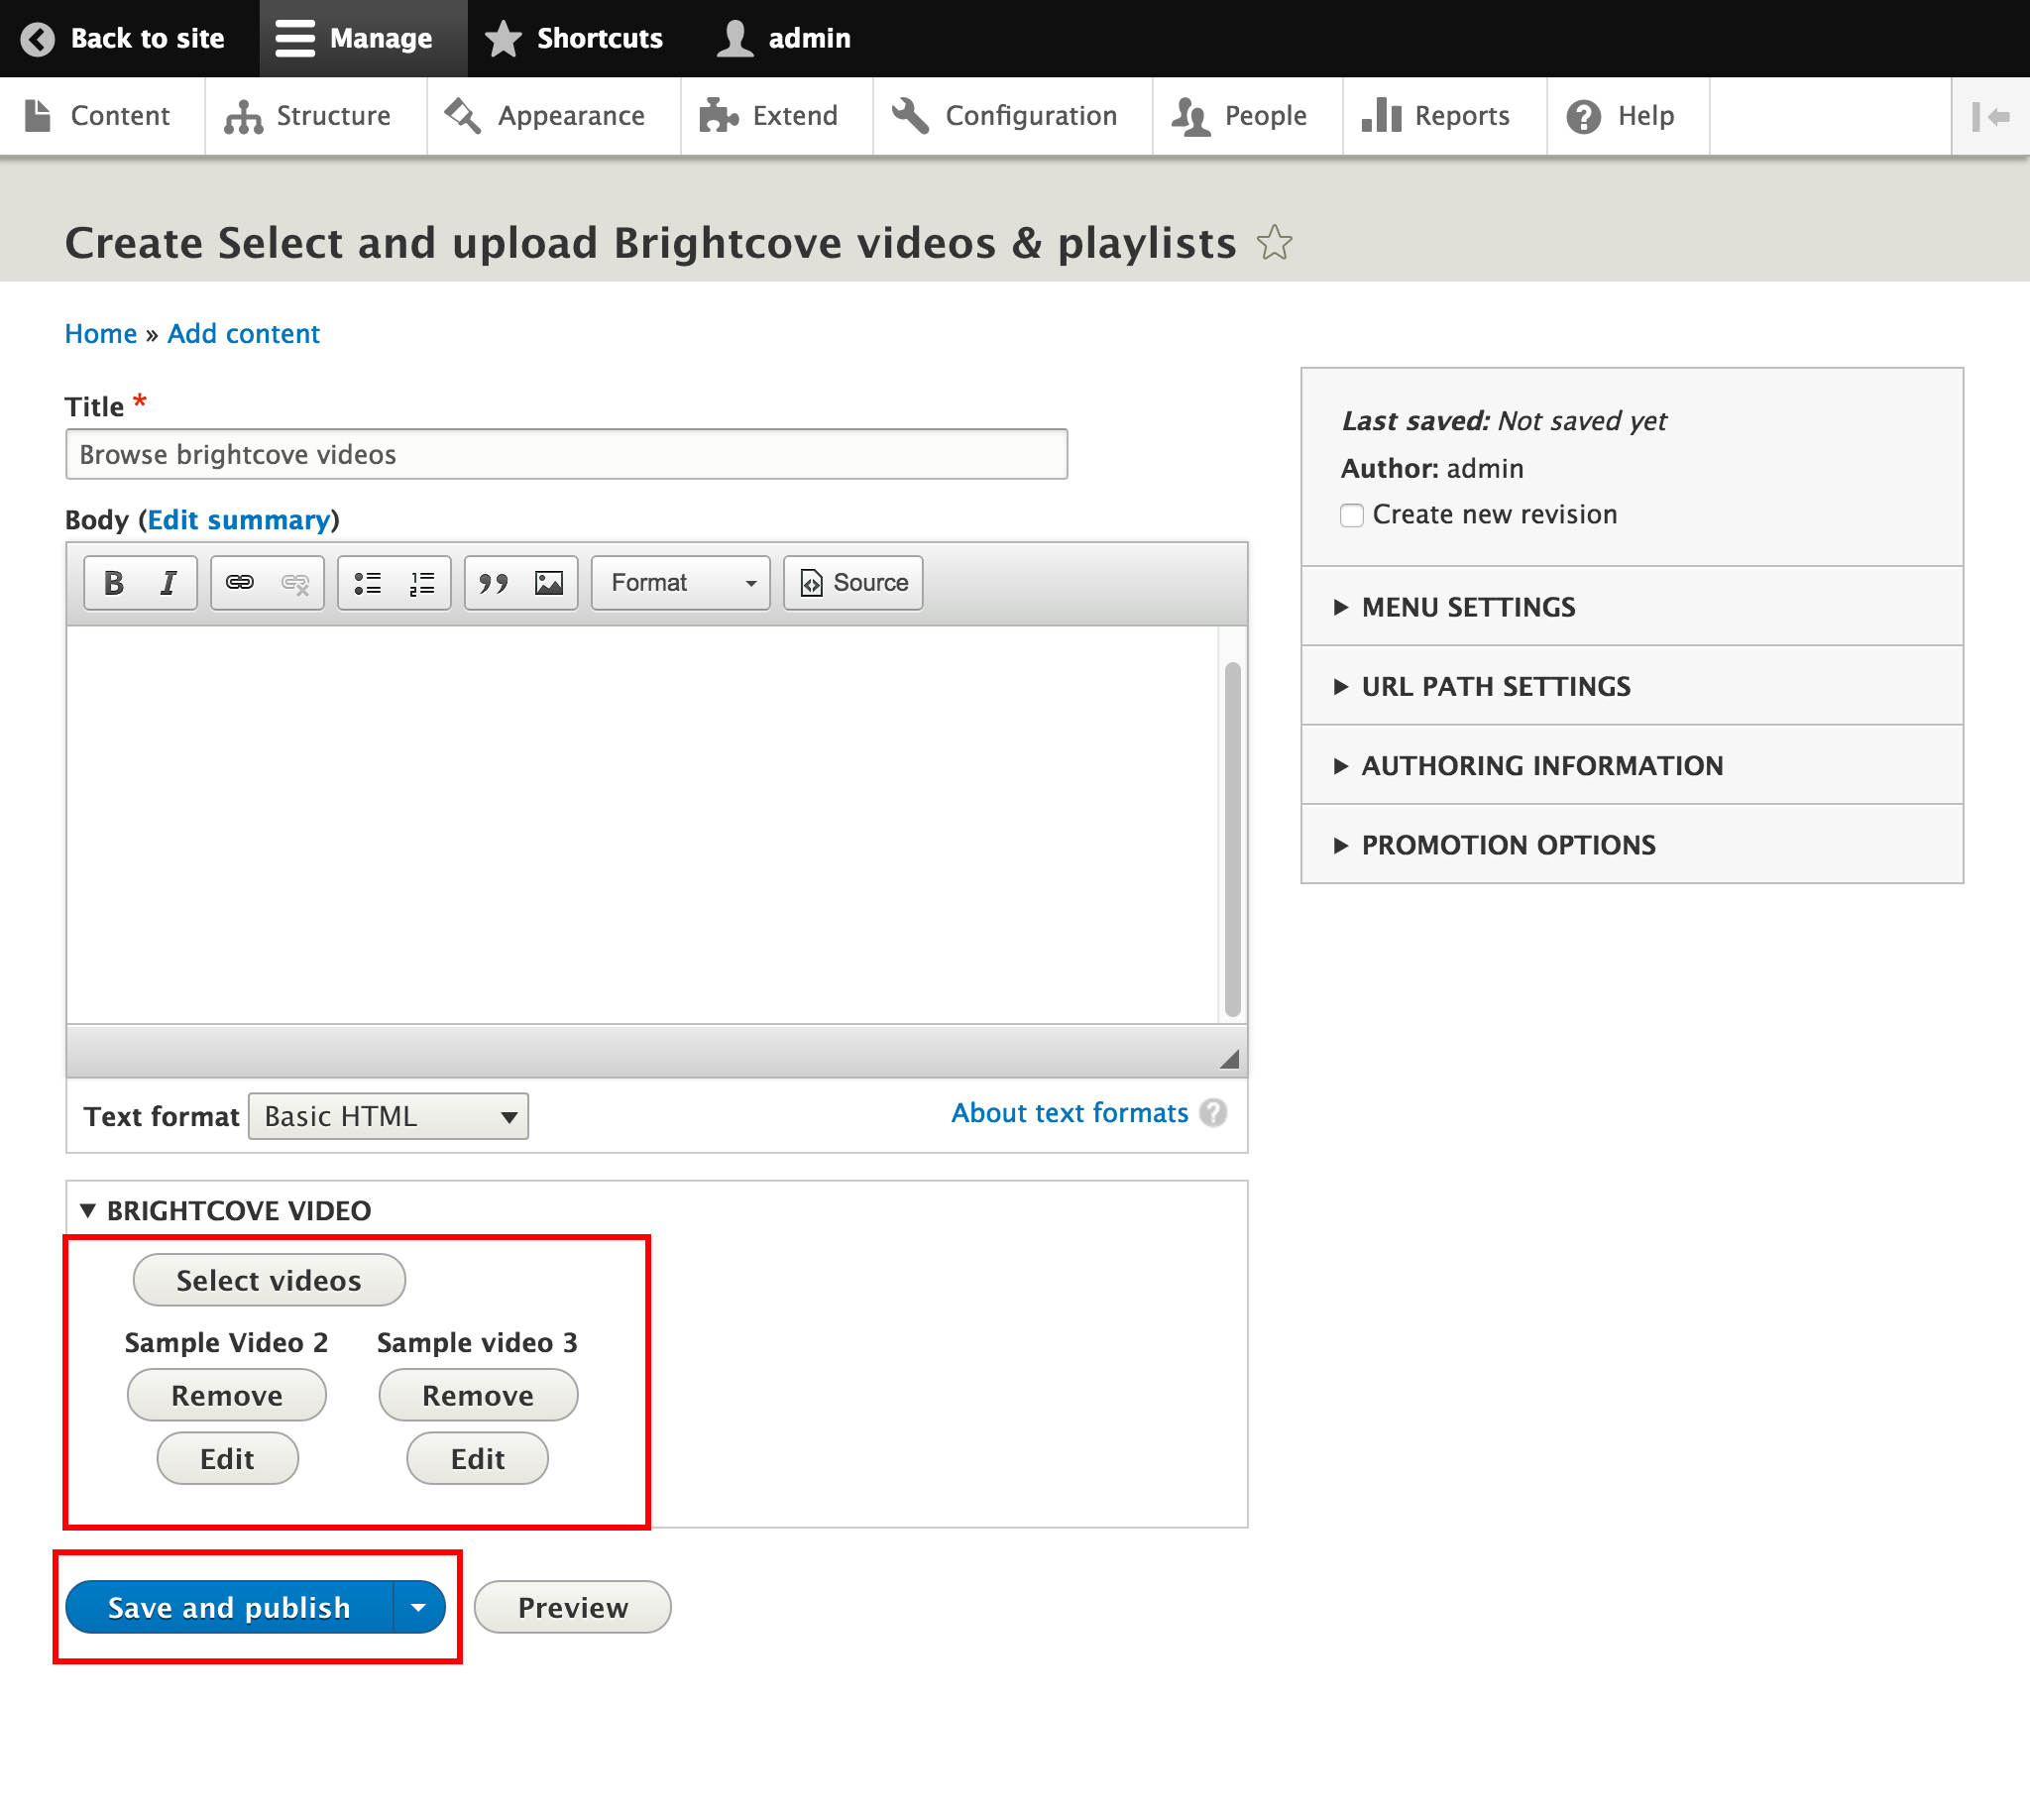
We can see the new Select videos button (that is the label we gave), instead of the autocomplete field.
Let’s click on Select videos: we get a pop-up where we can browse our uploaded videos more conveniently. We see the fields we set up in our custom widget view for each video, in this example that was Name, Created, Thumbnail and we get a checkbox for each. You select via checkboxes then affirm by clicking Select videos.
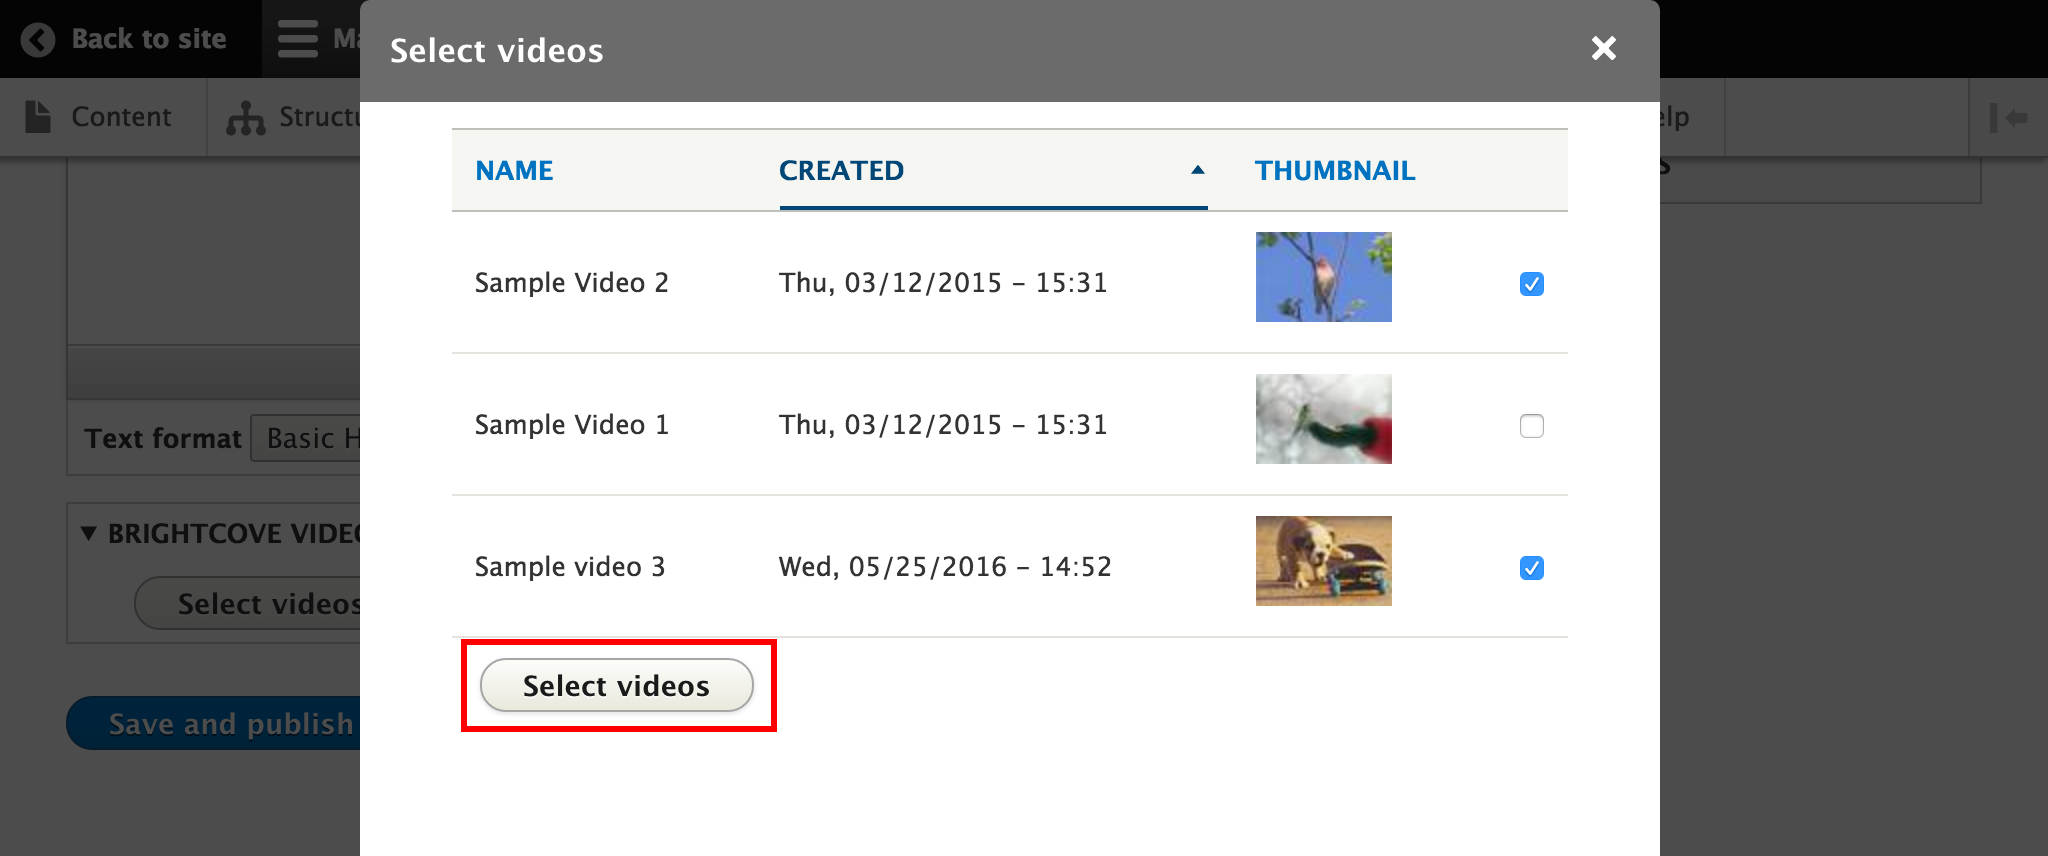
After selecting the videos for the Drupal content, we can Remove and Edit each. To finalize this video addition to the content, Save and publish.
Upload Brightcove Videos from Drupal content using the Inline Entity Form module
It’s even possible to upload Brightcove Videos and Playlists into your Brightcove account from Drupal content with the Inline Entity Form module. This feature is already included in the Brightcove module, we just need to do some configuration.
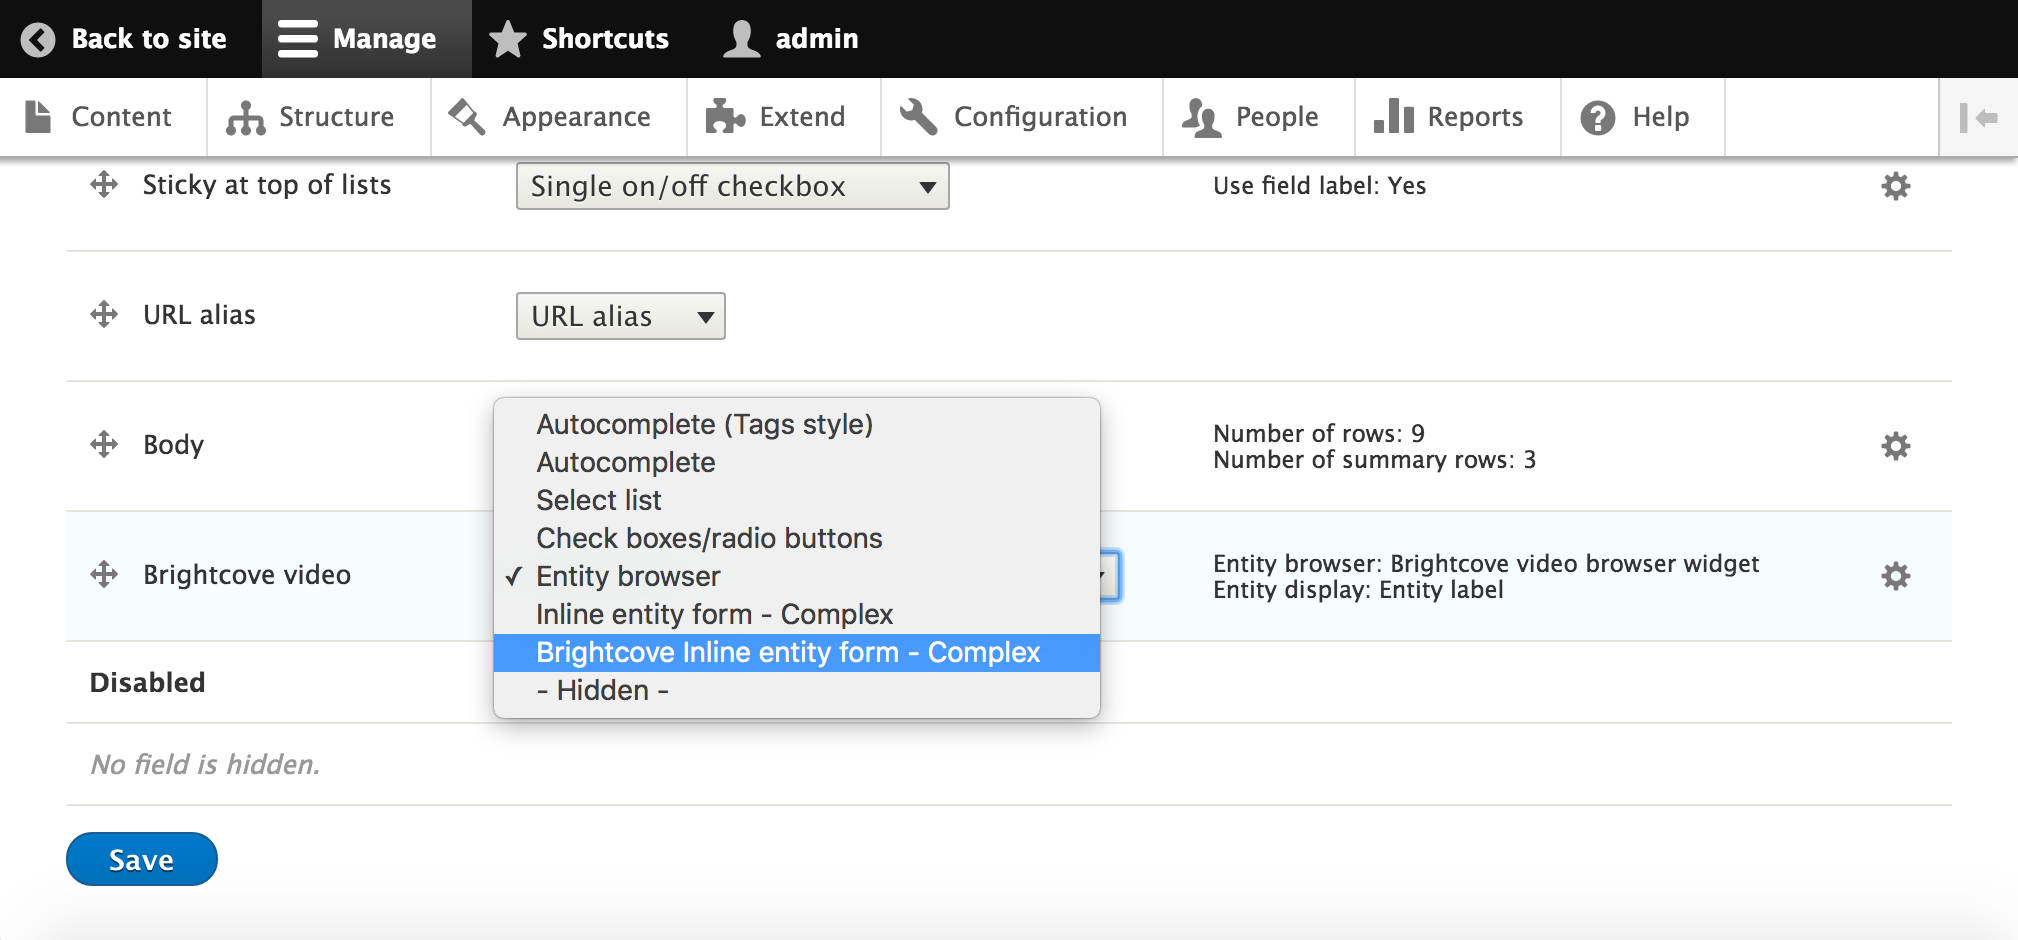
Navigate to Structure > Content types and choose Manage form display from the Operations on the video-containing content type.
Instead of the Entity browser widget, this time we want to choose the Brightcove Inline entity form - Complex widget. It is preconfigured, we only have to Save.
Navigate to Content and Add content, the Brightcove video field now shows the Add new brightcove video button.
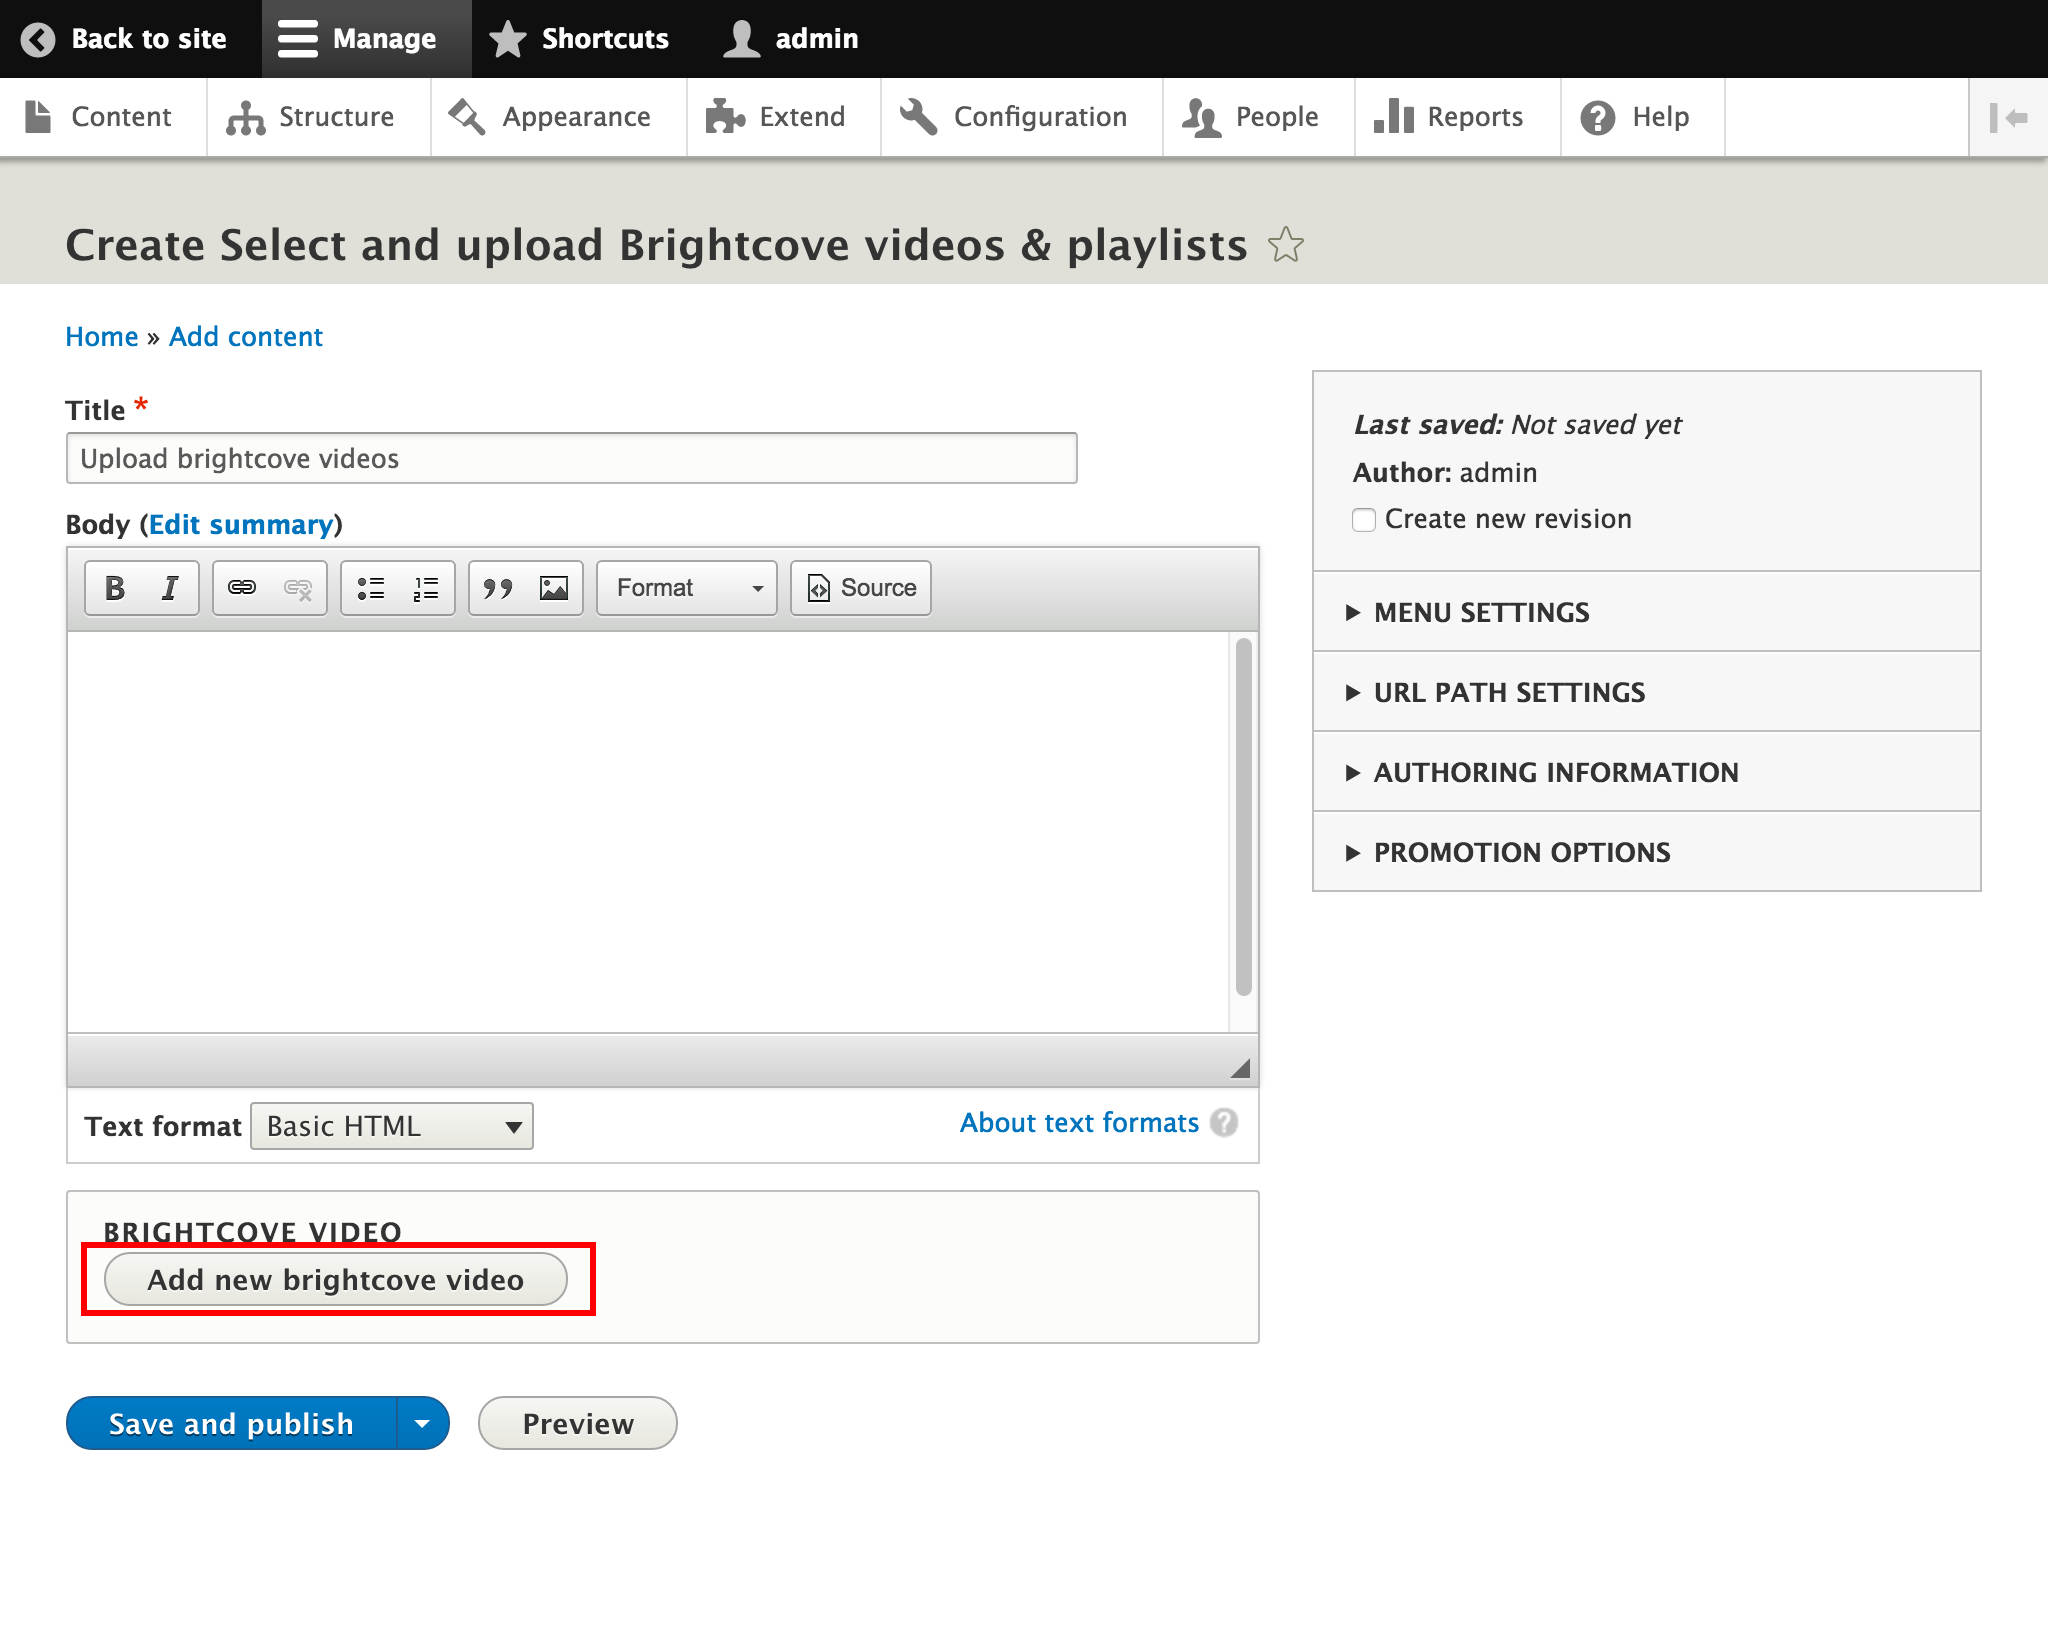
Click on it, and we can see the same interface showing up as in part 3’s Video upload and edit chapter.
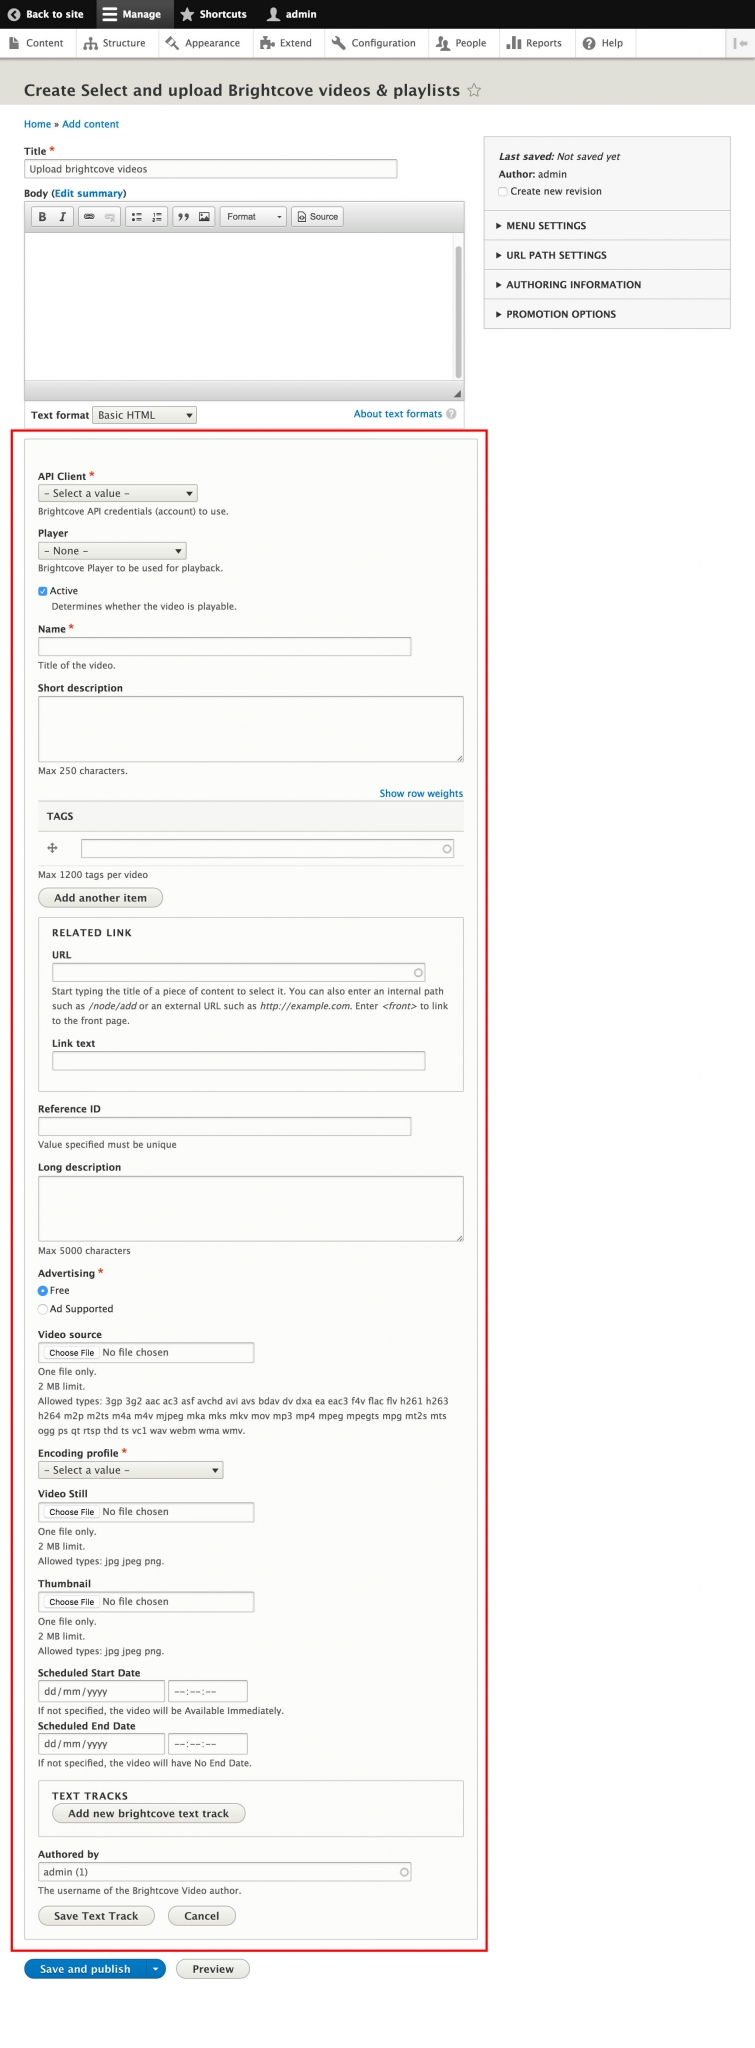
Follow the steps in the “Video upload and edit” section then Save. We are done, the video is included in our content (both in Drupal and in Brightcove, as they are synced).
What if we want to be able to browse existing videos and upload new ones in the same field? Is that possible in D8? Yes, it is. All we need to do is to enable the Entity Browser IEF (Inline Entity Form) submodule, and do some configuration. Let’s see how it works!
Browse and upload from the same field in your Drupal content, using the Entity Browser IEF submodule
Navigate to Extend and enable the Entity Browser IEF submodule.
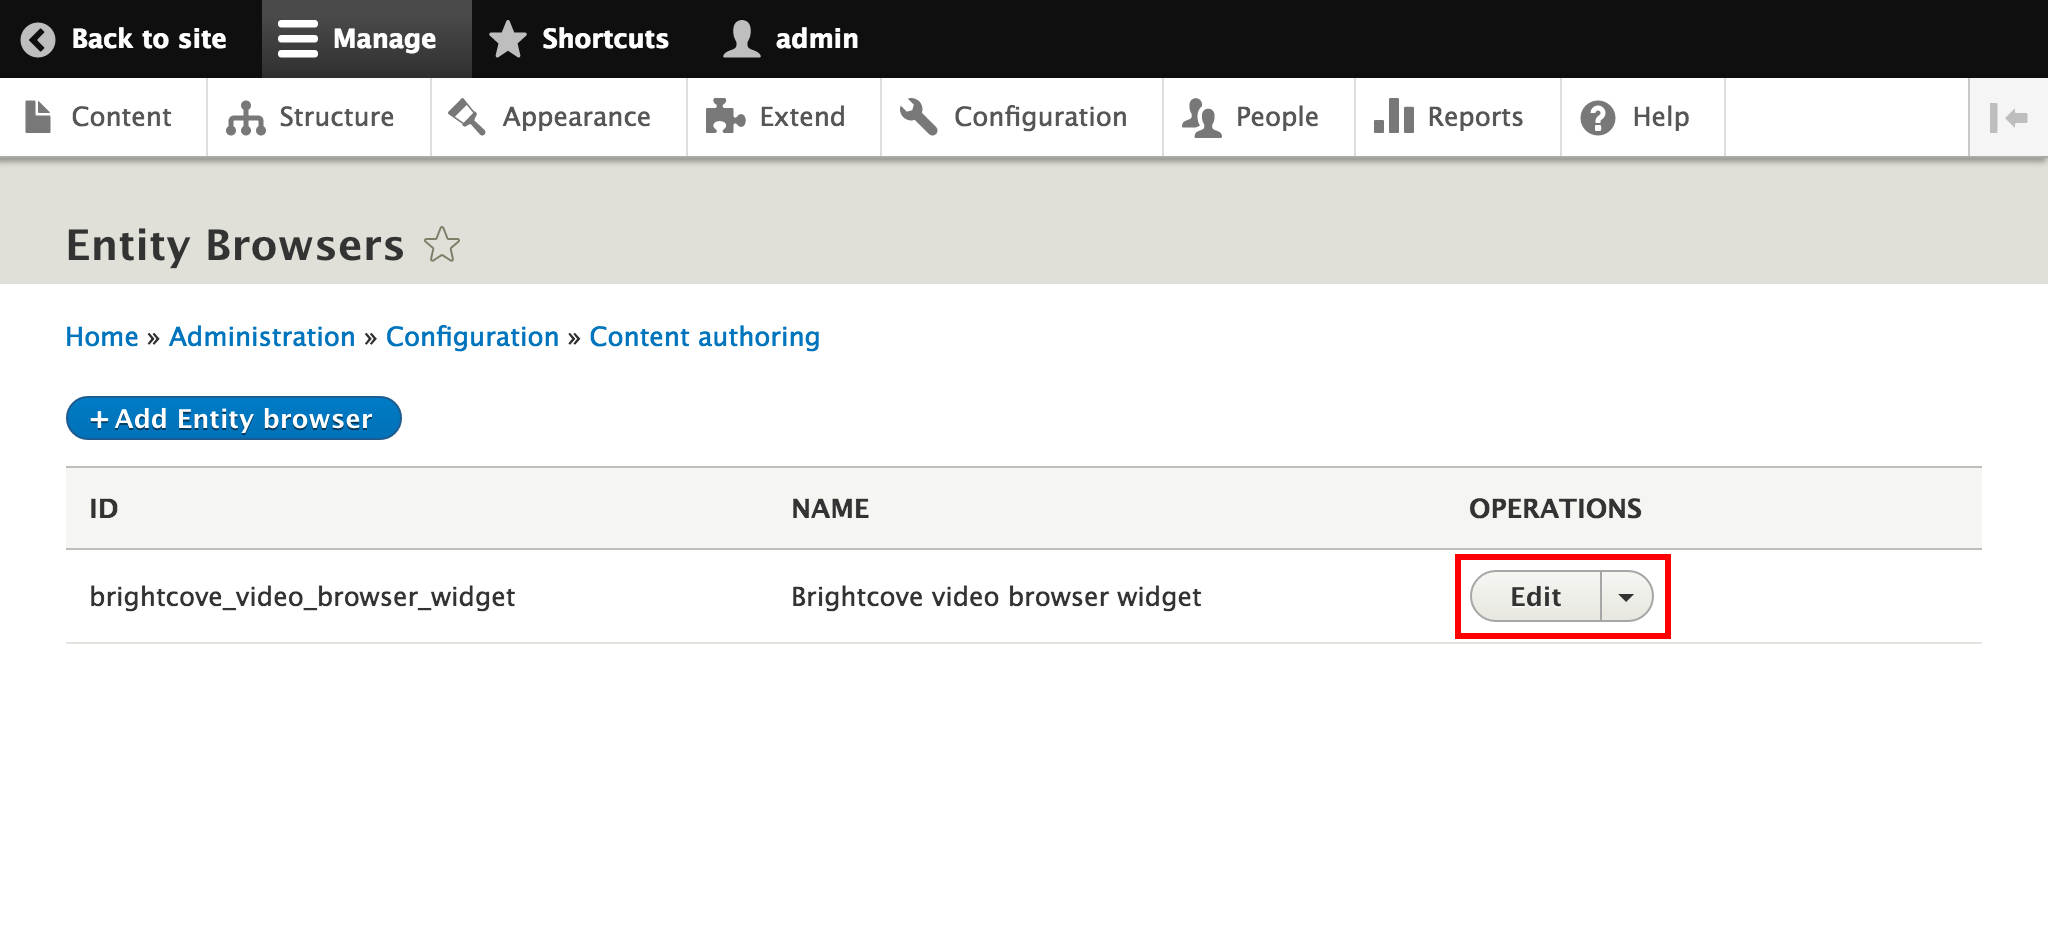
Navigate to Configuration and select Entity browsers from Content Authoring. It is a prerequisite to have the entity browser, you find its setup guidance in the Browse Brightcove Videos using the Entity Browser module chapter of this blog post. In the following steps we will do some changes to that configuration.
Choose to Edit the entity browser.
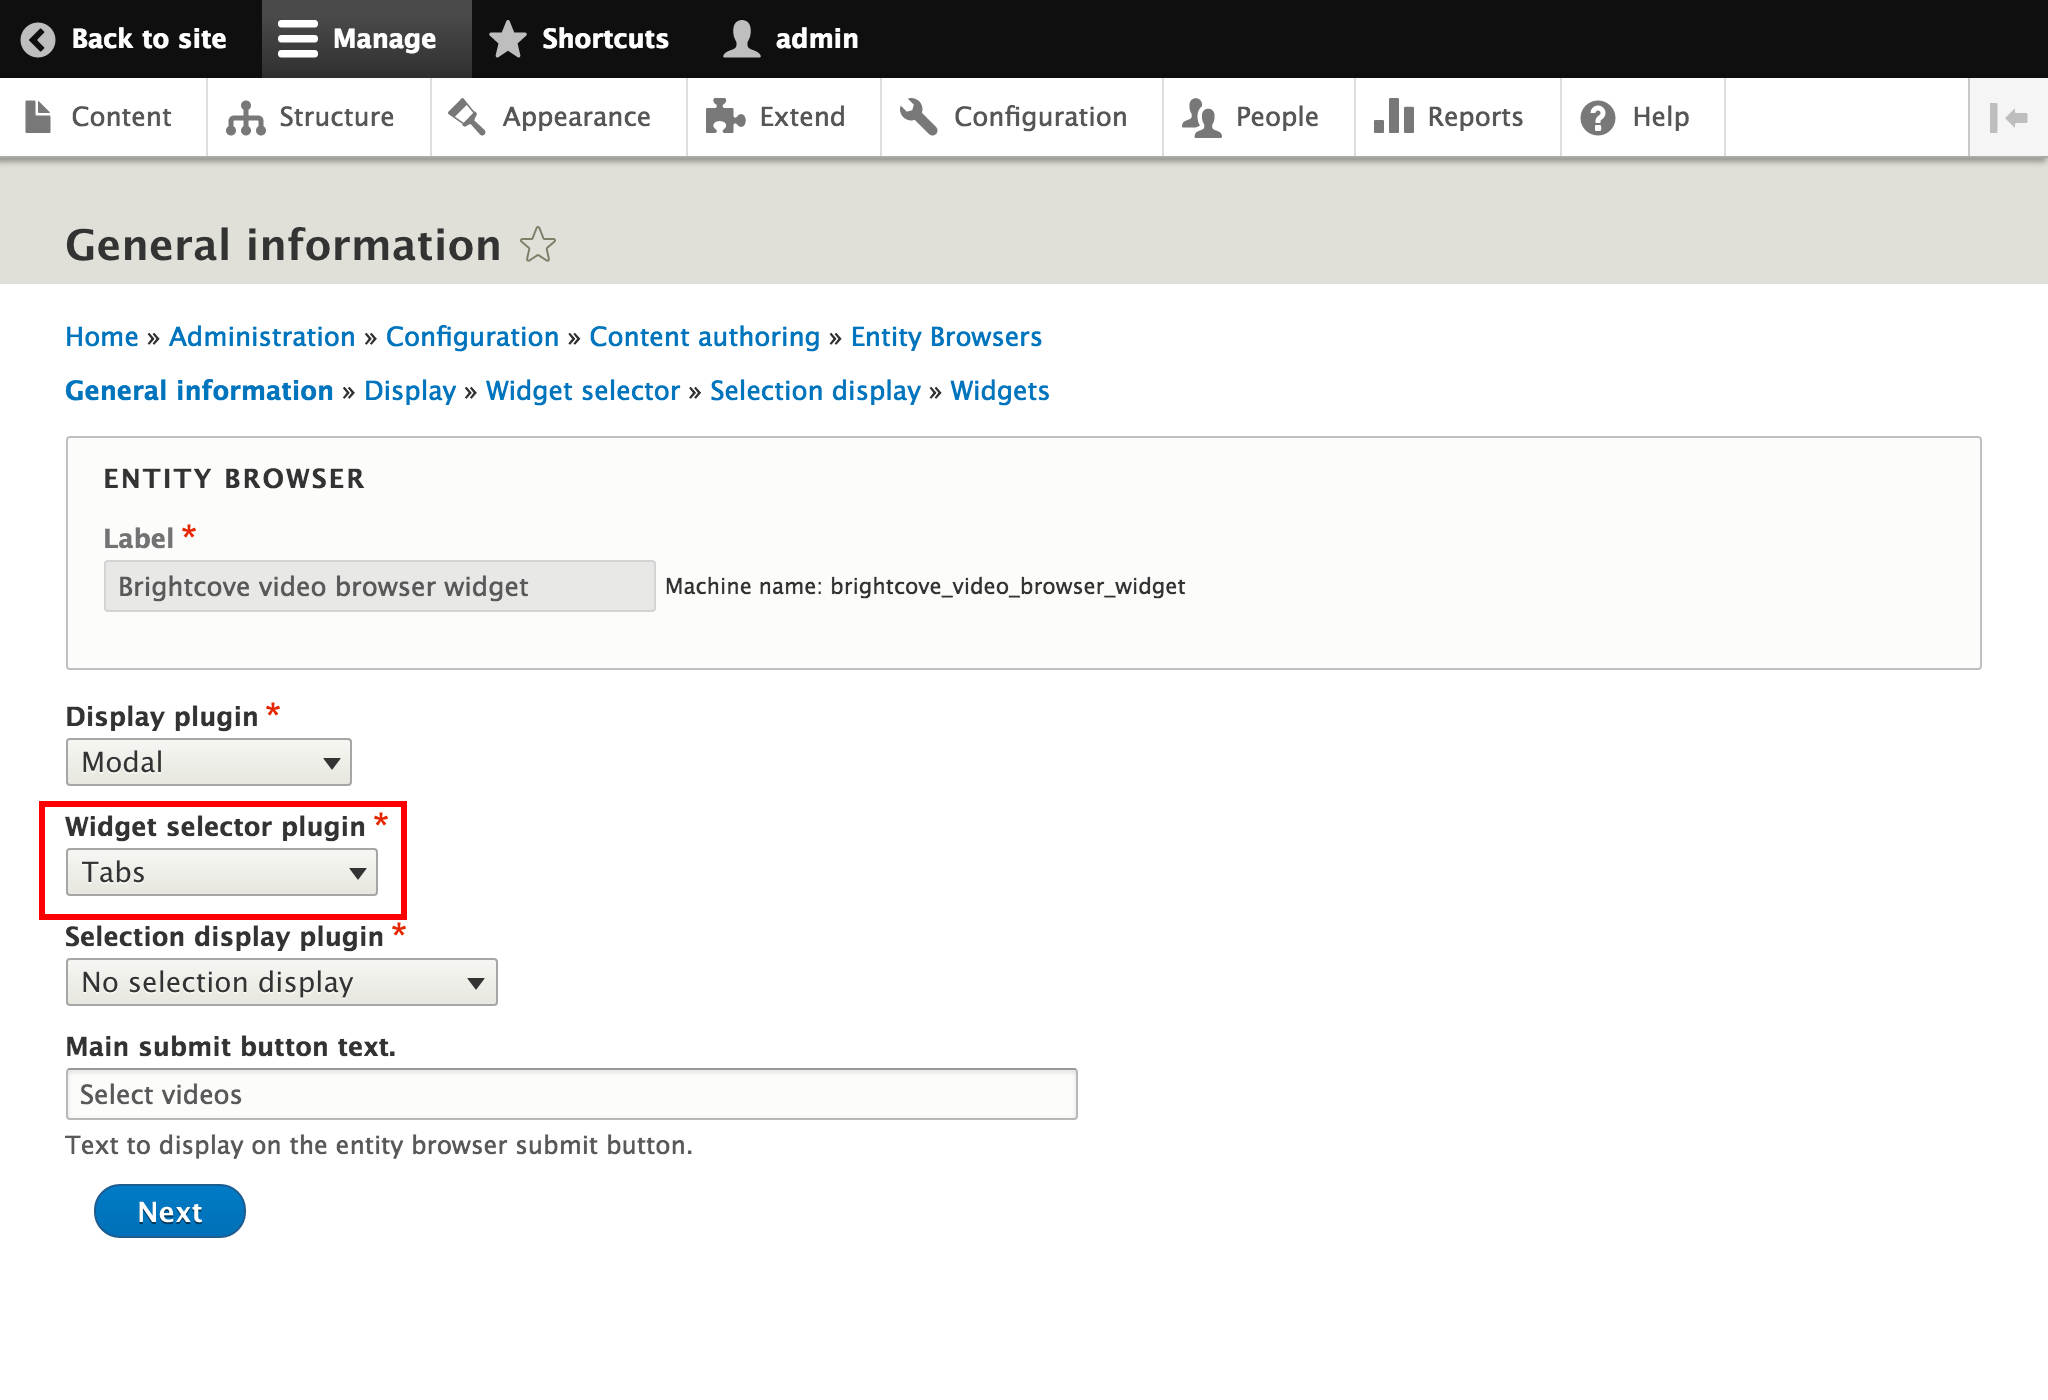
Change the Widget selector plugin from Single widget to Tabs.
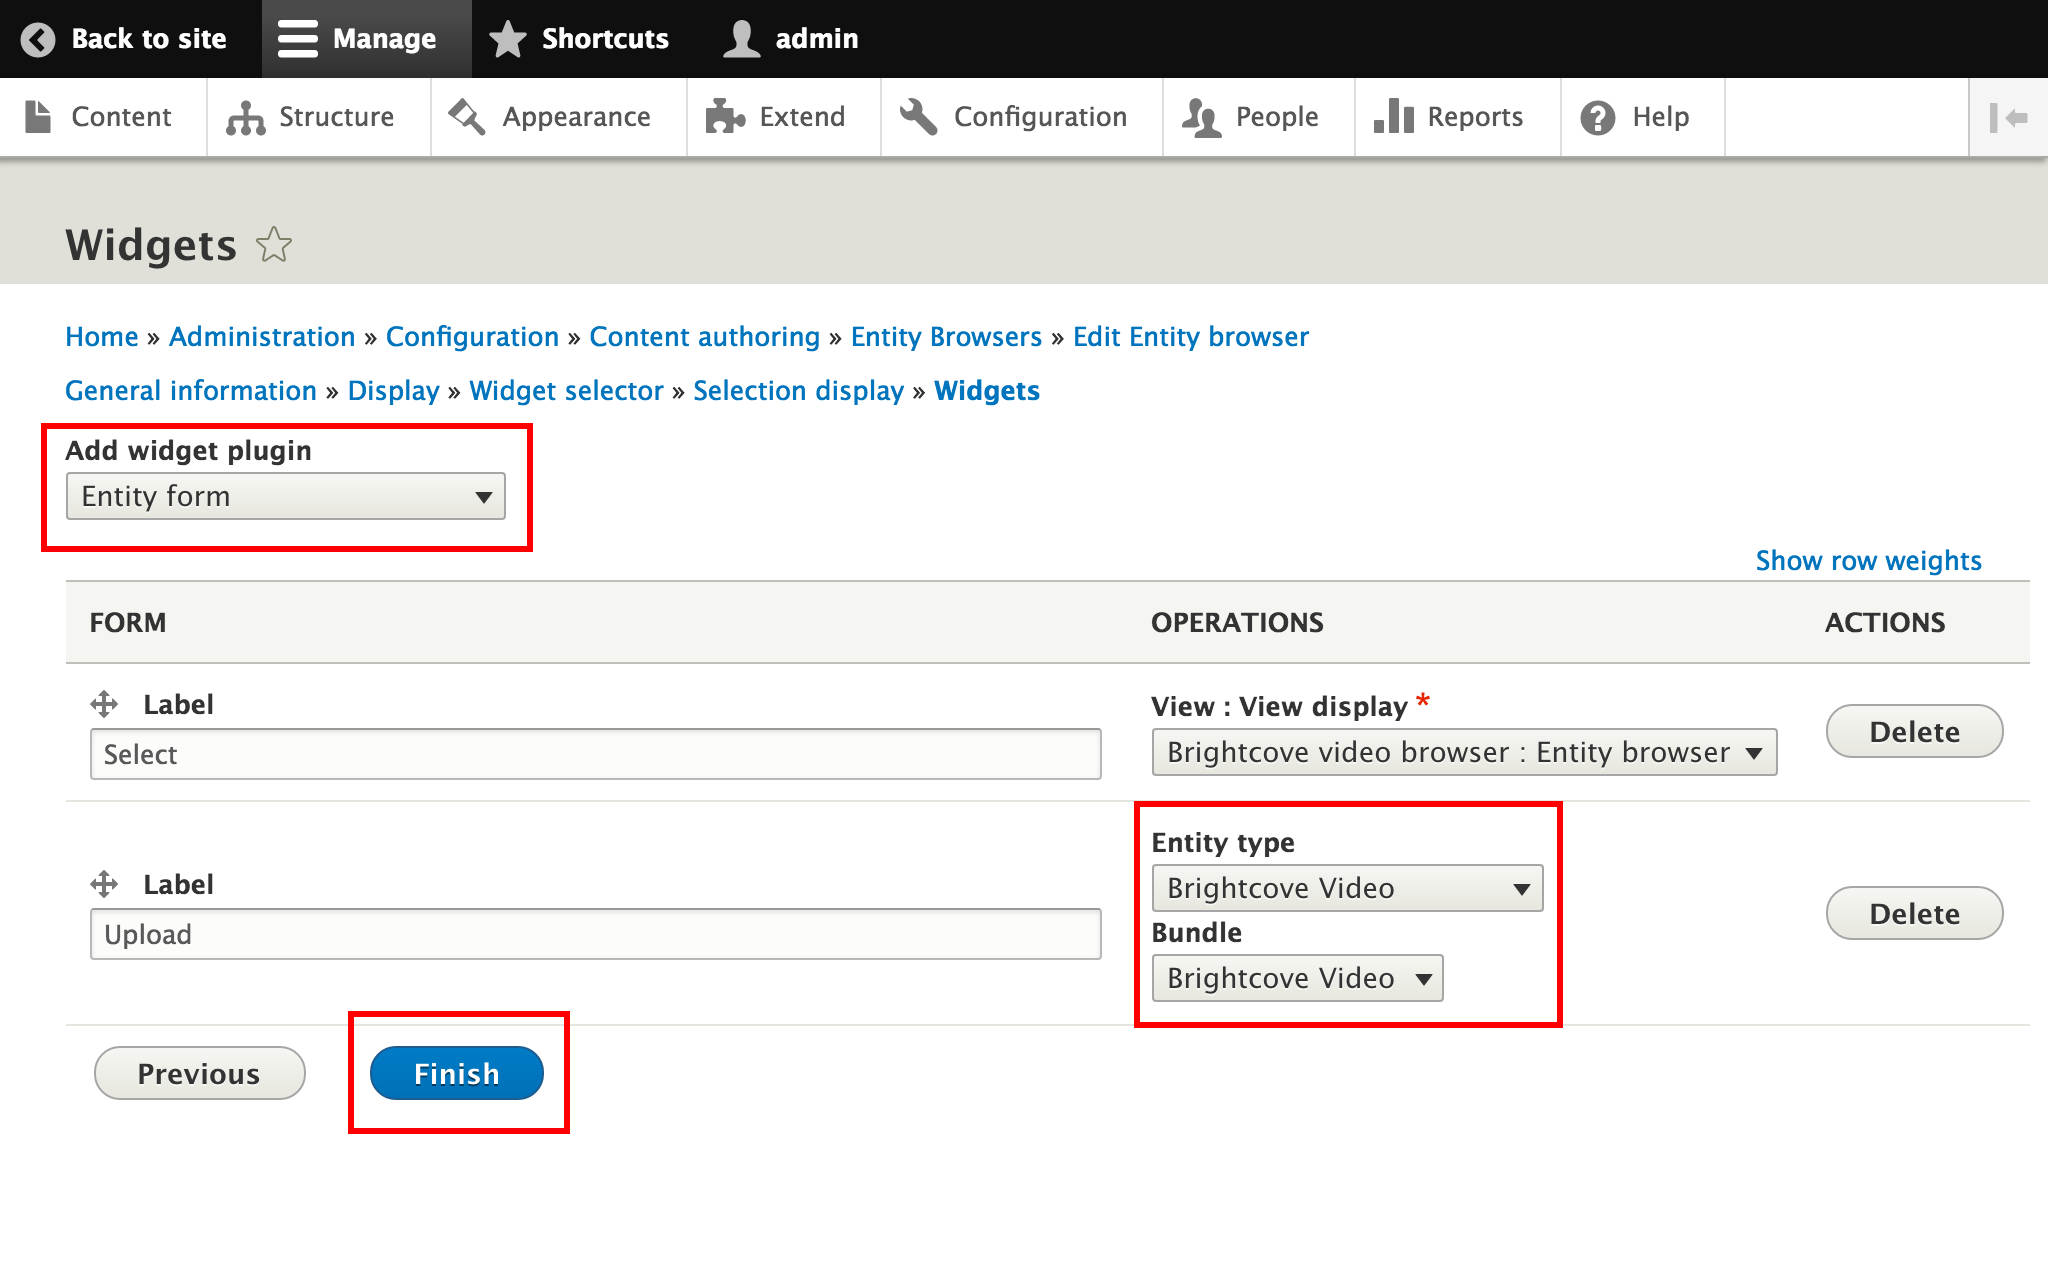
Hit Next until you get to the last configuration page (before Finish). In the Add widget plugin choose the now available Entity form. Give it a Label then change its Entity type and its Bundle both to Brightcove Video. Click Finish.
Navigate to Structure > Content types and choose Manage form display from Operations on your relevant content type. Change the widget settings to Entity browser, the same way we did in the Browse Brightcove Videos using the Entity Browser module chapter of this blog post.
Now navigate to Content and Add content (or select an existing one) of the type that includes the Brightcove video field and click on the Select videos button.
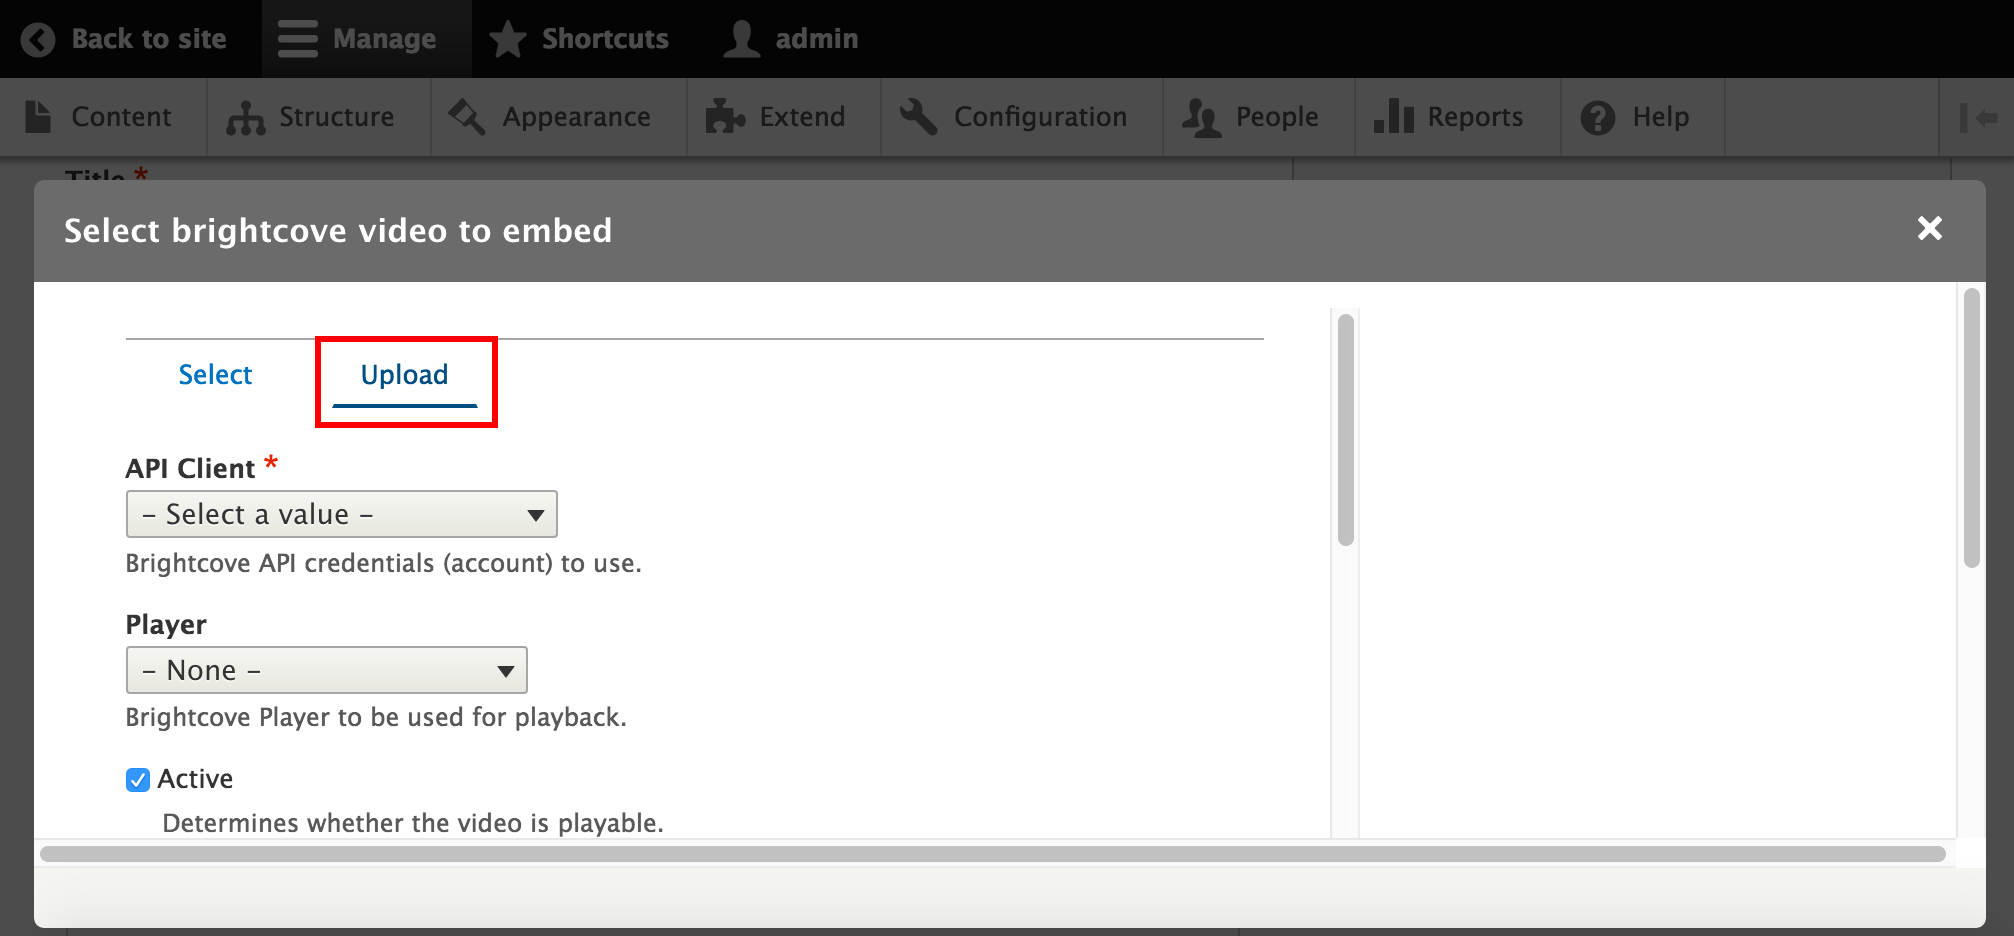
We can see that the new Upload tab appears next to the Select tab, and if we click on it the same form comes up like in this blog post’s part 3’s Video upload and edit chapter. We fill the form and then click Select videos in the end.
And that’s it, we can select our existing videos and upload new ones in the same place.
We can even do this from CKEditor!
Browse and upload Brightcove Videos from CKEditor
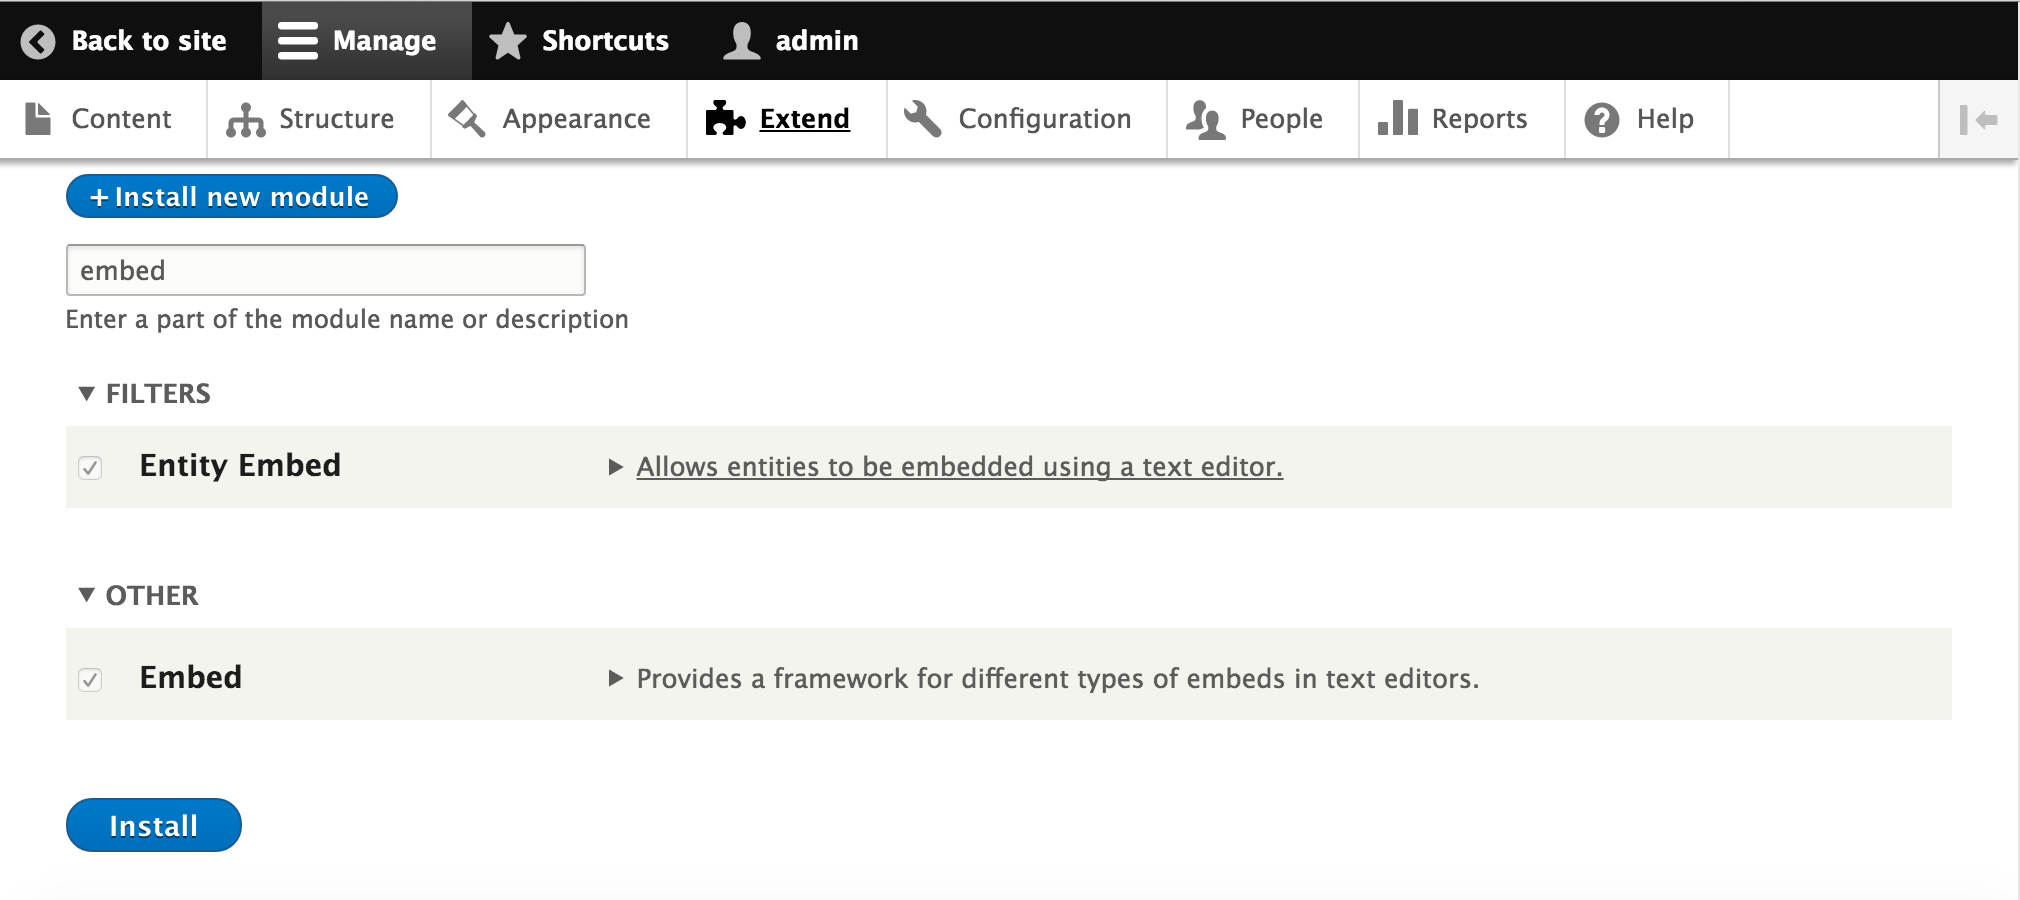
Download and enable the Entity Embed and Embed modules, and of course the CKEditor module if it is not enabled yet.
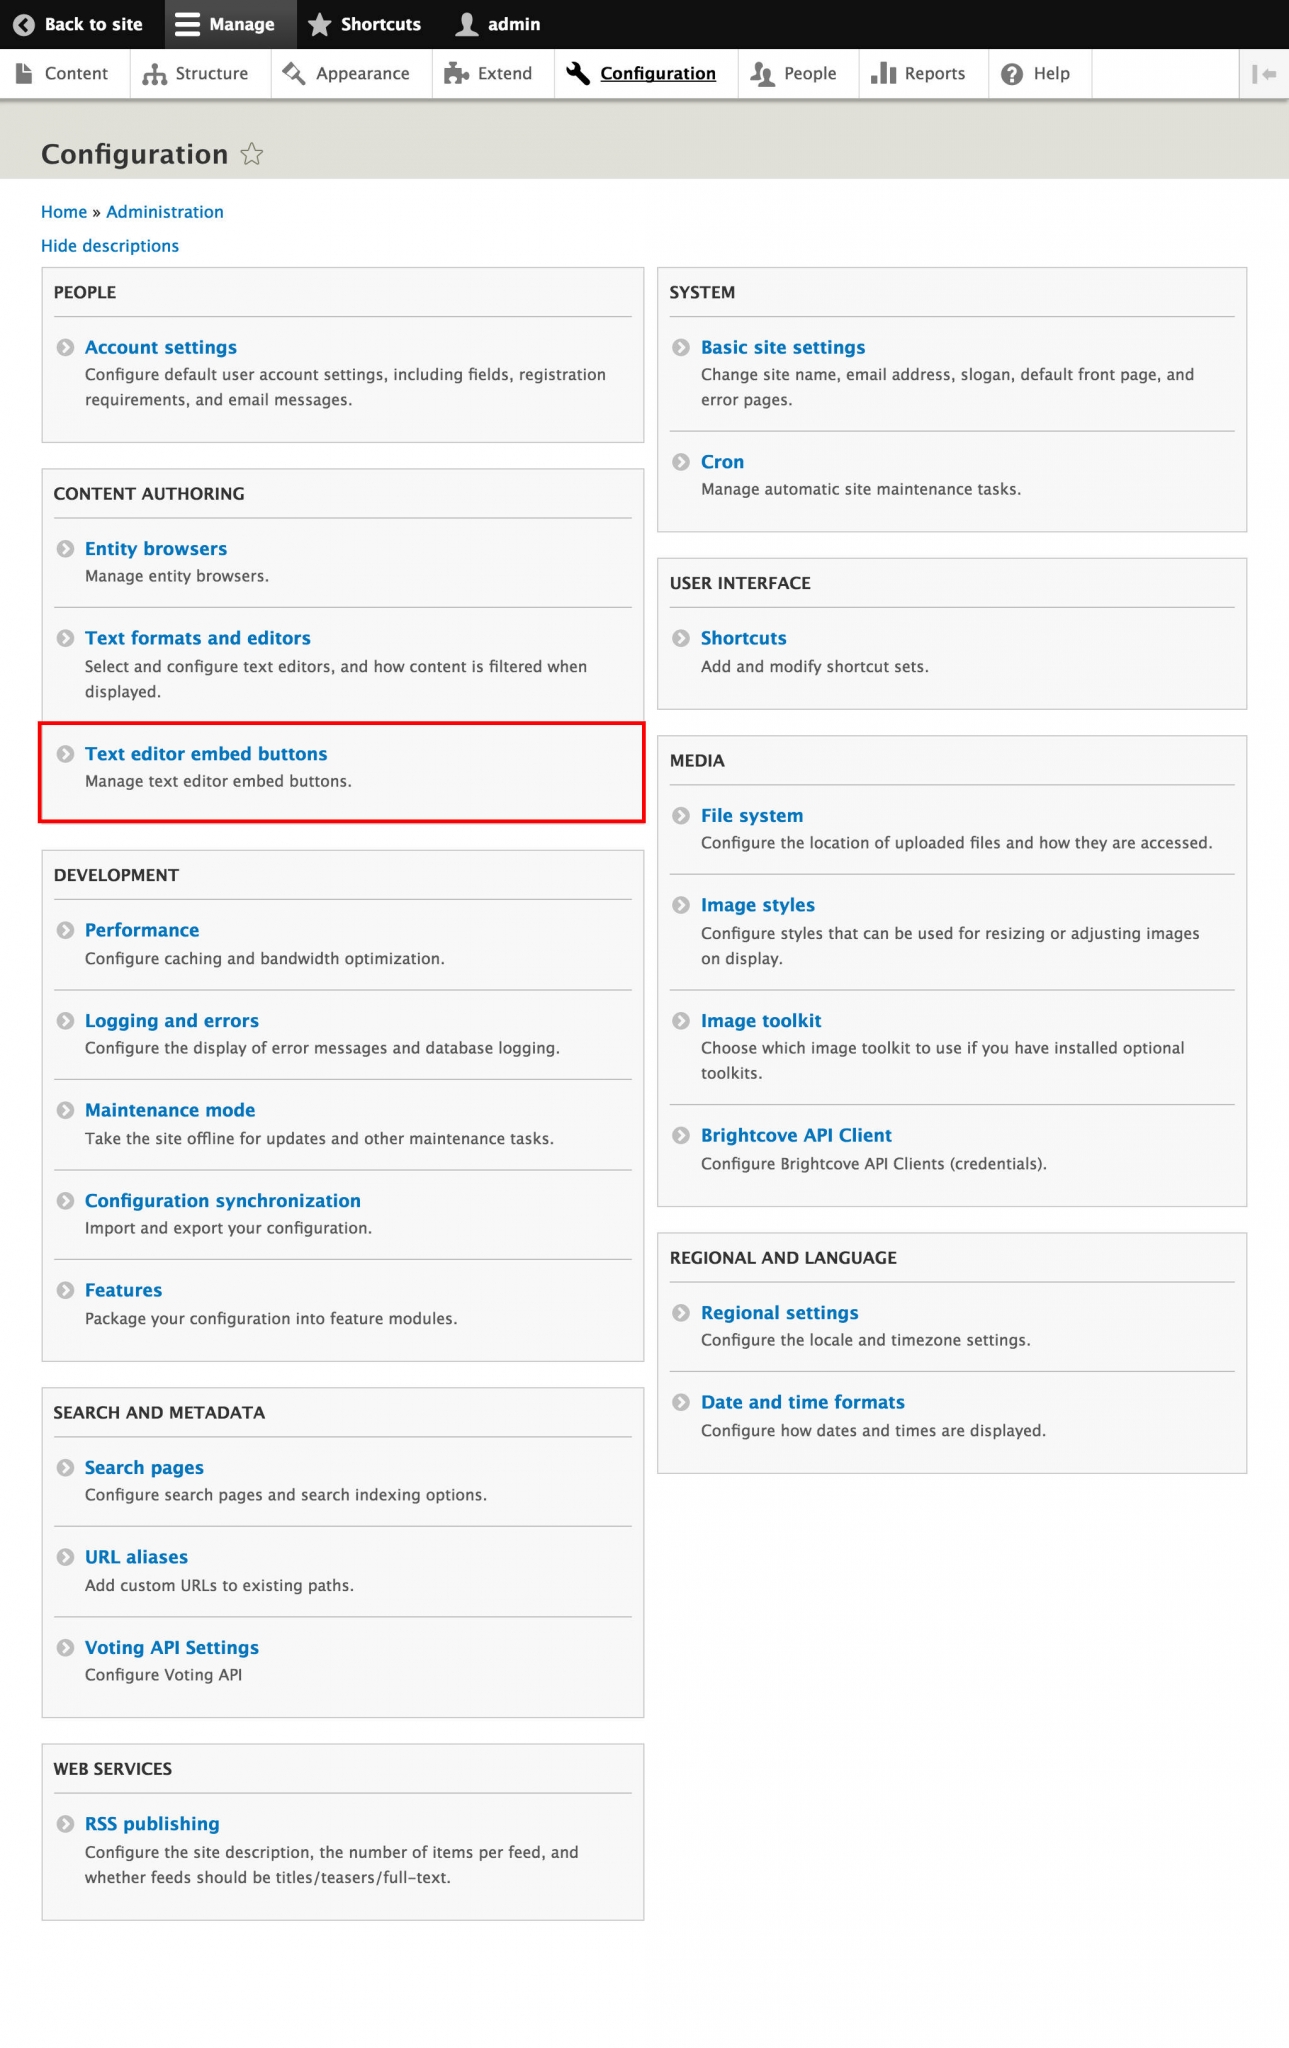
Navigate to Configuration and in the Content authoring section, select Text editor embed buttons.
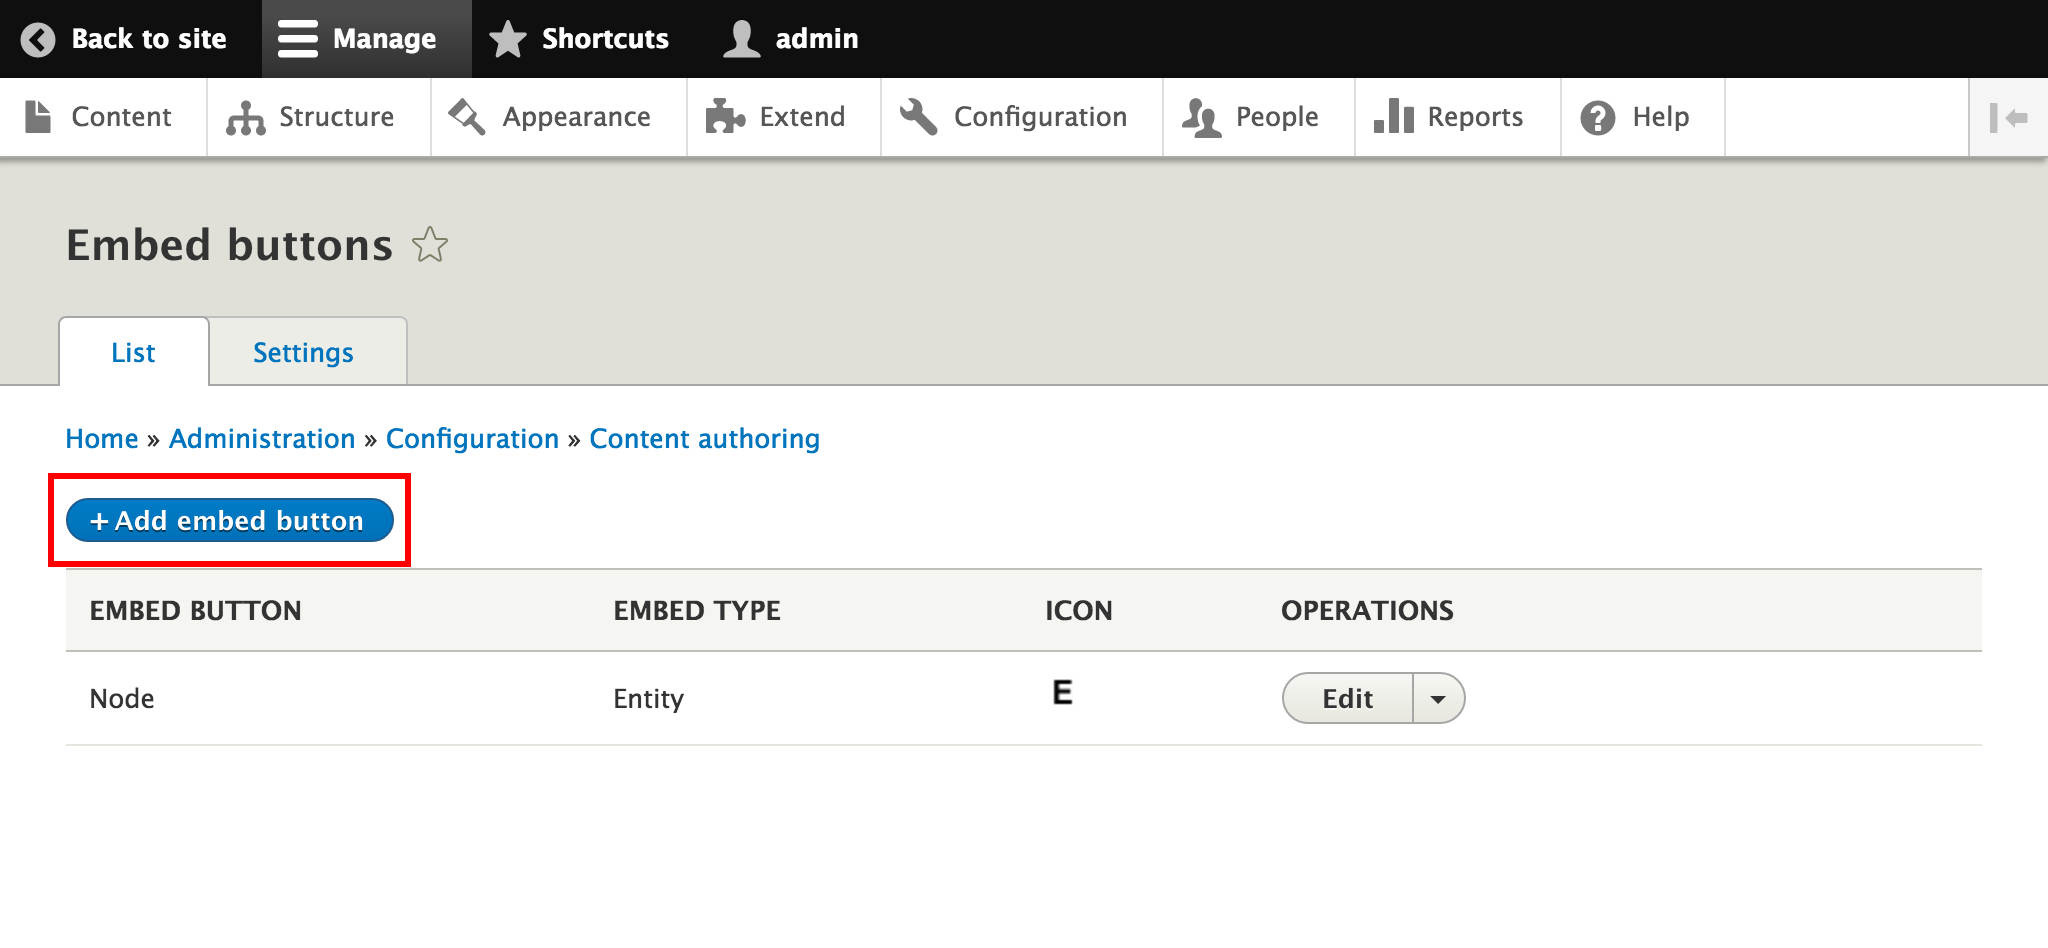
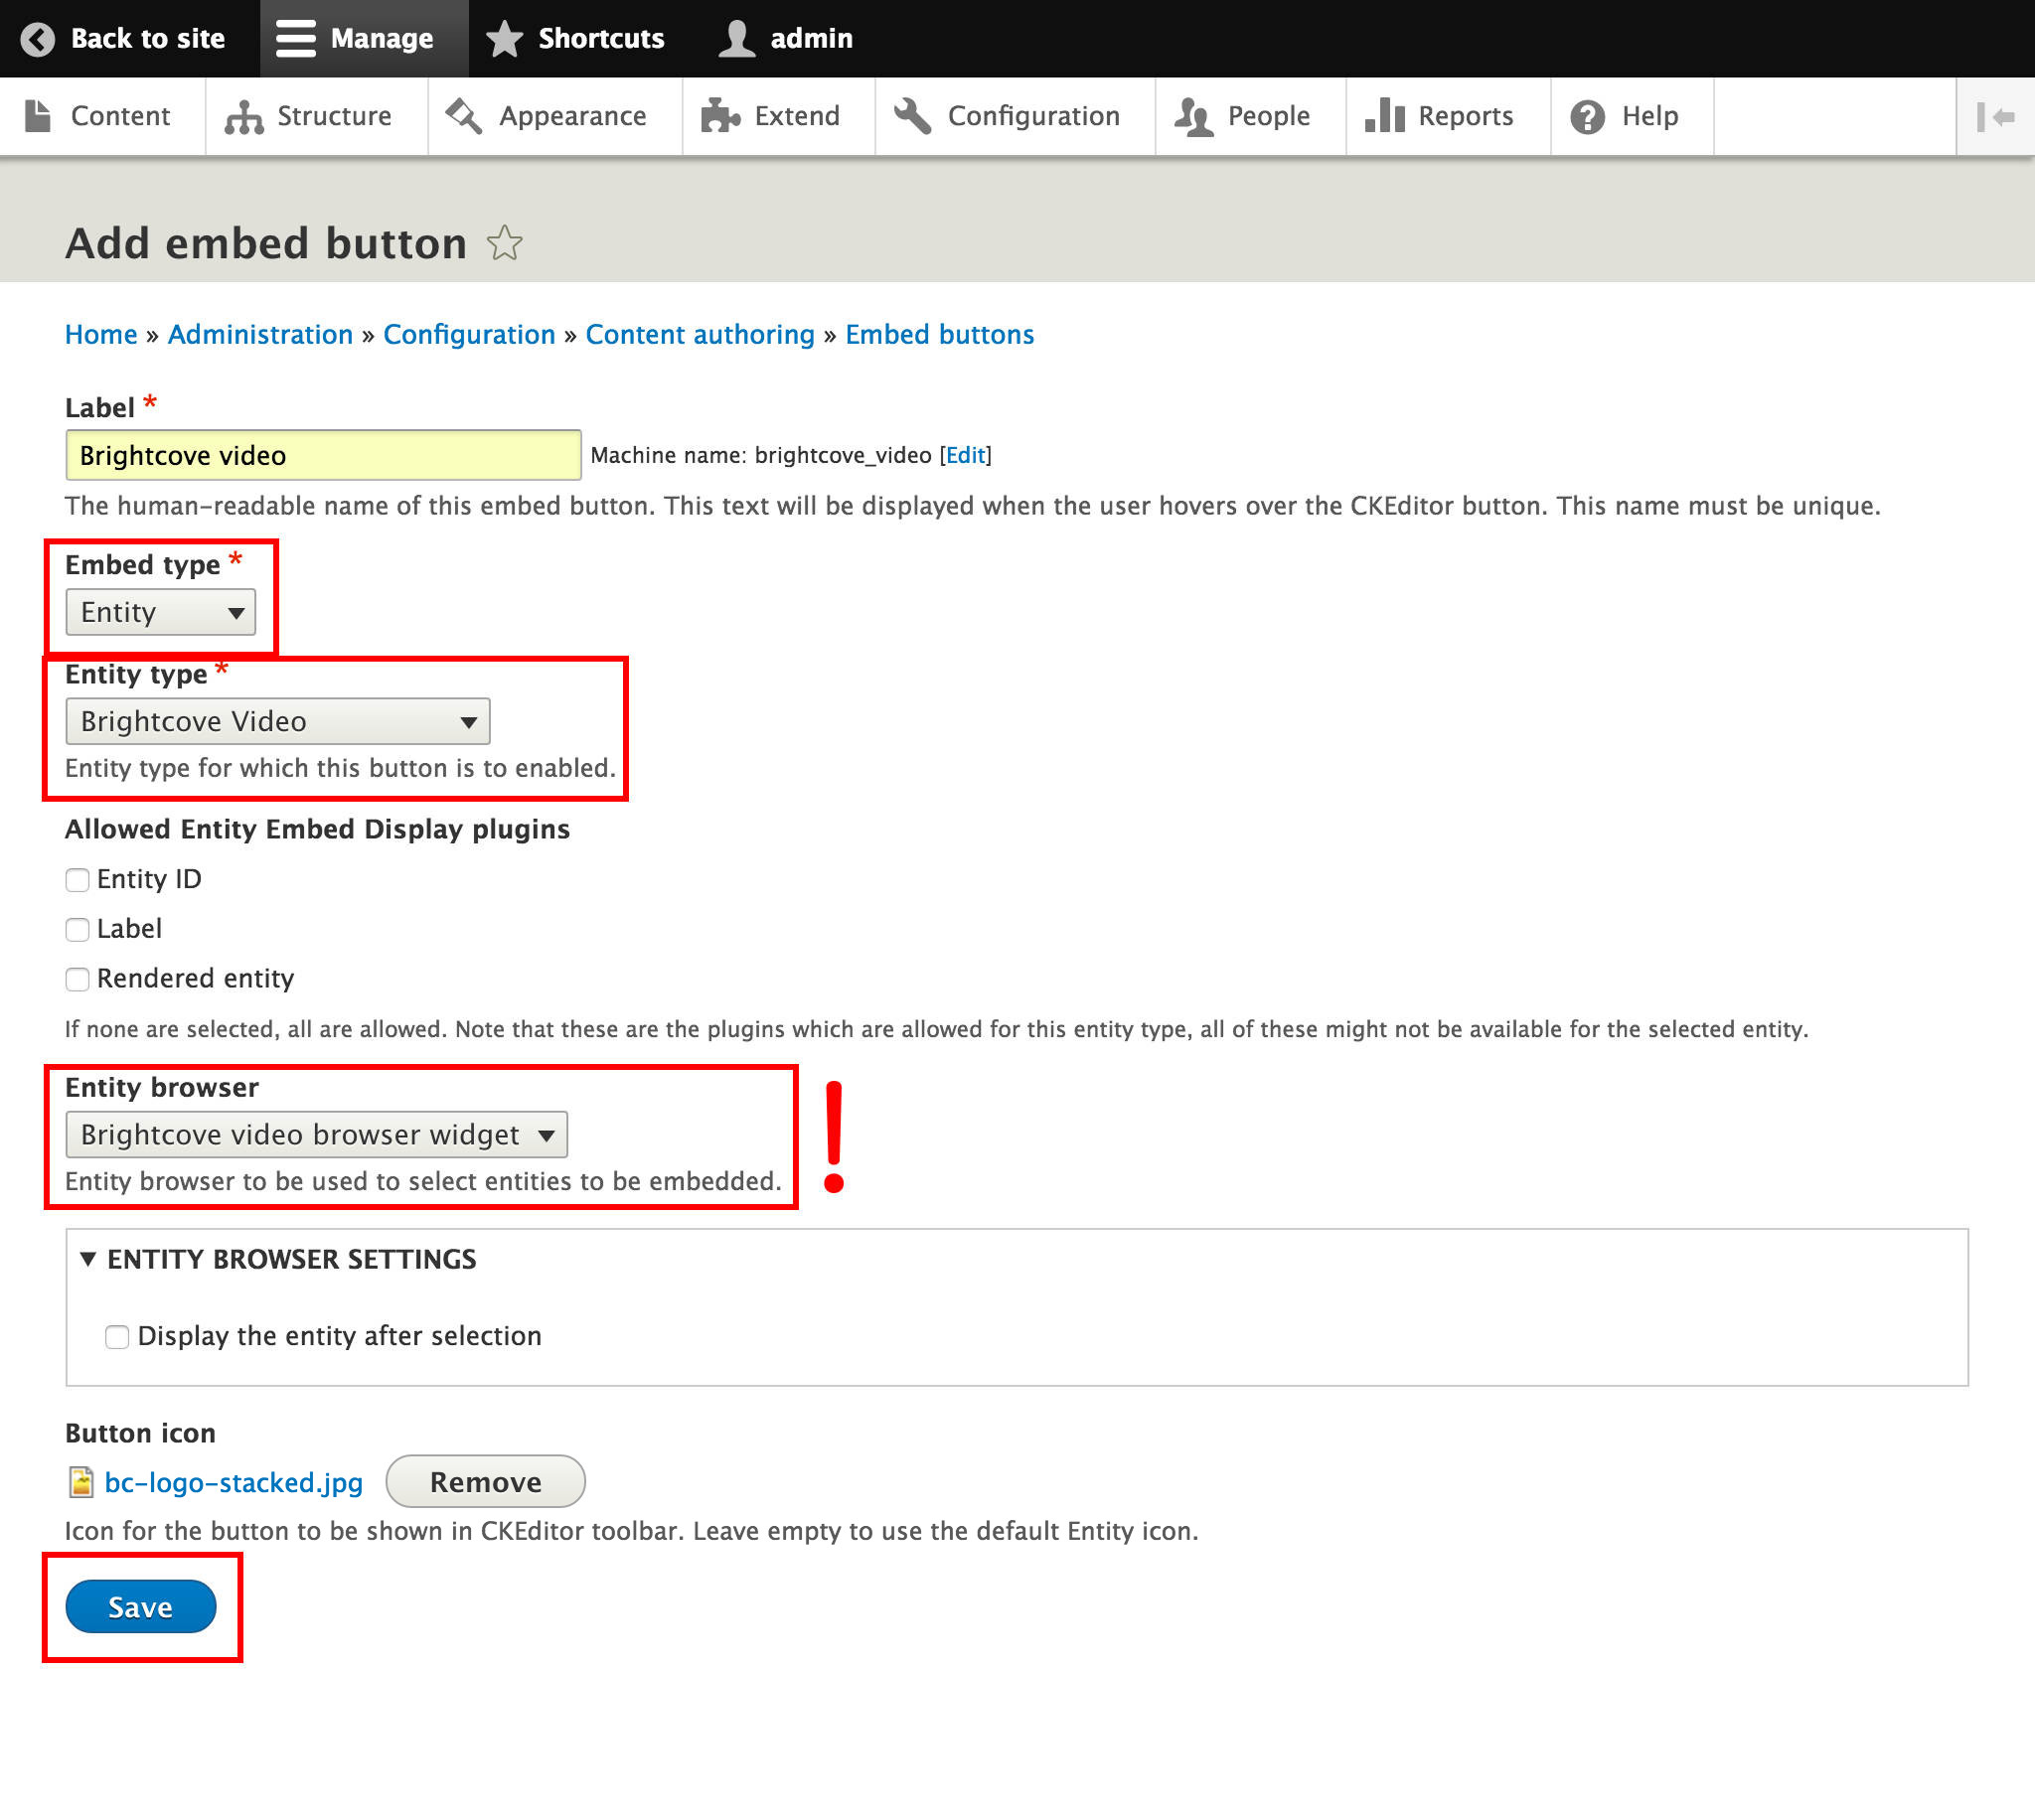
Choose to Add embed button.
Enter a Label for the embed button. In Embed type select Entity. In Entity type select Brightcove Video. Select the entity embed display plugins that you want to allow - we will leave it empty to allow them all. In Entity browser select the browser you configured. If it is not created yet, please follow the instructions in the Browse Brightcove Videos using the Entity Browser module chapter of this blog post. Upload Button icon for easier distinction.
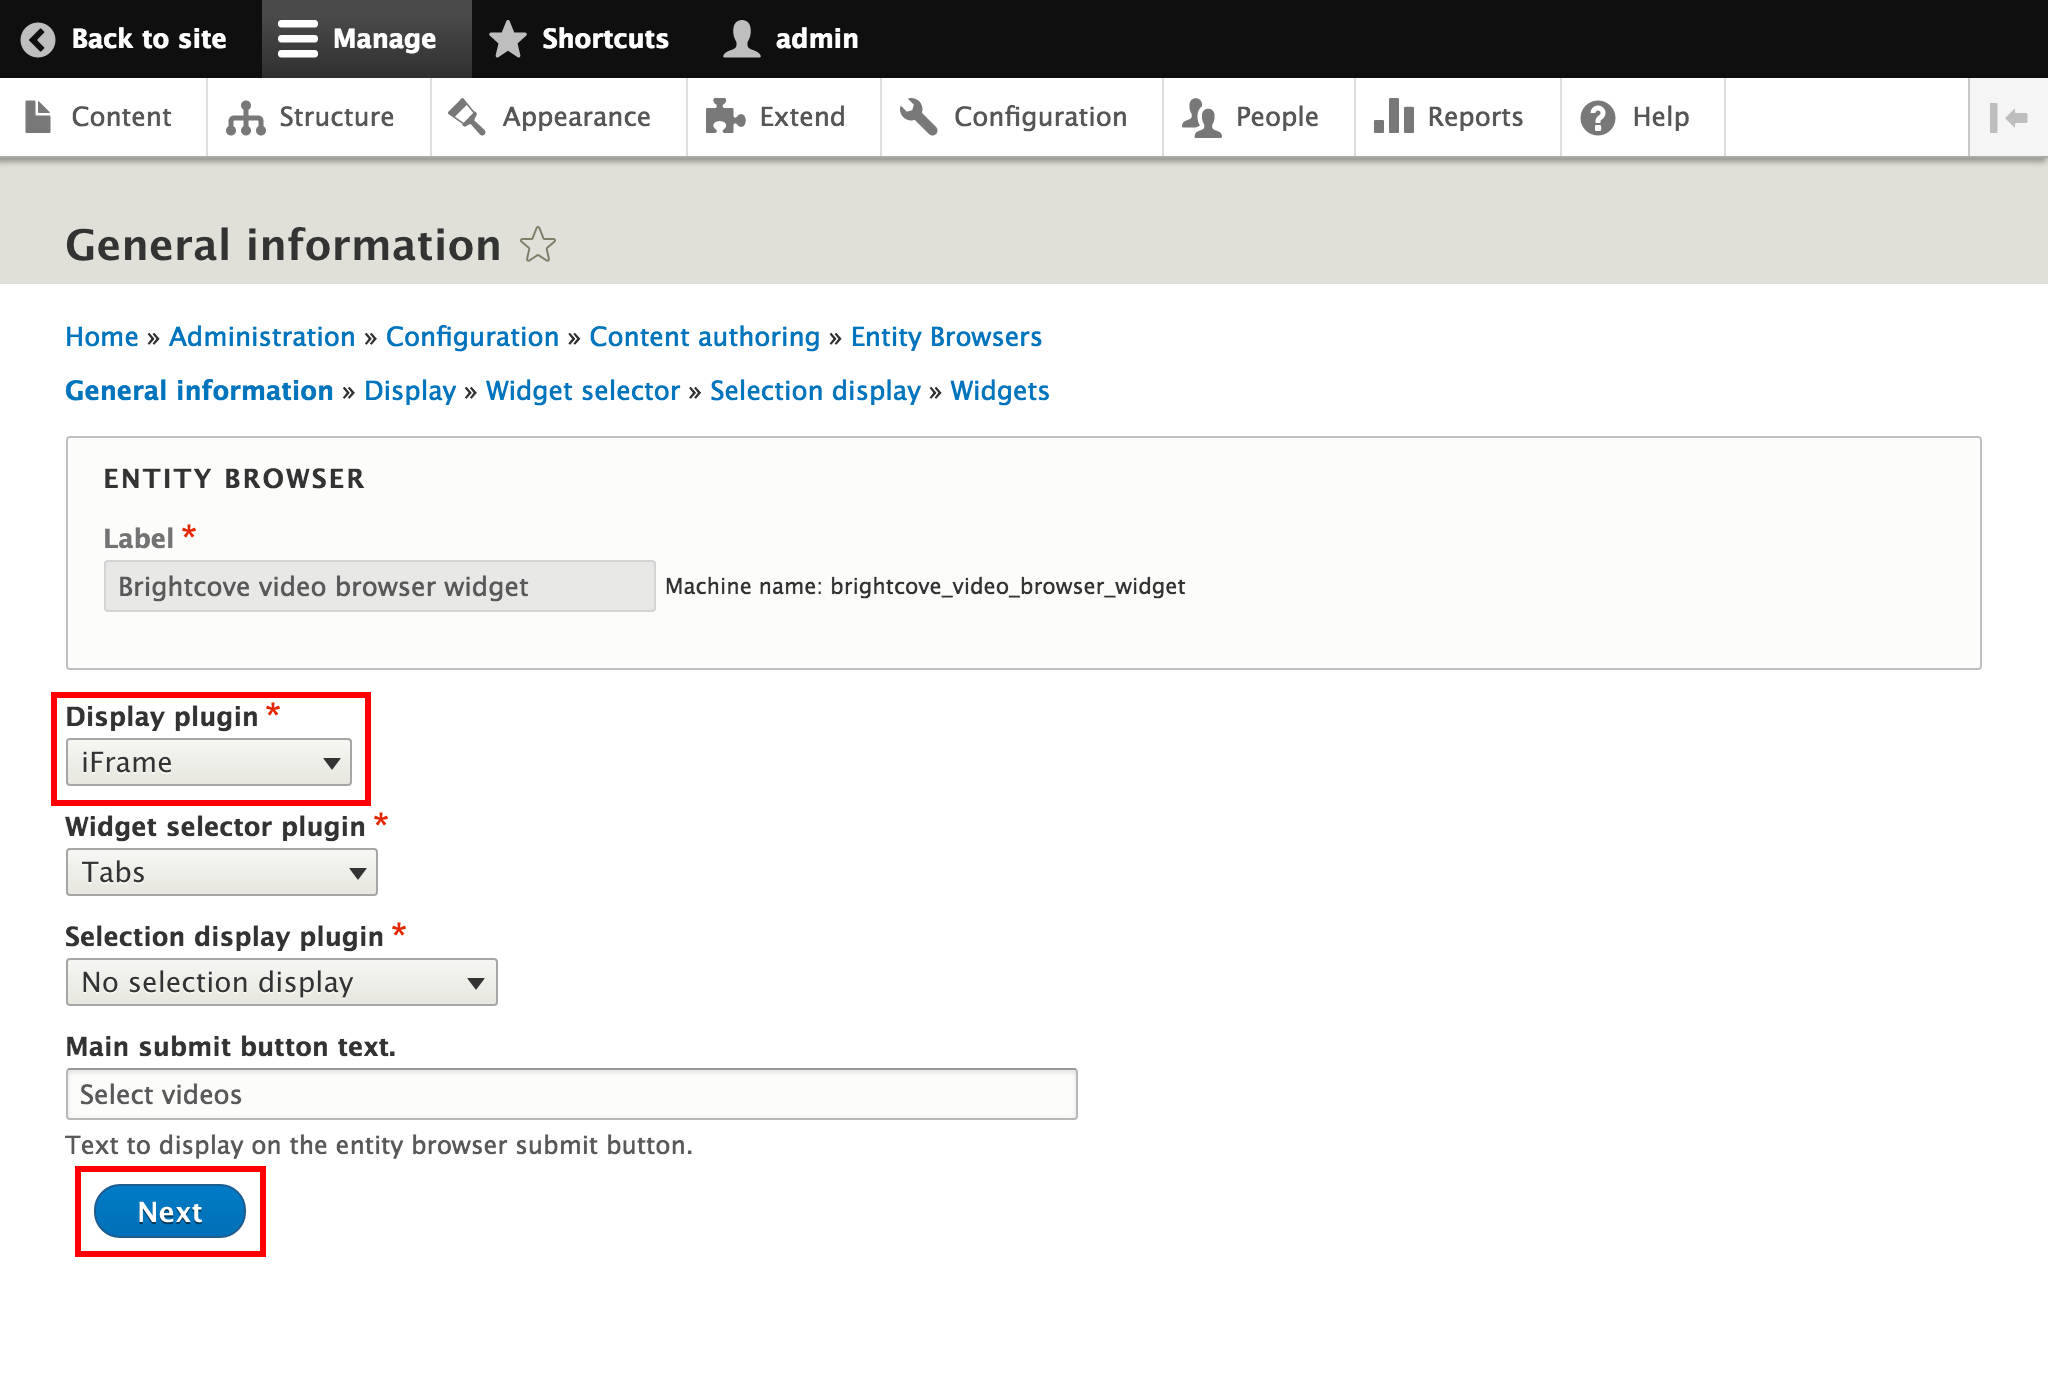
Before we continue, we need to adjust our entity browser. We must change the Display plugin from Modal to iFrame. CKEditor dialogs are always modal and currently Drupal 8 cannot handle subsequent modal calls, which is a known issue - until that’s fixed, we use the iFrame Display plugin.
Navigate to Configuration > Entity browsers in the Content authoring section and choose to edit the browser widget. Change the Display plugin to iFrame. Click through Next until the final configuration page then hit Finish.
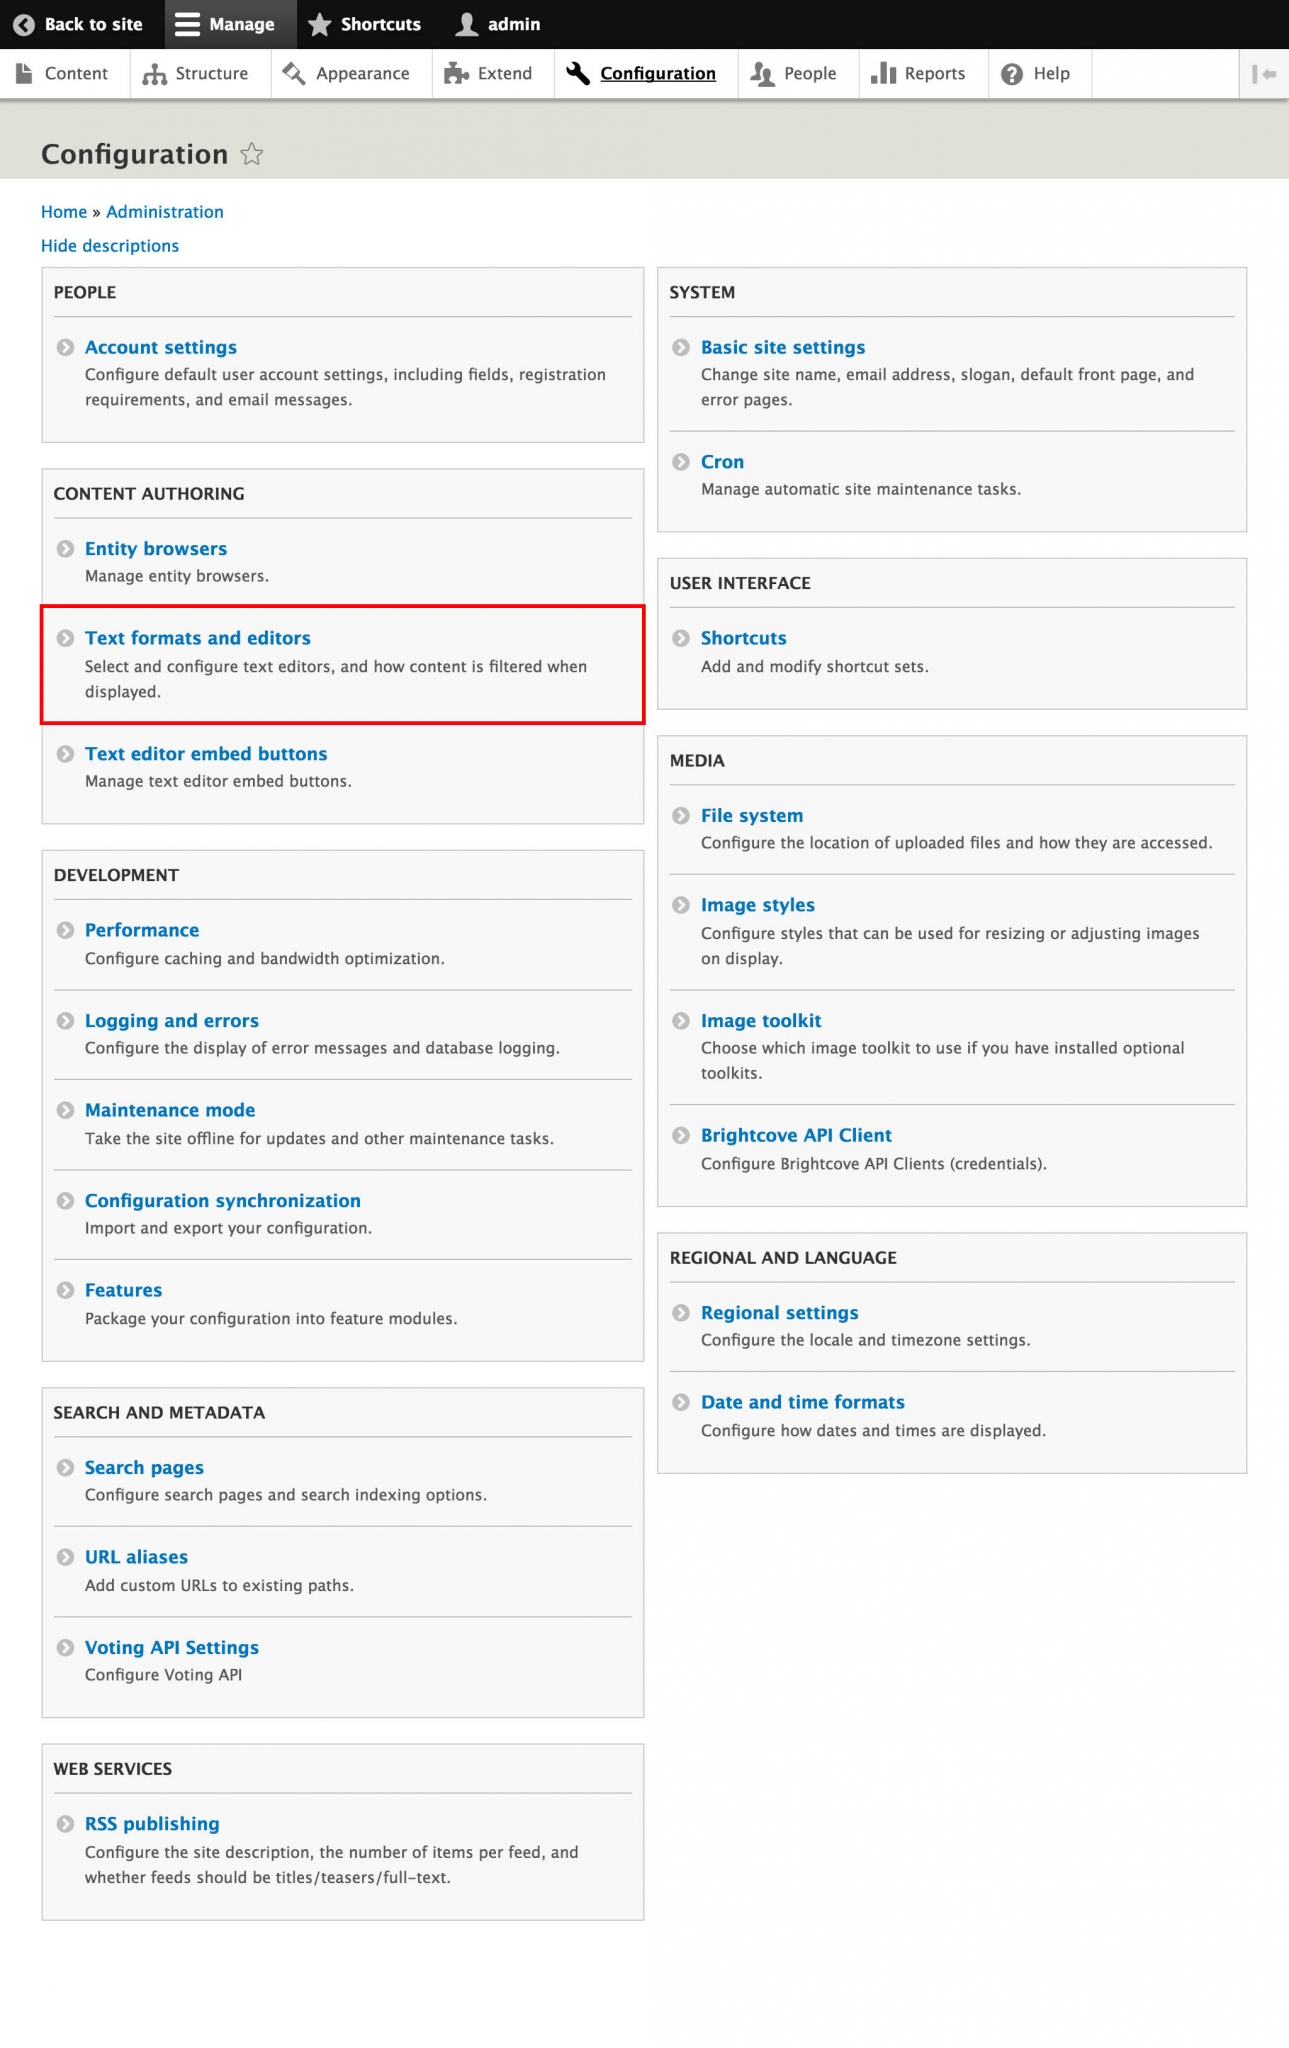
Now go back to Configuration and this time choose Text formats and editors in the Content Authoring section.
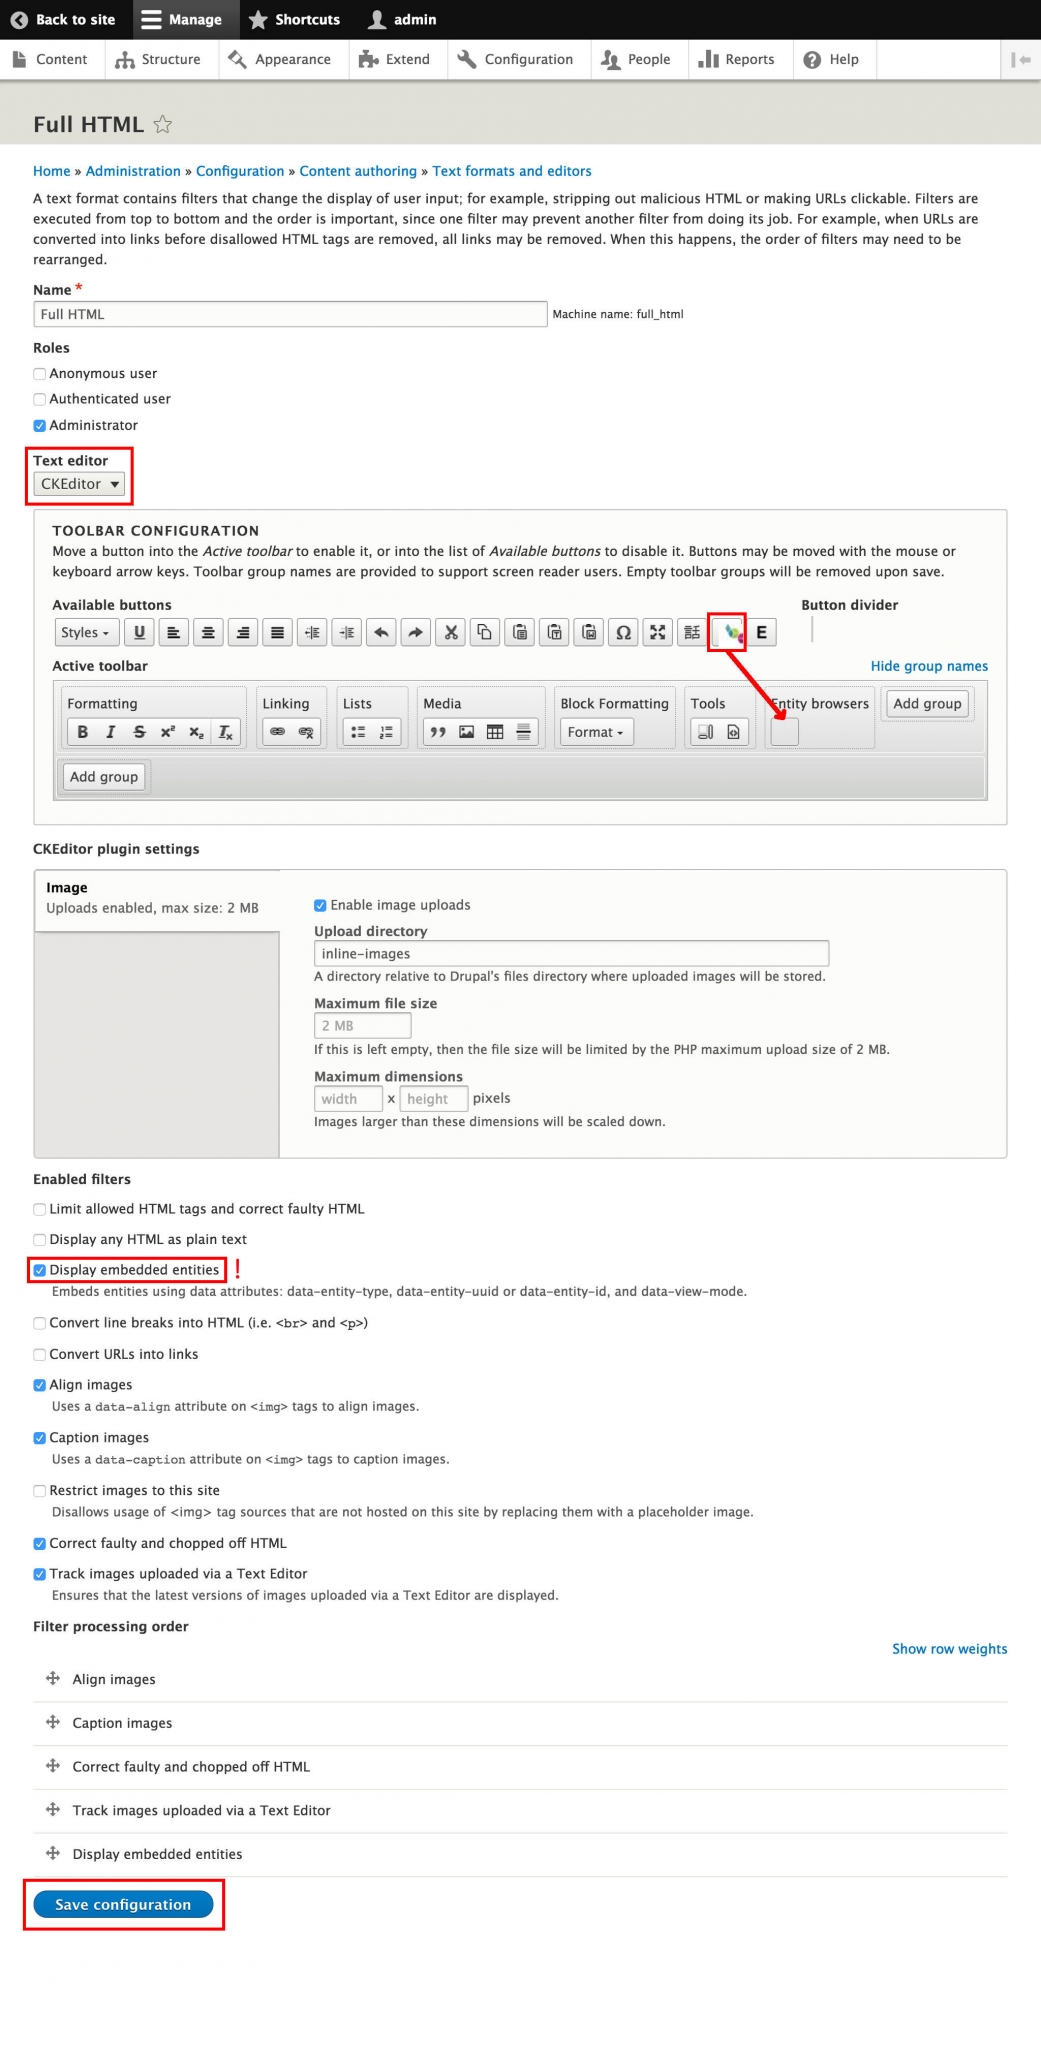
Choose to Configure the text format where you want to add the entity embed button. For Text editor set CKEditor. In the Toolbar configuration section drag and drop the previously created button from the Available buttons row to the Active toolbar. You can create a new group for it if you want to, like in this example we added the Entity browsers group. In the Enabled filters checklist opt in Display embedded entities then Save configuration.
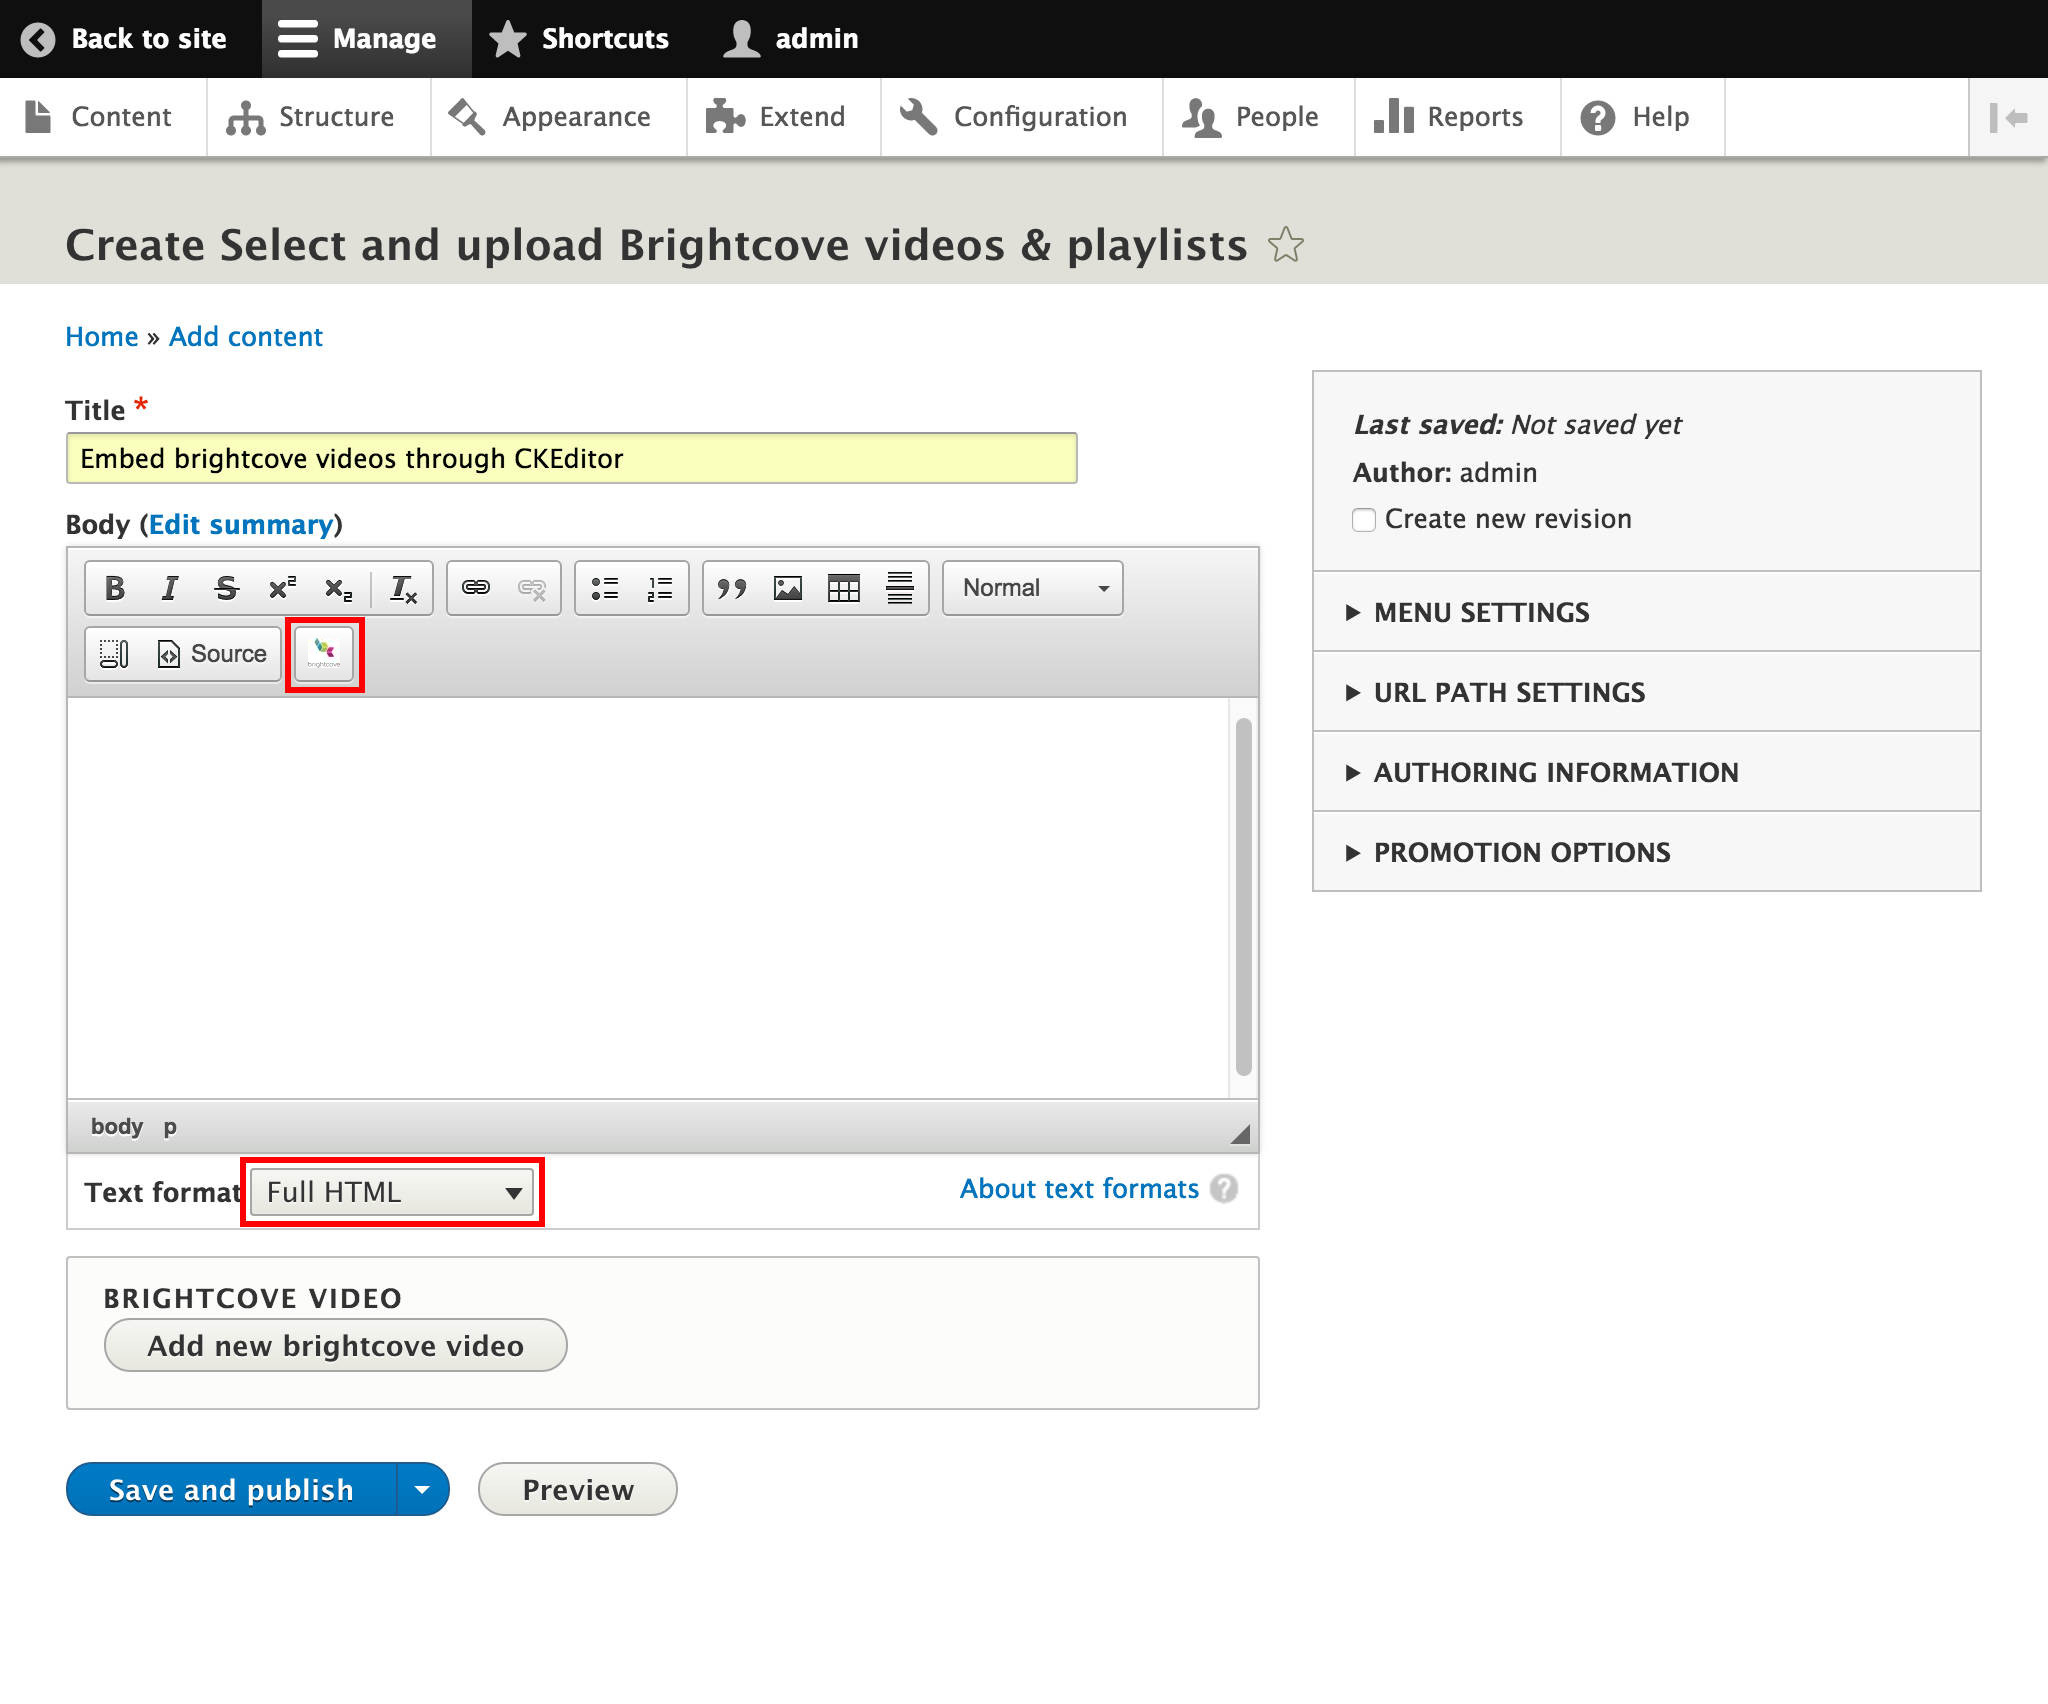
Navigate to Content > Add content, choose your content type. Give it a Title. In the Body section, select the Text format where you previously added the Entity Embed button. Click on the embed button (if there are more buttons, hovering over them will reveal their functionality).
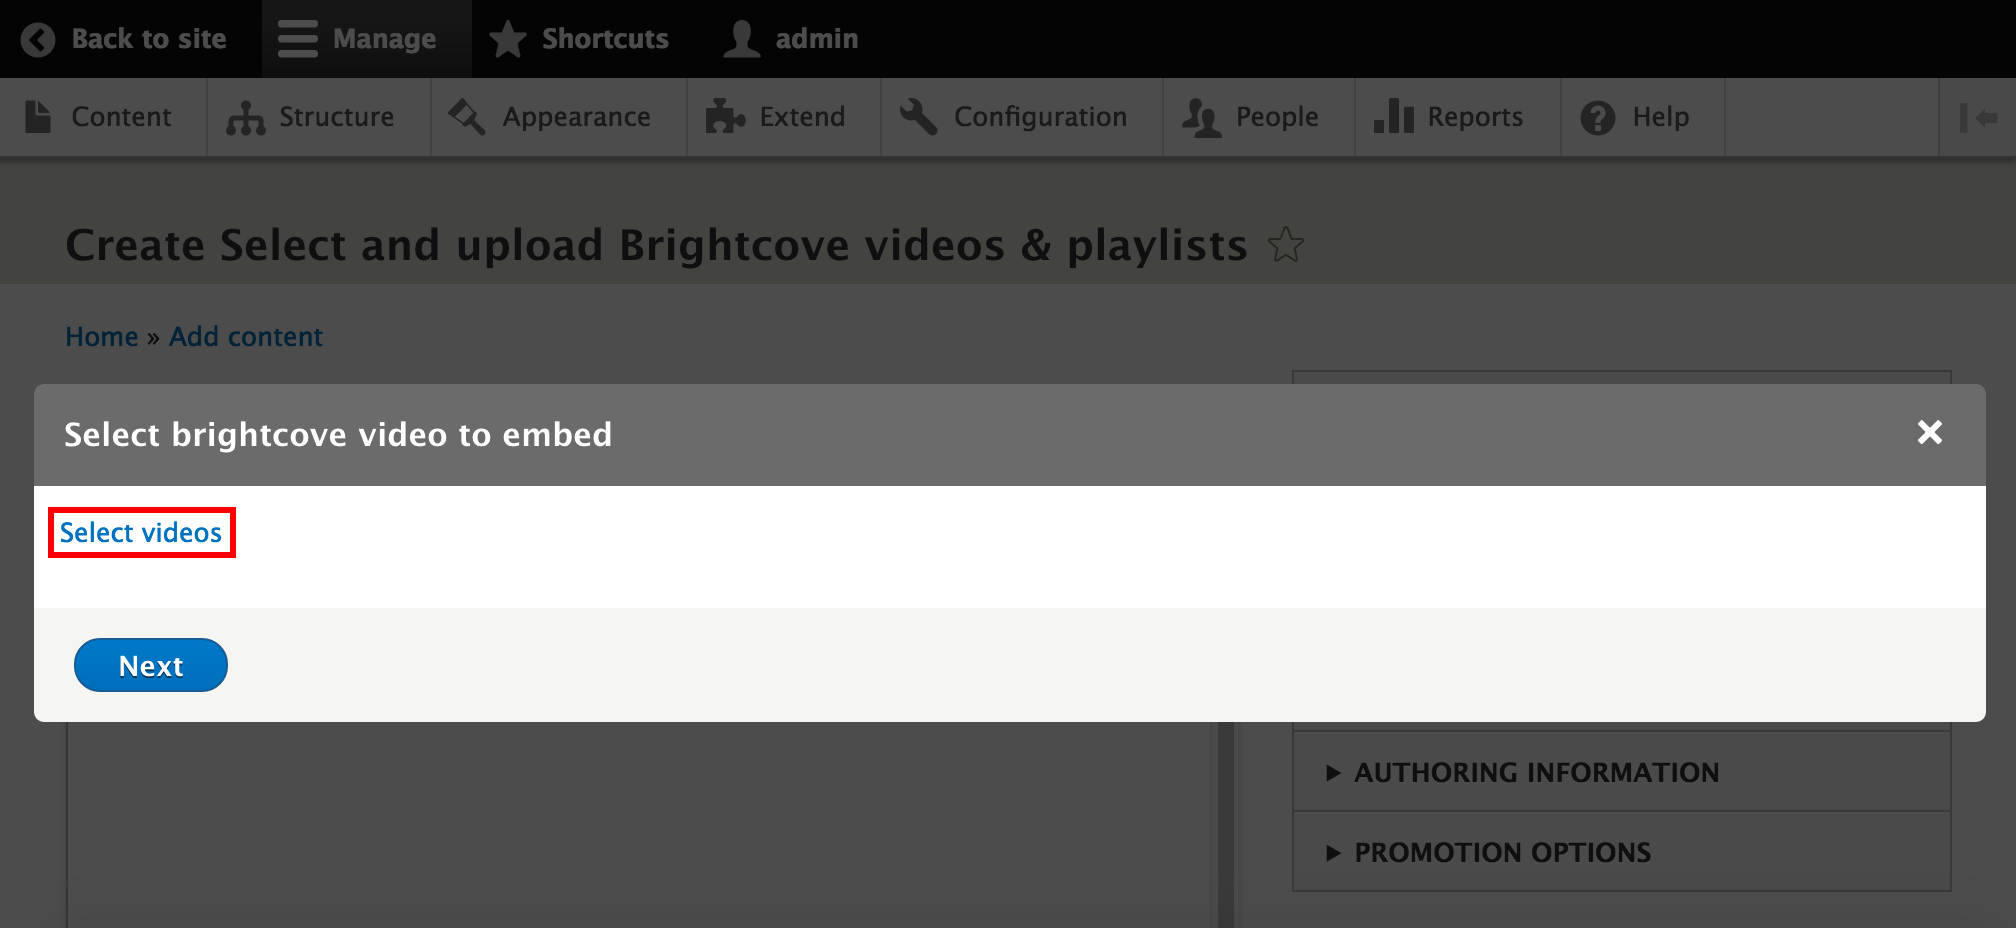
A modal display will show up to select videos.
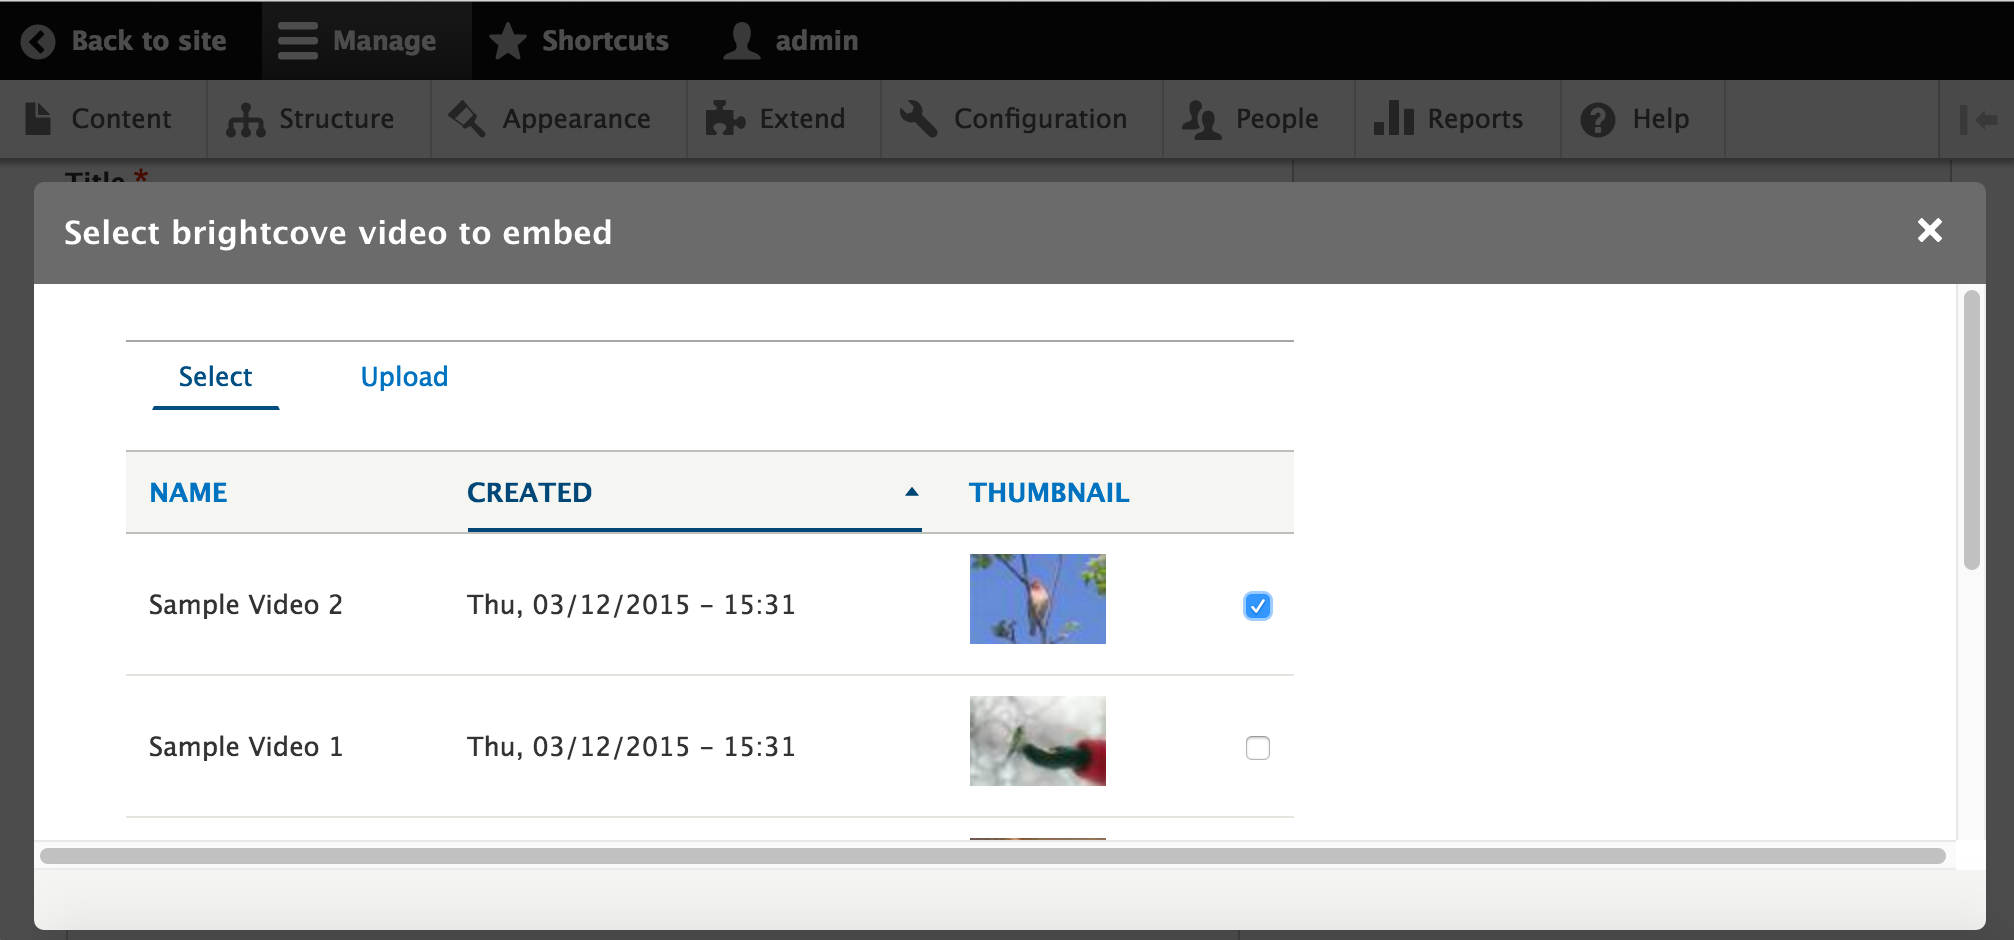
We can browse our existing videos and choose them via their checkboxes.
Alternatively, we can upload new Brightcove videos the same way as we did in the Browse and upload from the same field in your Drupal content, using the Entity Browser IEF submodule chapter of this blog post.
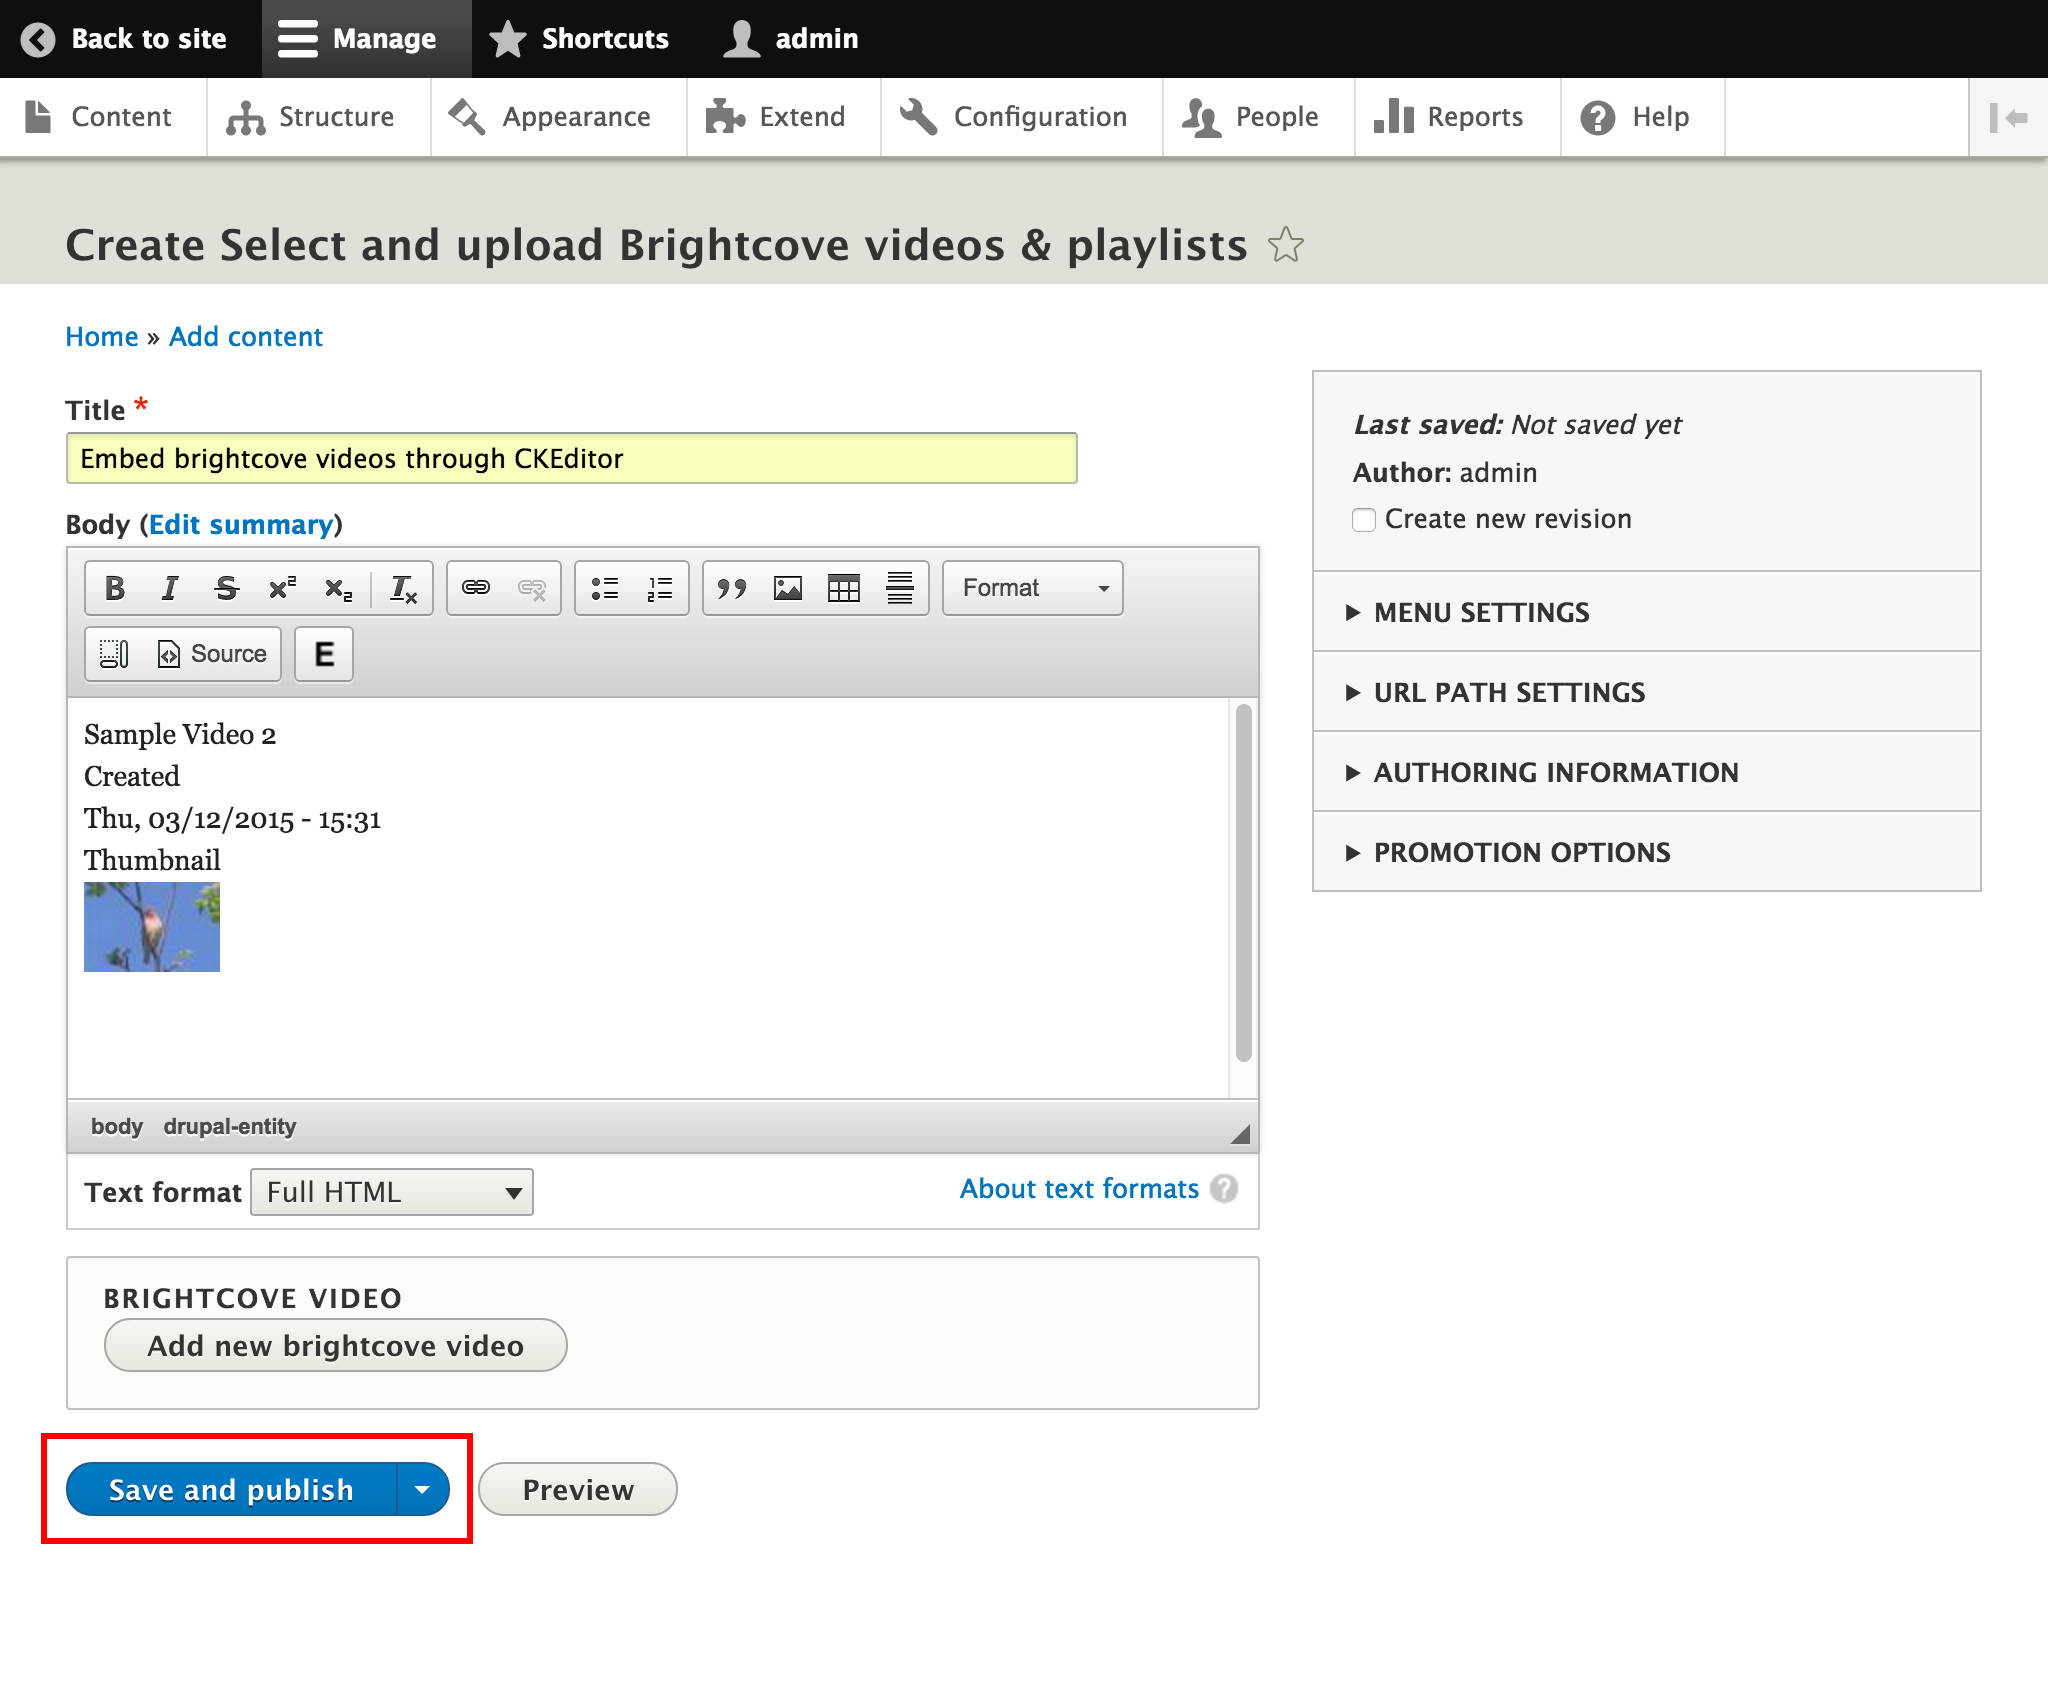
Once the video(s) are selected, we can set the way we want to display it (Display as), the View mode, _Align_ment and we can also add a Caption. The default view mode on these configuration options usually contains all properties of the video. We can customize this by creating a new view mode for the Brightcove Video entity then configuring its display. When everything is set, hit Embed.
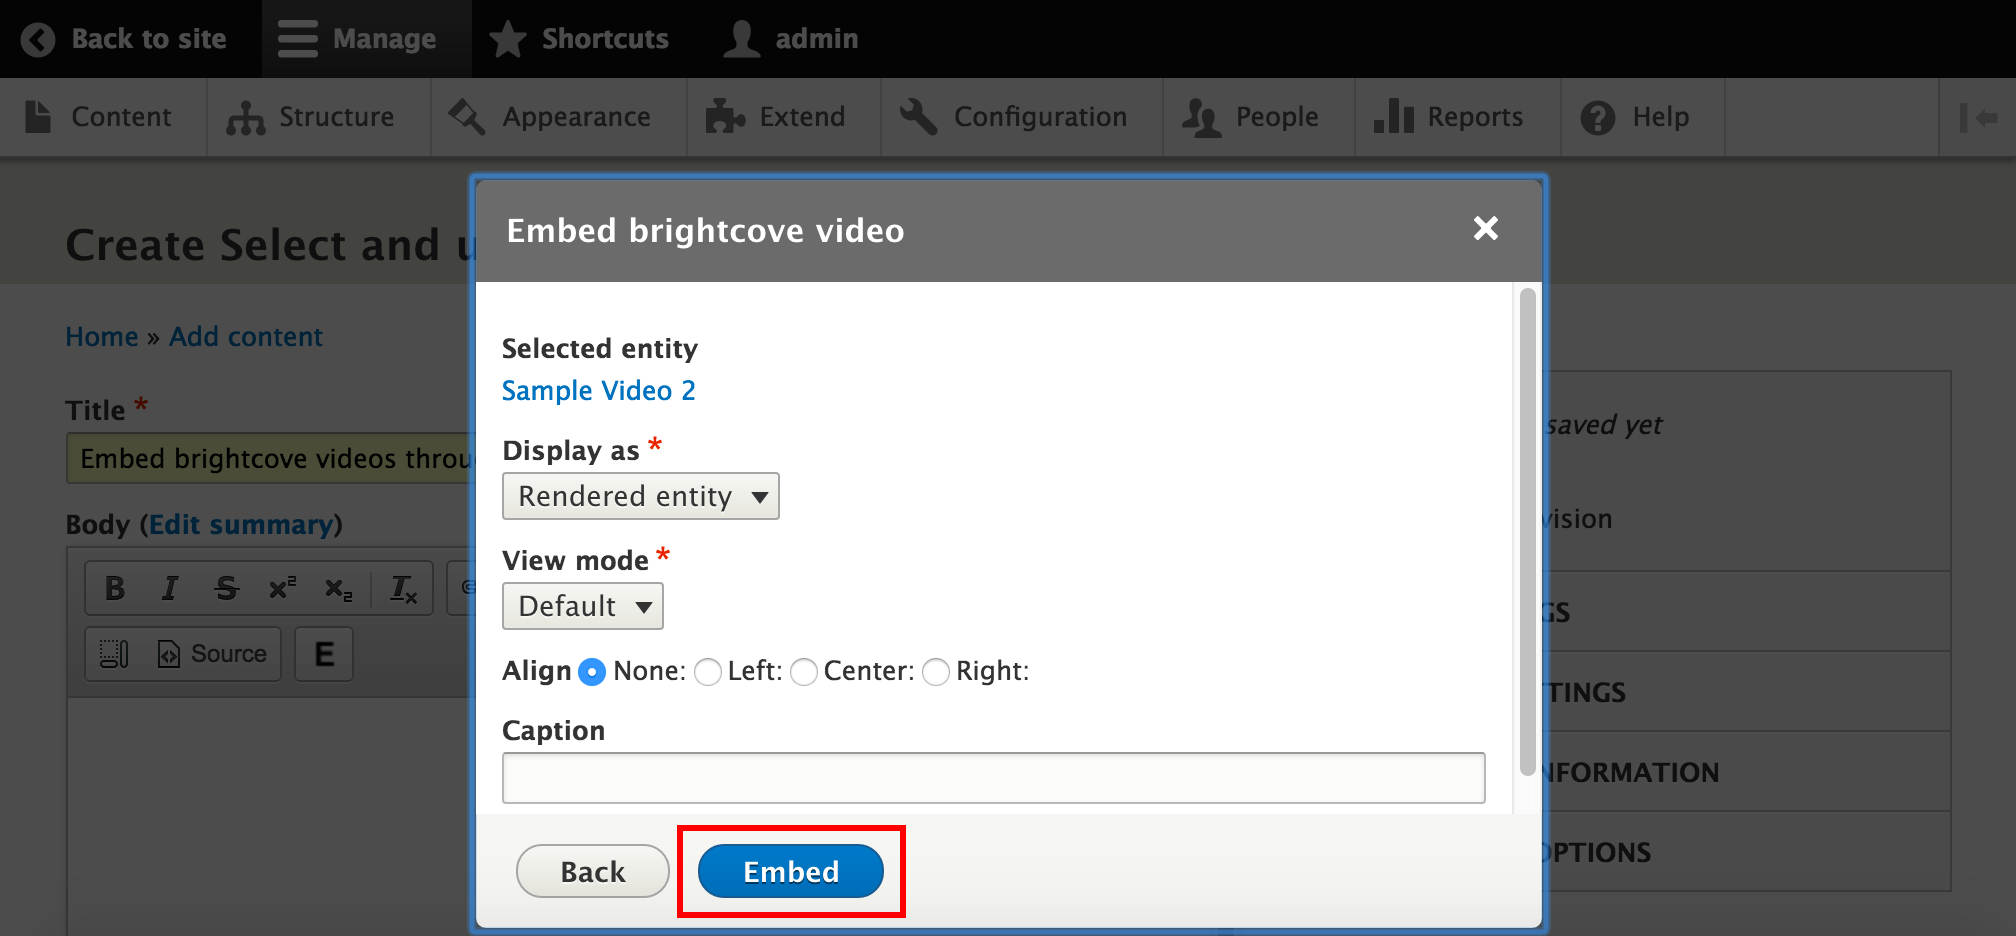
Our Brightcove video is embedded in the text field, we can Save and publish our content.
This fourth part concludes the blog series. We hope the information provided will prove useful to everybody setting up Brightcove Video Connect in Drupal 8.
Part 1: Architecture summary
Part 2: Installation & Configuration
Part 3: Video & Playlist Management