Part 1: Architecture summary
Part 2: Installation & Configuration
Part 3: Video & Playlist Management
Part 4: Including Videos & Playlists in Drupal content
In this multi-part blog series, we are covering the various aspects of the new Brightcove Video Connect module for Drupal 8. Part 1 consisted of an Architecture summary and discussed the Technical approach used during the development of the module. This second part details the Installation & Configuration steps required to get the module up and running properly.
The only element in common between the 8.x-1.x version and the previous 7.x-6.x version of the Brightcove module is the PHP-API-Wrapper library used to assist in the communication between Drupal and the Brightcove API. Installing the PHP library in the previous 7.x-6.x version required downloading and extracting the library into sites/all/libraries, followed by a “composer install.” This is no longer necessary in the 8.x-1.x version because the PHP library is included as a dependency in the module’s composer.json file.
Installation steps
The following steps require Drush and will install the Brightcove module as well as all of the module’s dependencies, including the PHP library…
1. Download the Brightcove module$ drush dl brightcove
2. Install the library dependency (PHP-API-Wrapper)
The recommended method for installing the library dependency is to reference the Brightcove module’s composer.json inside the extra section of the root composer.json file as described in Managing dependencies for a custom project.
After adding the brightcove/composer.json path to the merge-plugin section (in the extra section) of the root composer.json, it should look similar to this:
        "merge-plugin": {
            "include": [
                "core/composer.json",
                "modules/brightcove/composer.json"
            ],
            "recurse": false,
            "replace": false,
            "merge-extra": false
        }
After the extra section has been modified, run composer update in the root folder to install the required libraries. (note: composer is required)
For more information, see Using Composer with Drupal
3. Enable the Brightcove module (this will also install all dependencies)$ drush en brightcove
Configuring permissions
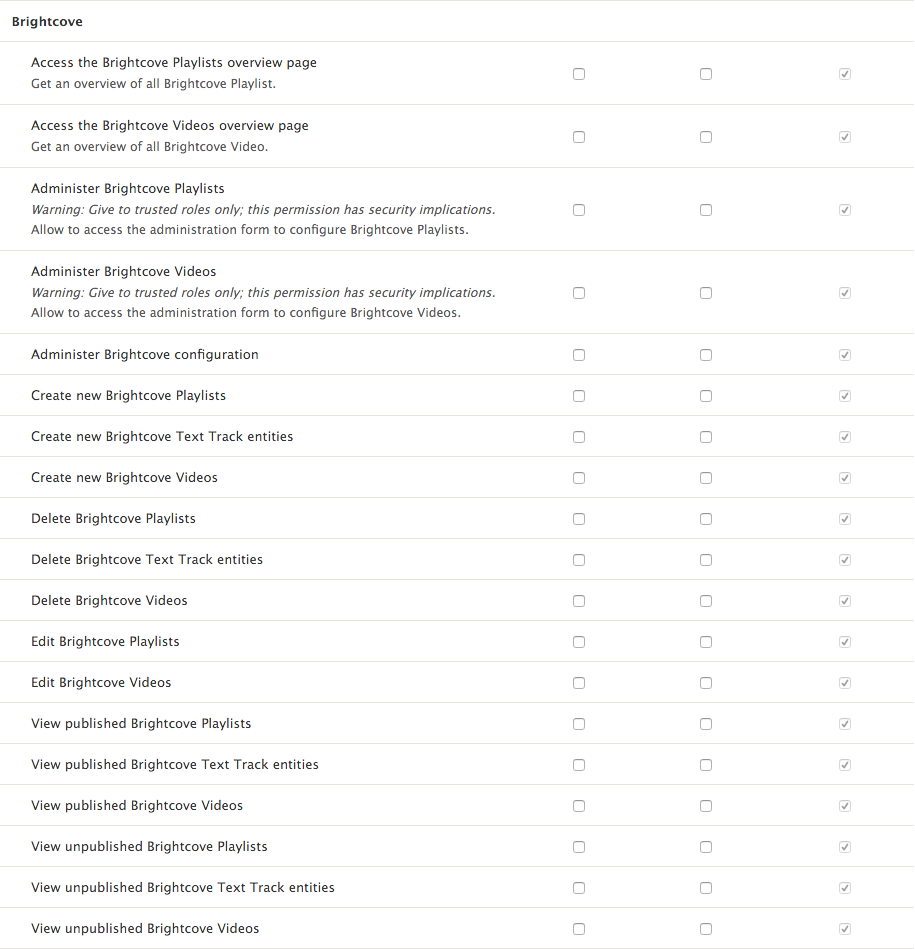
The module includes a list of permissions which should be configured if non-admin users will require privileges to manage the Brightcove API credentials, videos or playlists:
Configuring API credentials
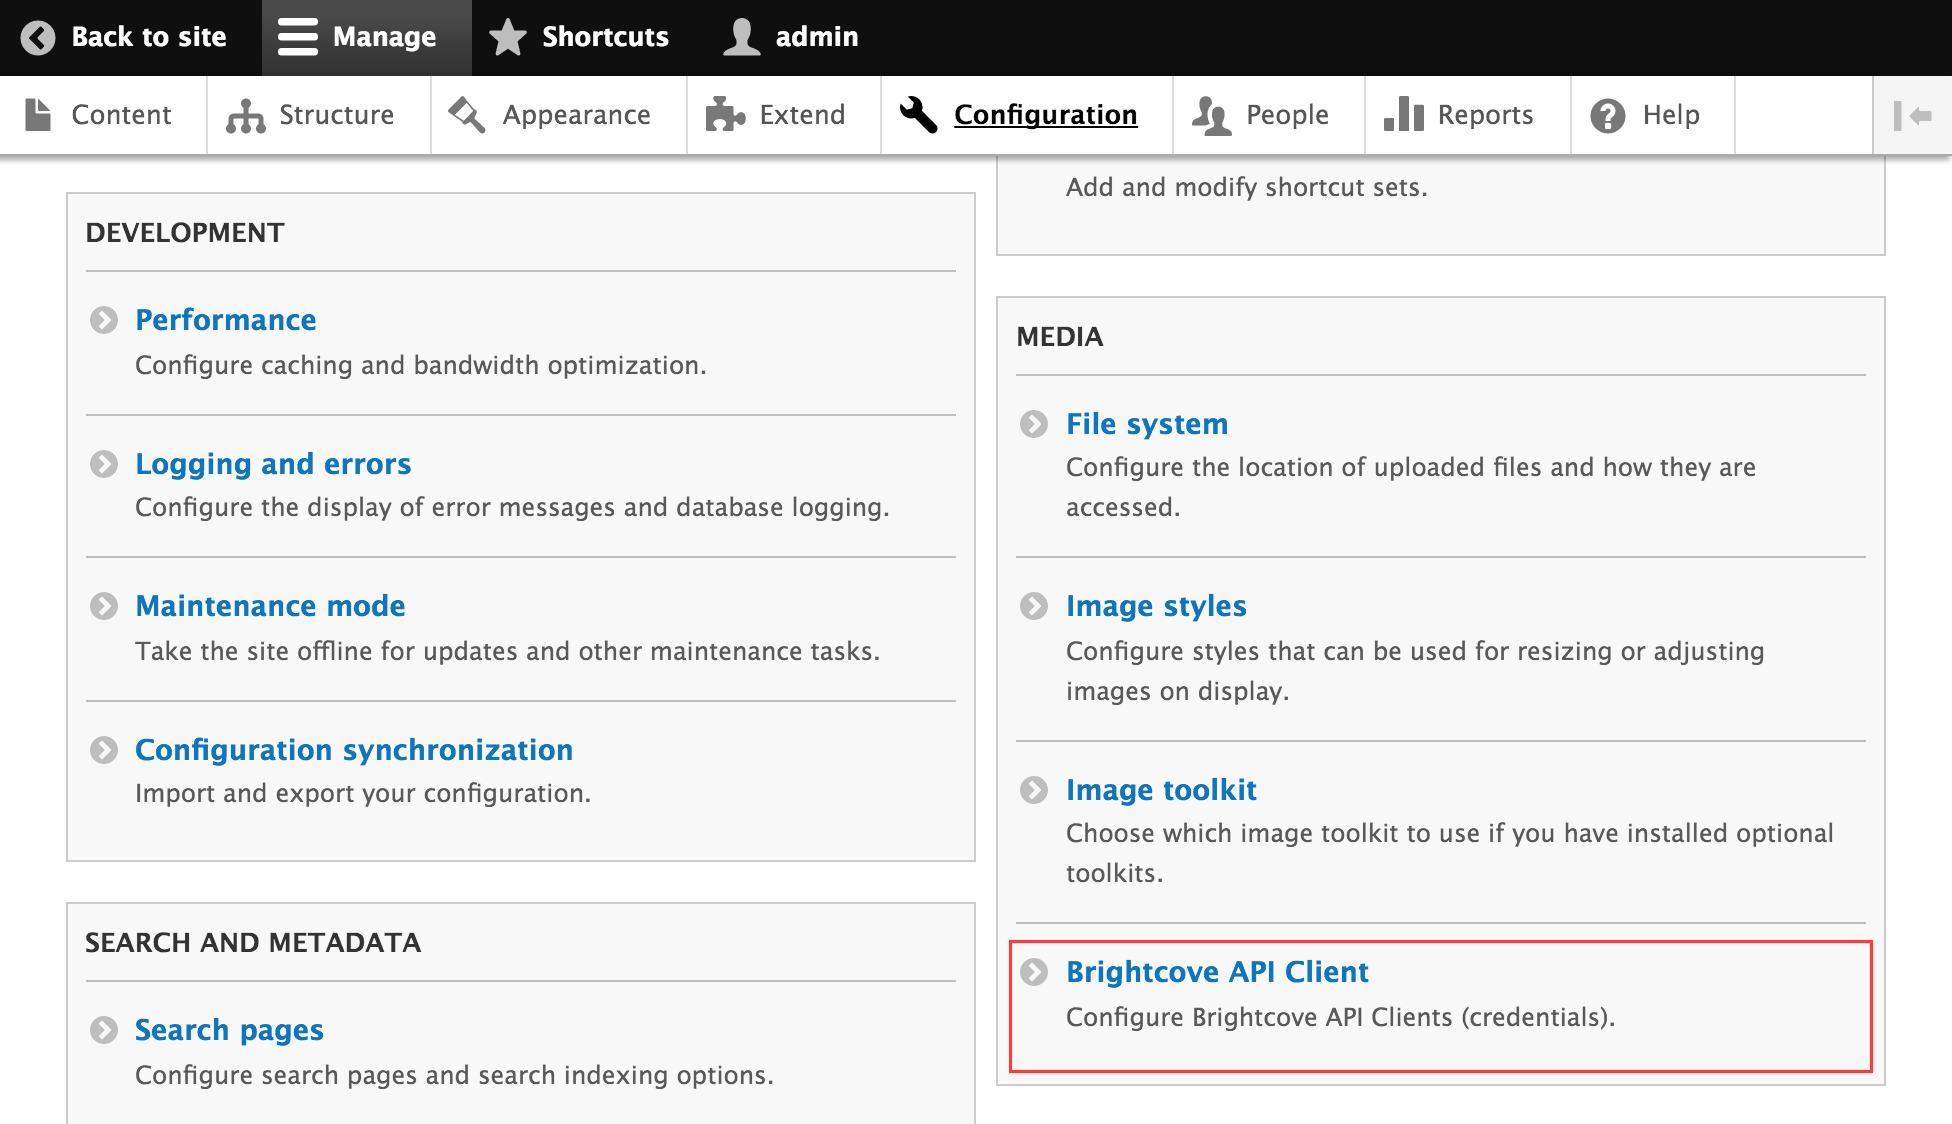
Once the module and all it’s dependencies have been installed, you can enter your Brightcove API credentials into the Brightcove API Clients configuration page - which is linked from Drupal’s Configuration page:
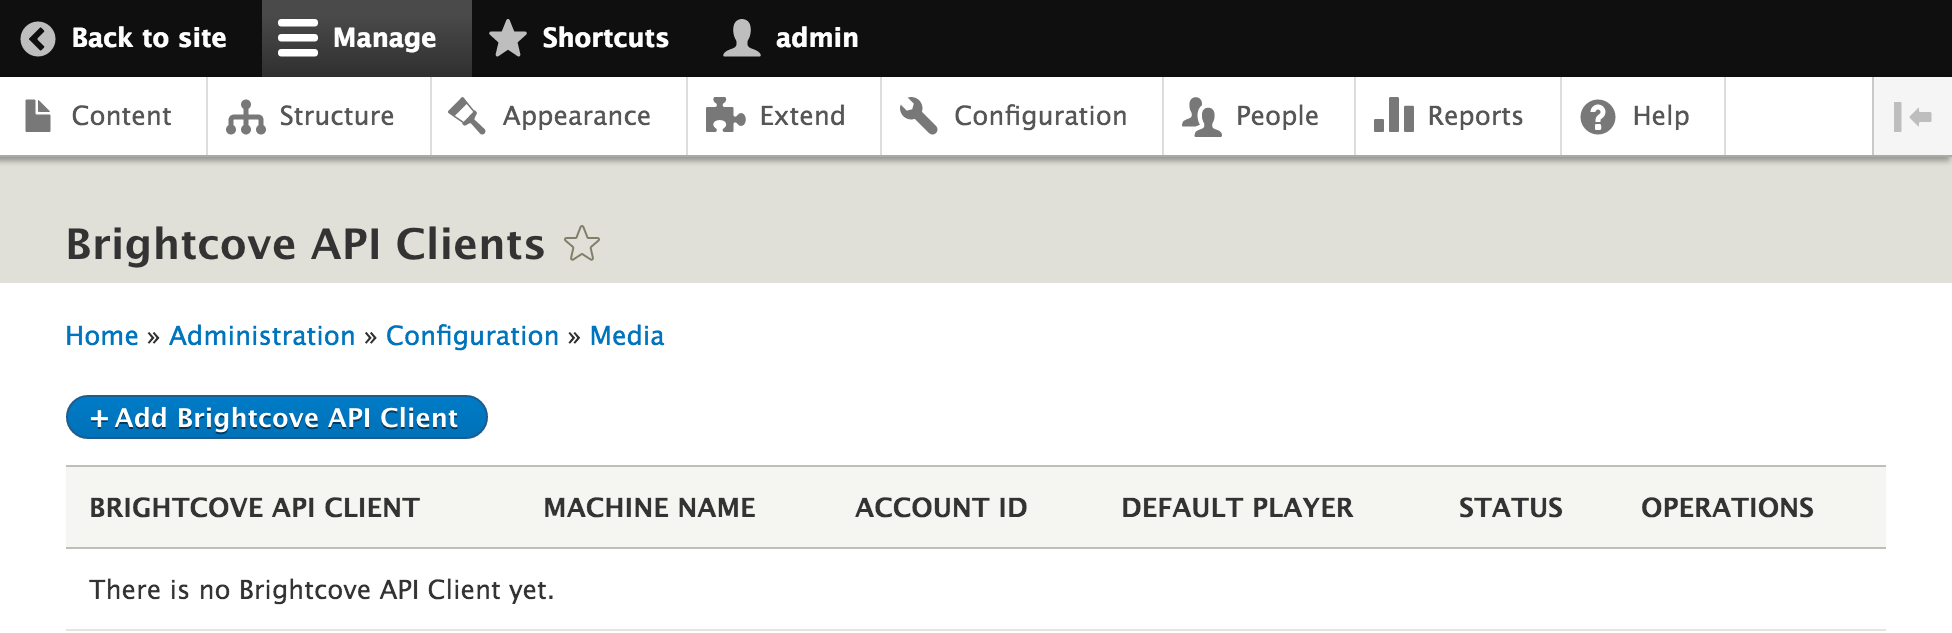
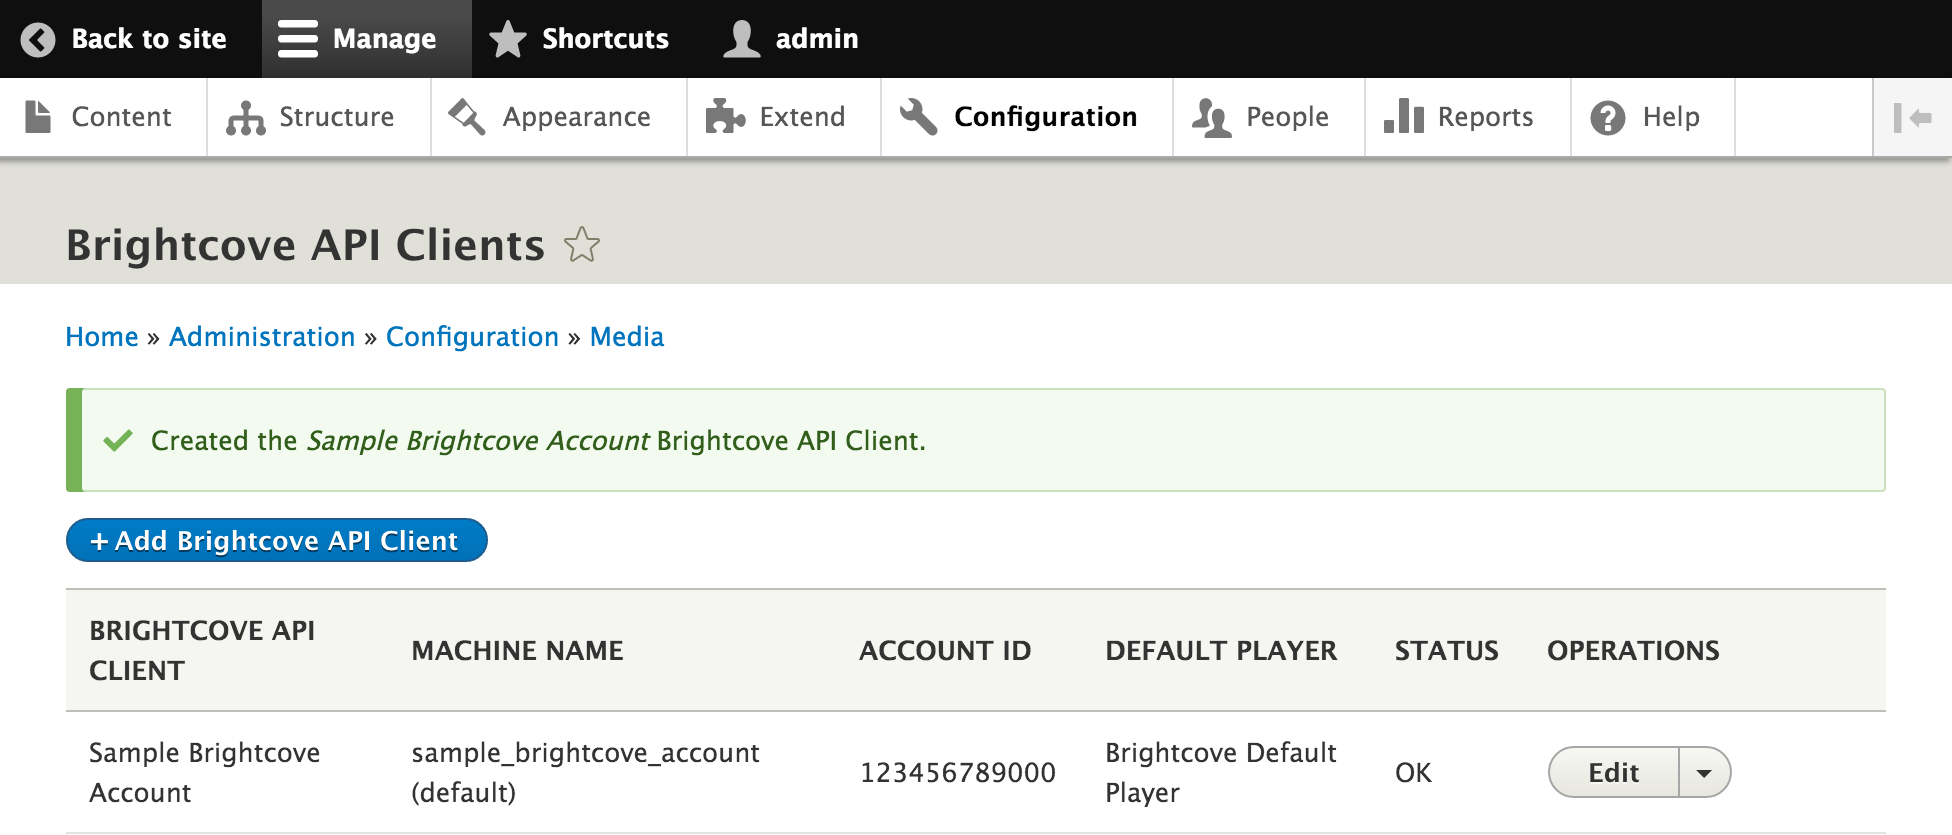
The Brightcove API Clients page lists the configured API credentials and allows you to add new credentials:
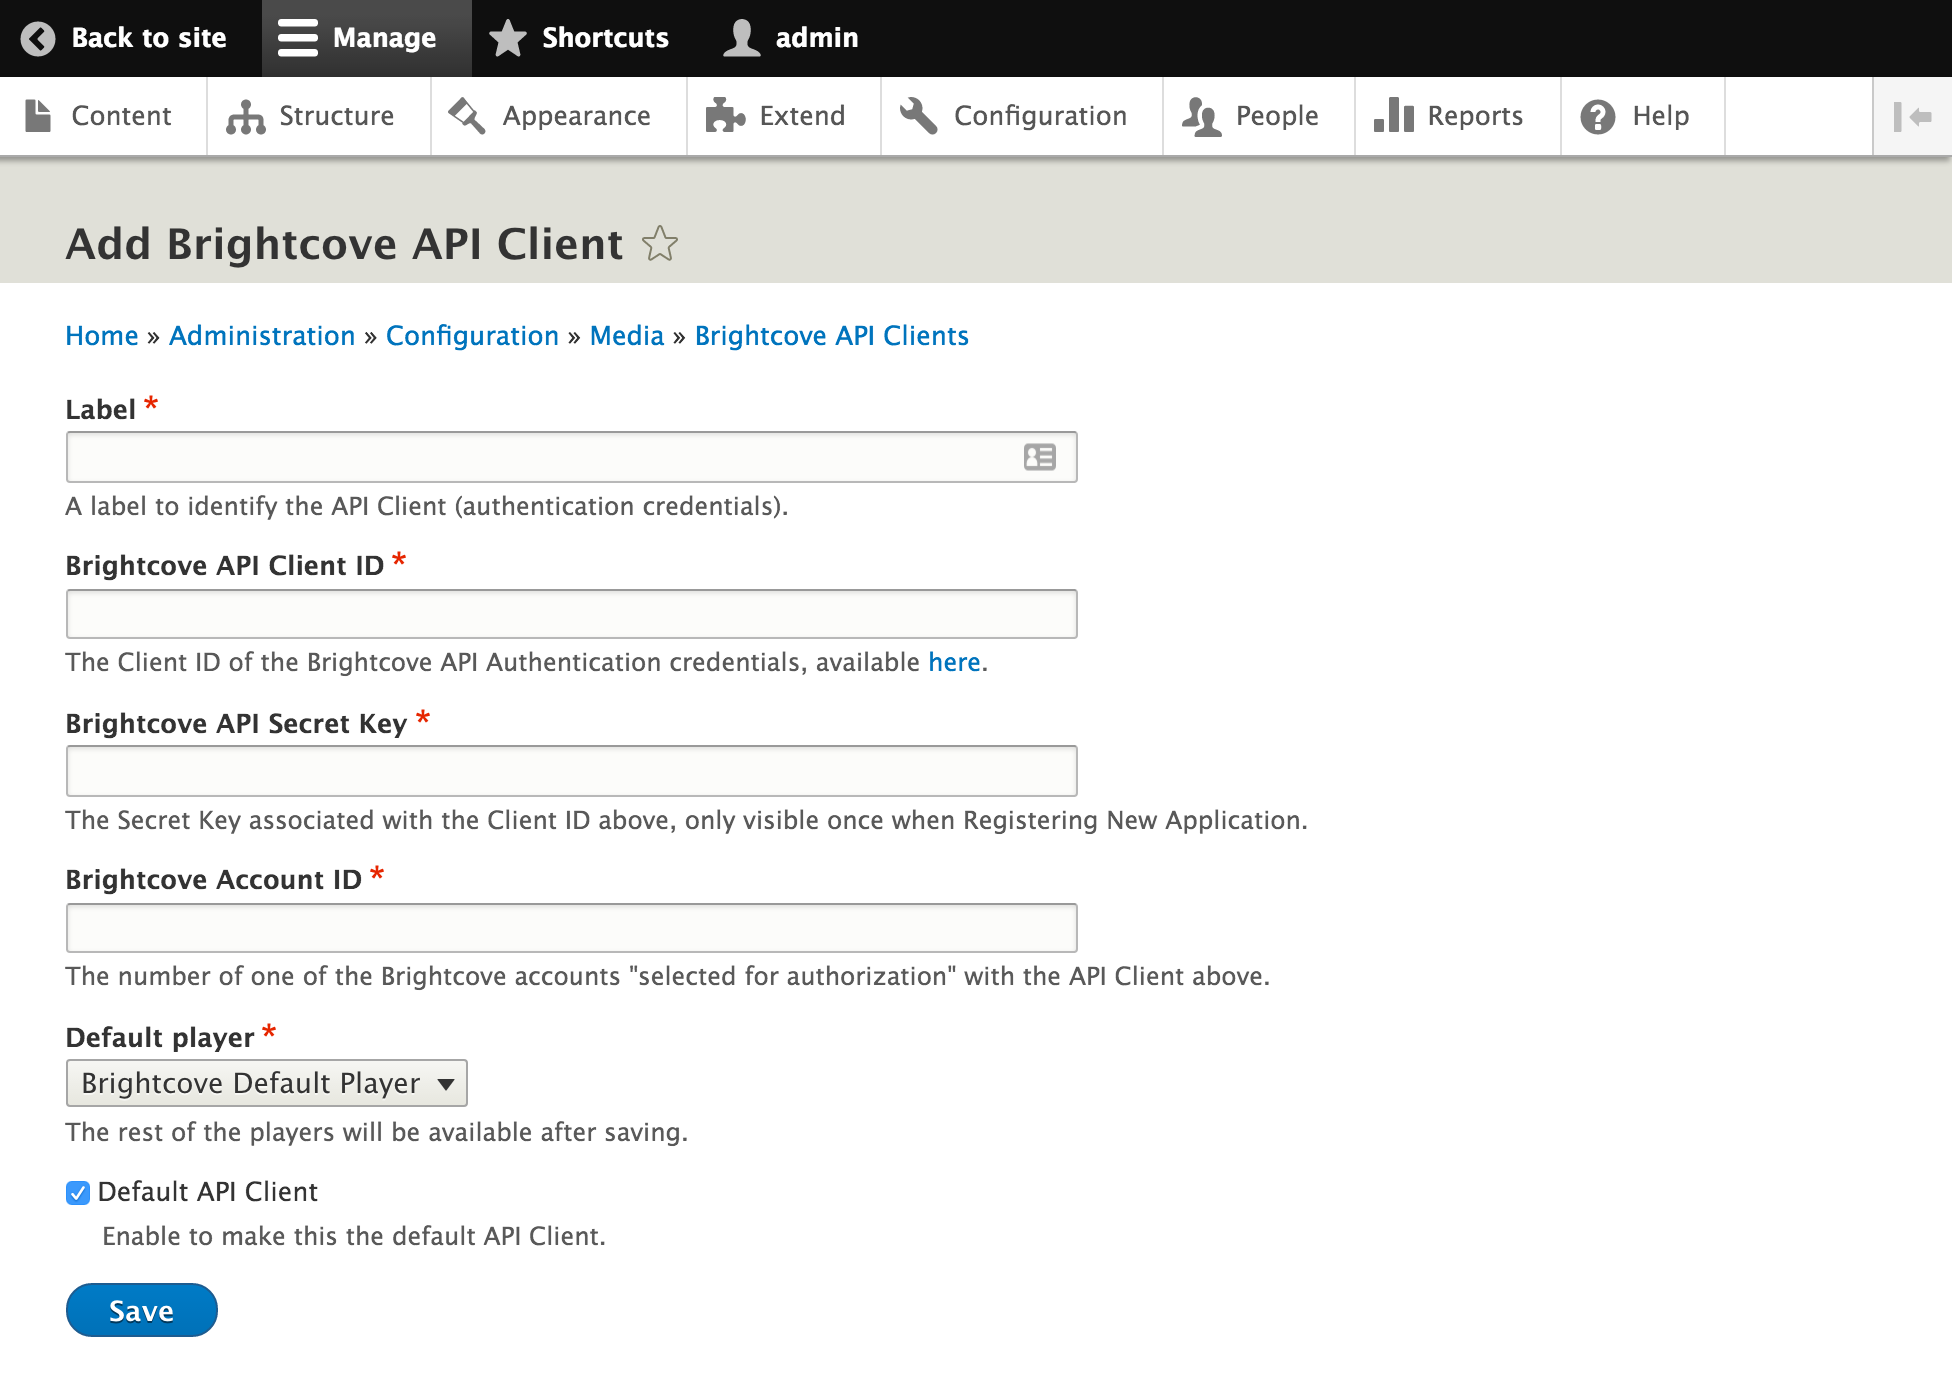
After clicking Add Brightcove API Client above, the following screen will appear where you can enter your Brightcove Client ID, Secret Key and Account ID:
If the Client ID, Secret Key and Account ID entered above pass verification from Brightcove, then the API Client will be saved successfully:
Synchronization
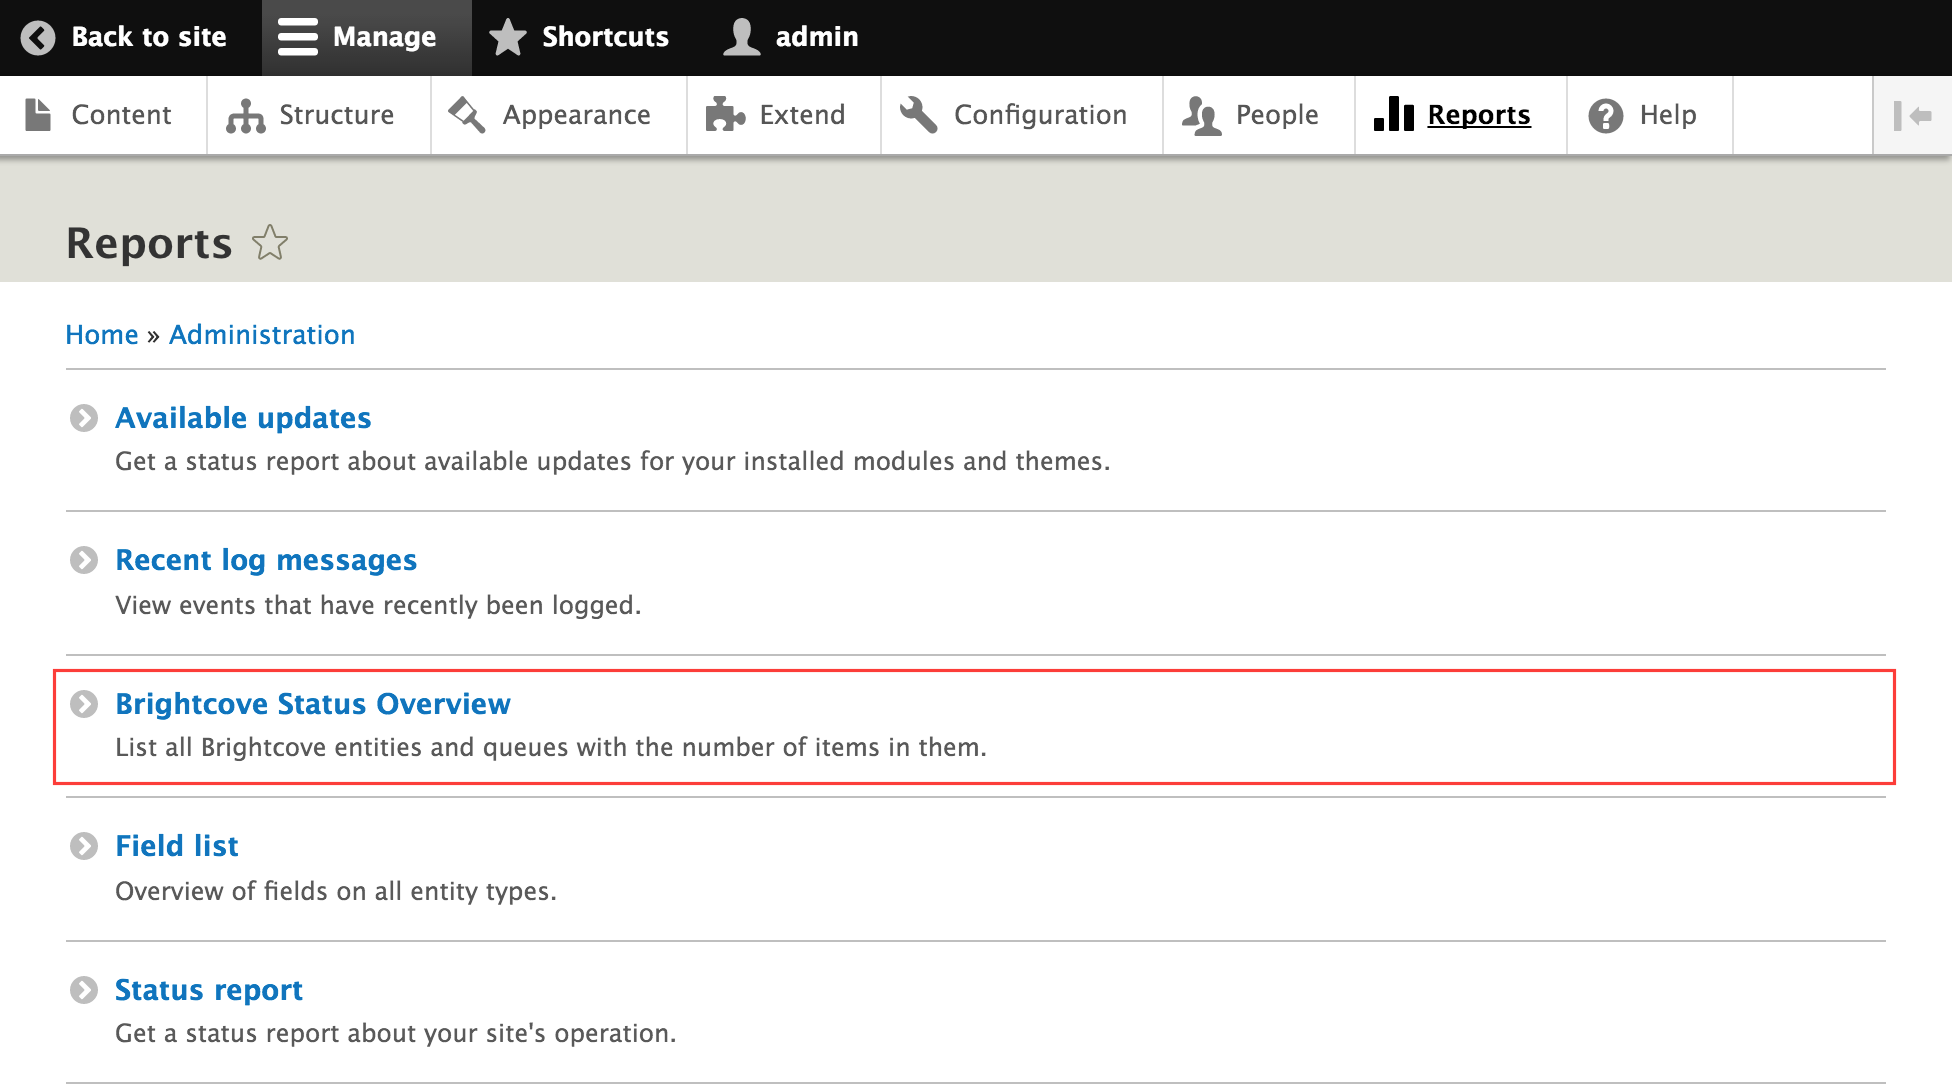
The most significant difference between the Drupal 8 and previous versions of the module is that videos are now synchronized between Brightcove and Drupal, using Brightcove as the source of truth. This allows users to “import” all of their existing Brightcove videos into Drupal after the module is configured. Not to worry, the actual video files will not be downloaded from Brightcove into Drupal - only the metadata and images associated with the videos. The synchronization option is available in the Brightcove Status Overview page which is linked from the Drupal Reports page:
The Brightcove Status Overview displays the synchronization status of all the various entities, and also includes buttons for managing the queues:
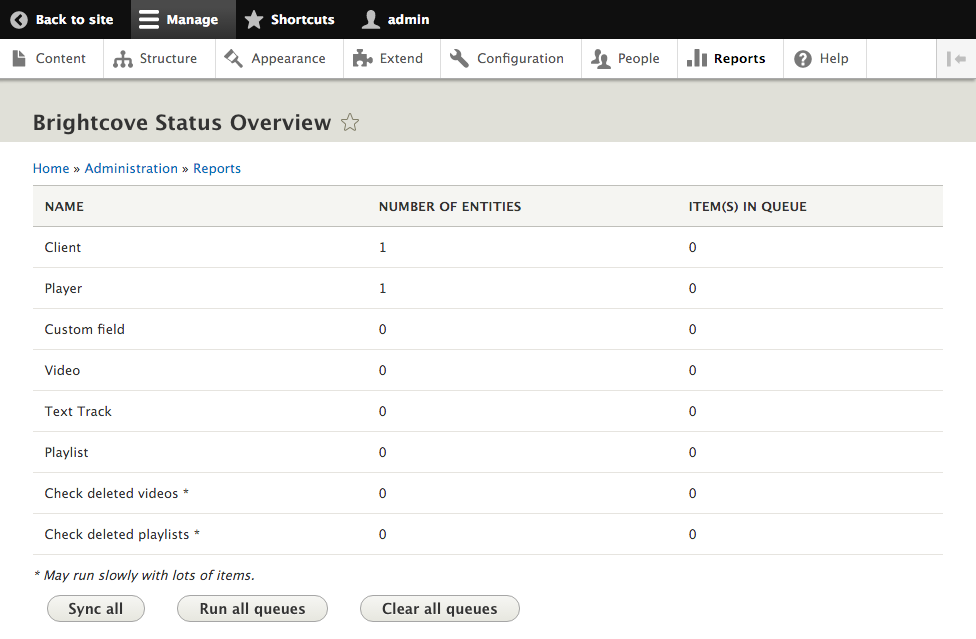
Clicking “Sync all” above will synchronize all listed Brightcove entities into Drupal - which is useful in order to do an initial batch sync. Synchronizing the entities manually is not necessary, however, as the synchronization will run in the background through Drupal’s cron.

Part 3 of this blog series will illustrate the management of Videos & Playlists and discuss some of the changes compared to the Drupal 7 version of the module - especially the new video listing interface (with a similar layout to Brightcove’s own Studio interface) and autocompleting tags feature.
Part 1: Architecture summary
Part 3: Video & Playlist Management
Part 4: Including Videos & Playlists in Drupal content